


What is EigenLayer and ETH Restaking?
EigenLayer is a protocol built on Ethereum that introduces restaking, a new primitive in cryptoeconomic security. At the heart of EigenLayer's innovation is the concept of 'restaking'—a novel approach that allows the rehypothecation of ETH on the consensus layer. Users that stake ETH can opt-in to EigenLayer smart contracts to restake their ETH and extend cryptoeconomic security to additional applications on the network.
By restaking ETH tokens, ETH holders will receive a wide range of benefits, including ETH staking profits, EigenLayer points, and restaking profits from the AVS projects protected by EigenLayer restaking.
What Should You Know about Restaking ETH?
The following table summarizes the basic information for restaking ETH:
| Item | Description |
|---|---|
| Rewards Distribution Interval | 4 - 5 Days |
| Rewards Distribution Method | Rewards need to be manually claimed. |
| Unbonding Period | 7 Days |
| Compounding | No auto compounding. |
| Additional Reward | EigenLayer Points, AVS Restaking Profits |
How to Restake ETH with InfStones?
Create Your EigenPod on EigenLayer
Step 1: Access EigenLayer Dashboard
Start by opening the EigenLayer Dashboard in your web browser at https://app.eigenlayer.xyz/, which is your gateway to the world of restaking on Ethereum.
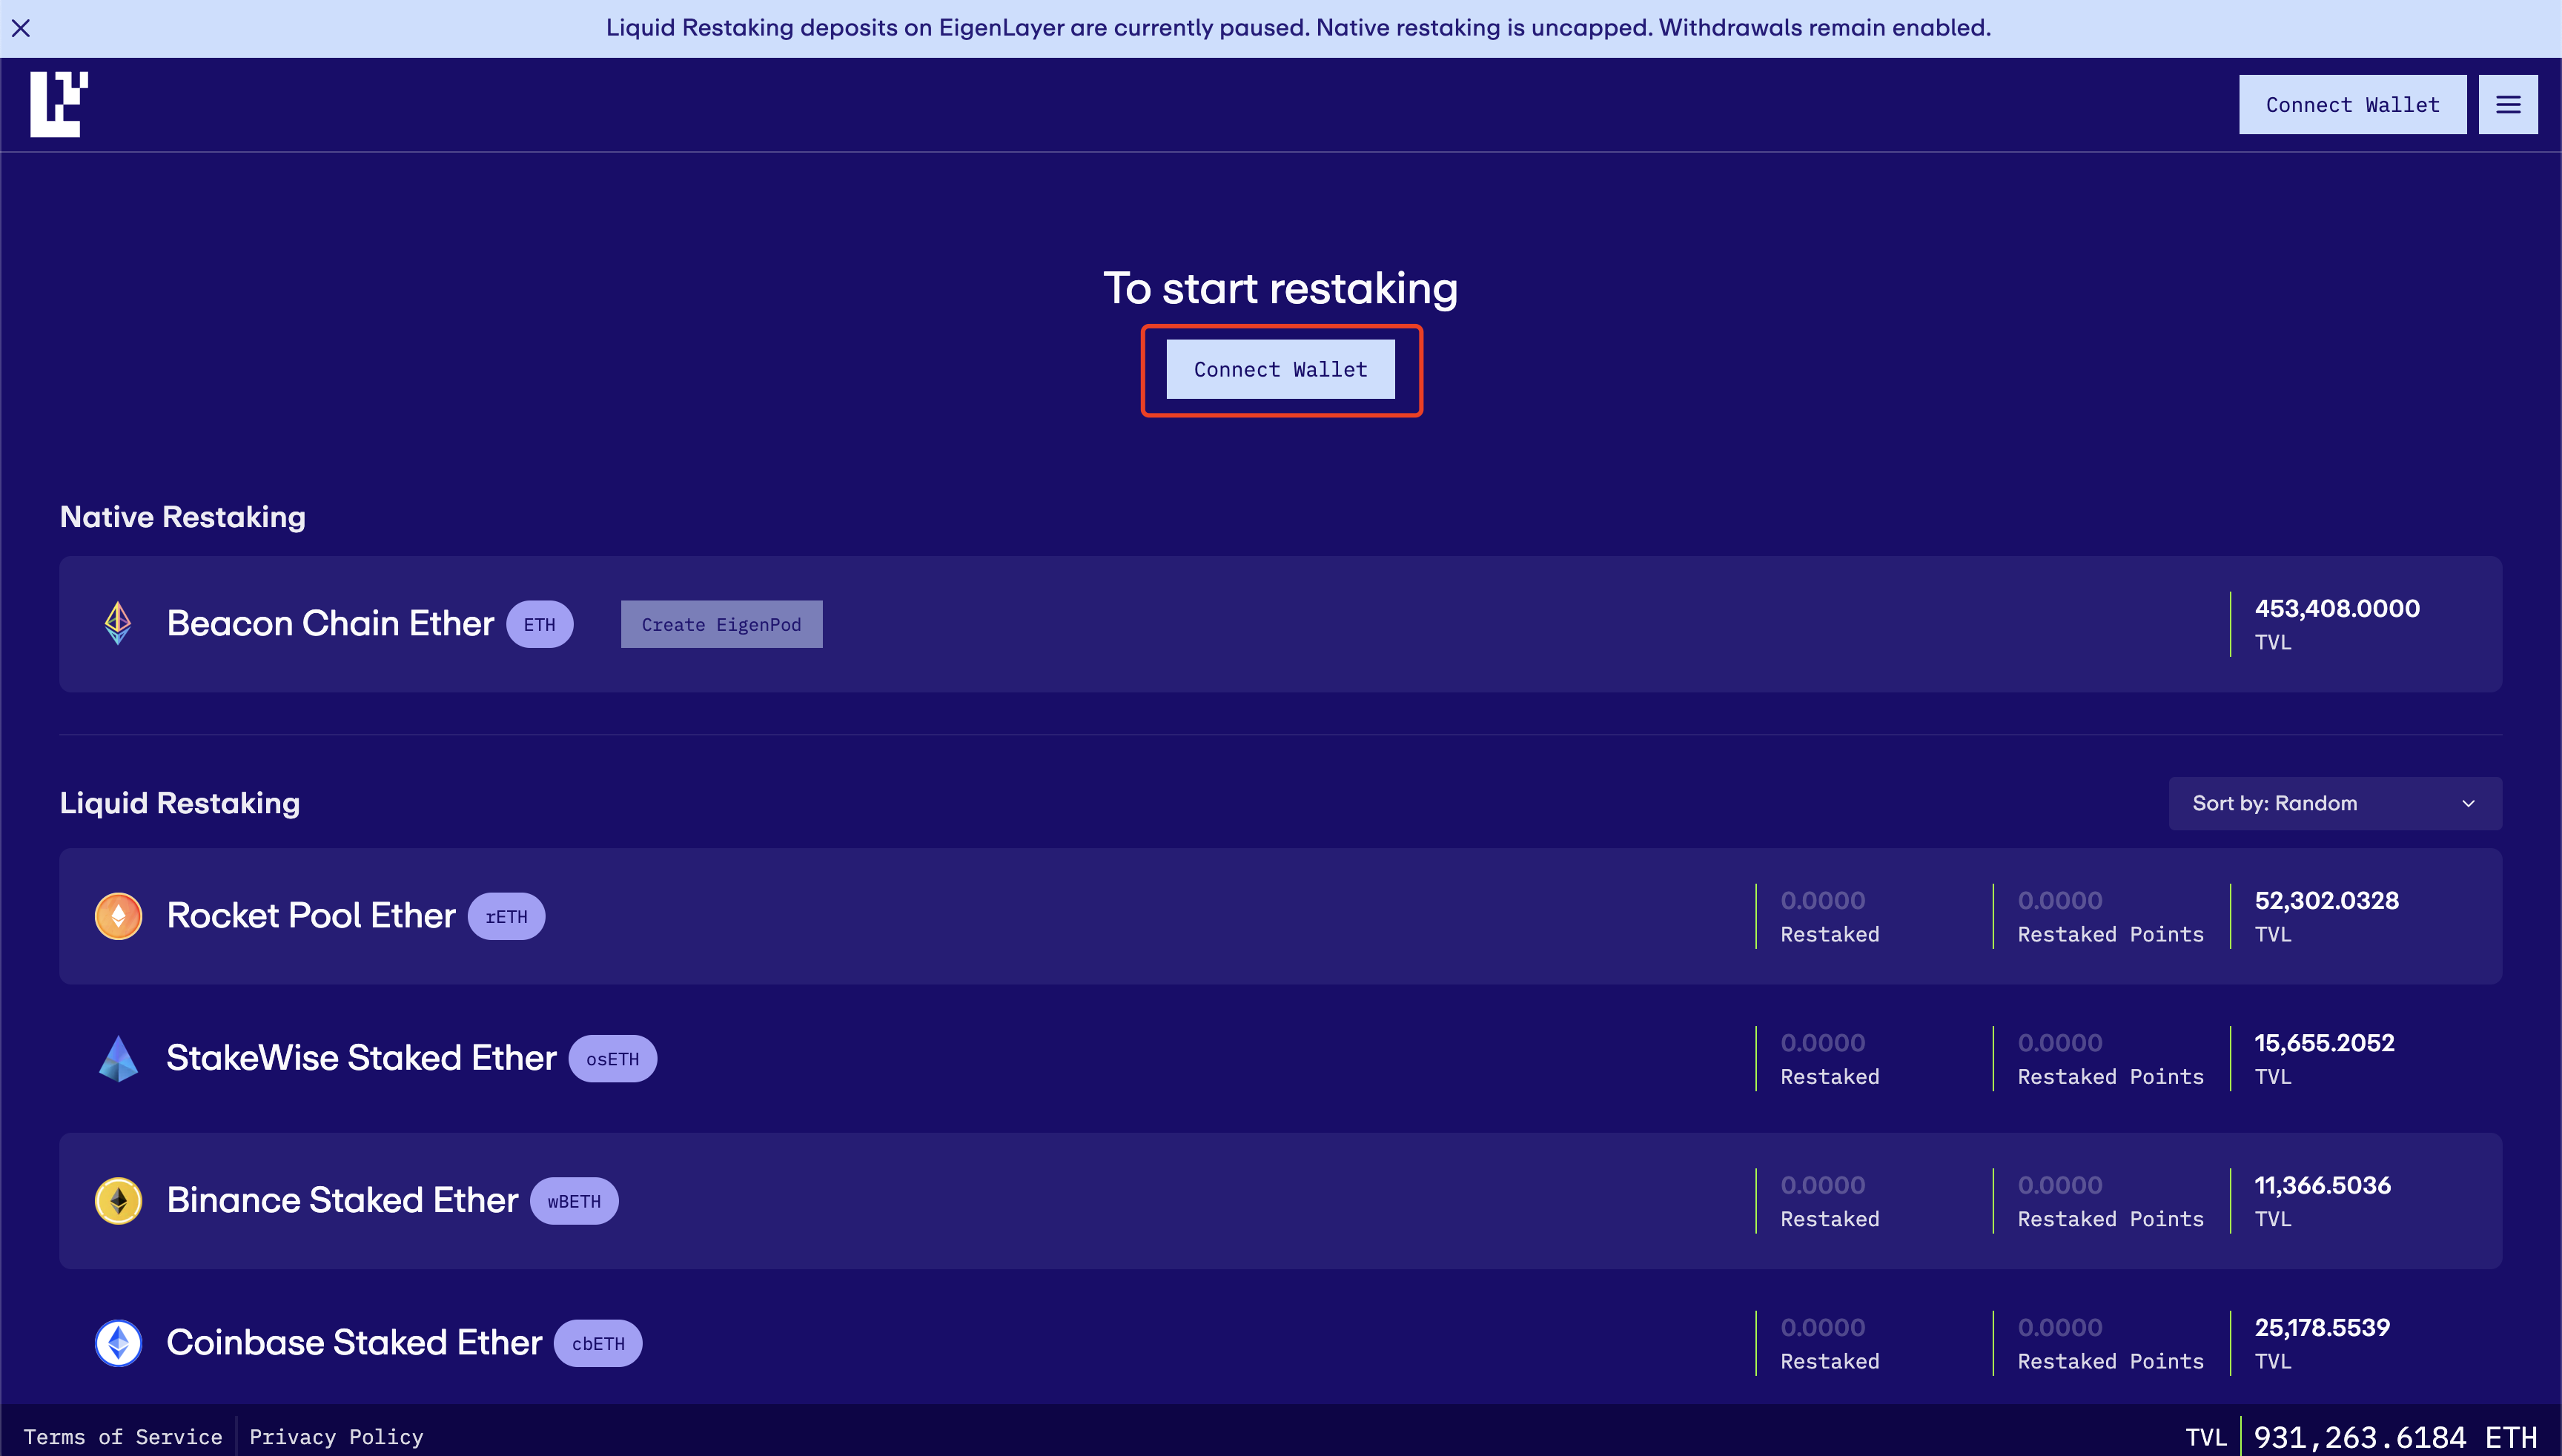
Step 2: Connect Wallet
Look for the “Connect Wallet” button prominently placed in the upper right corner of the Dashboard, click into this.
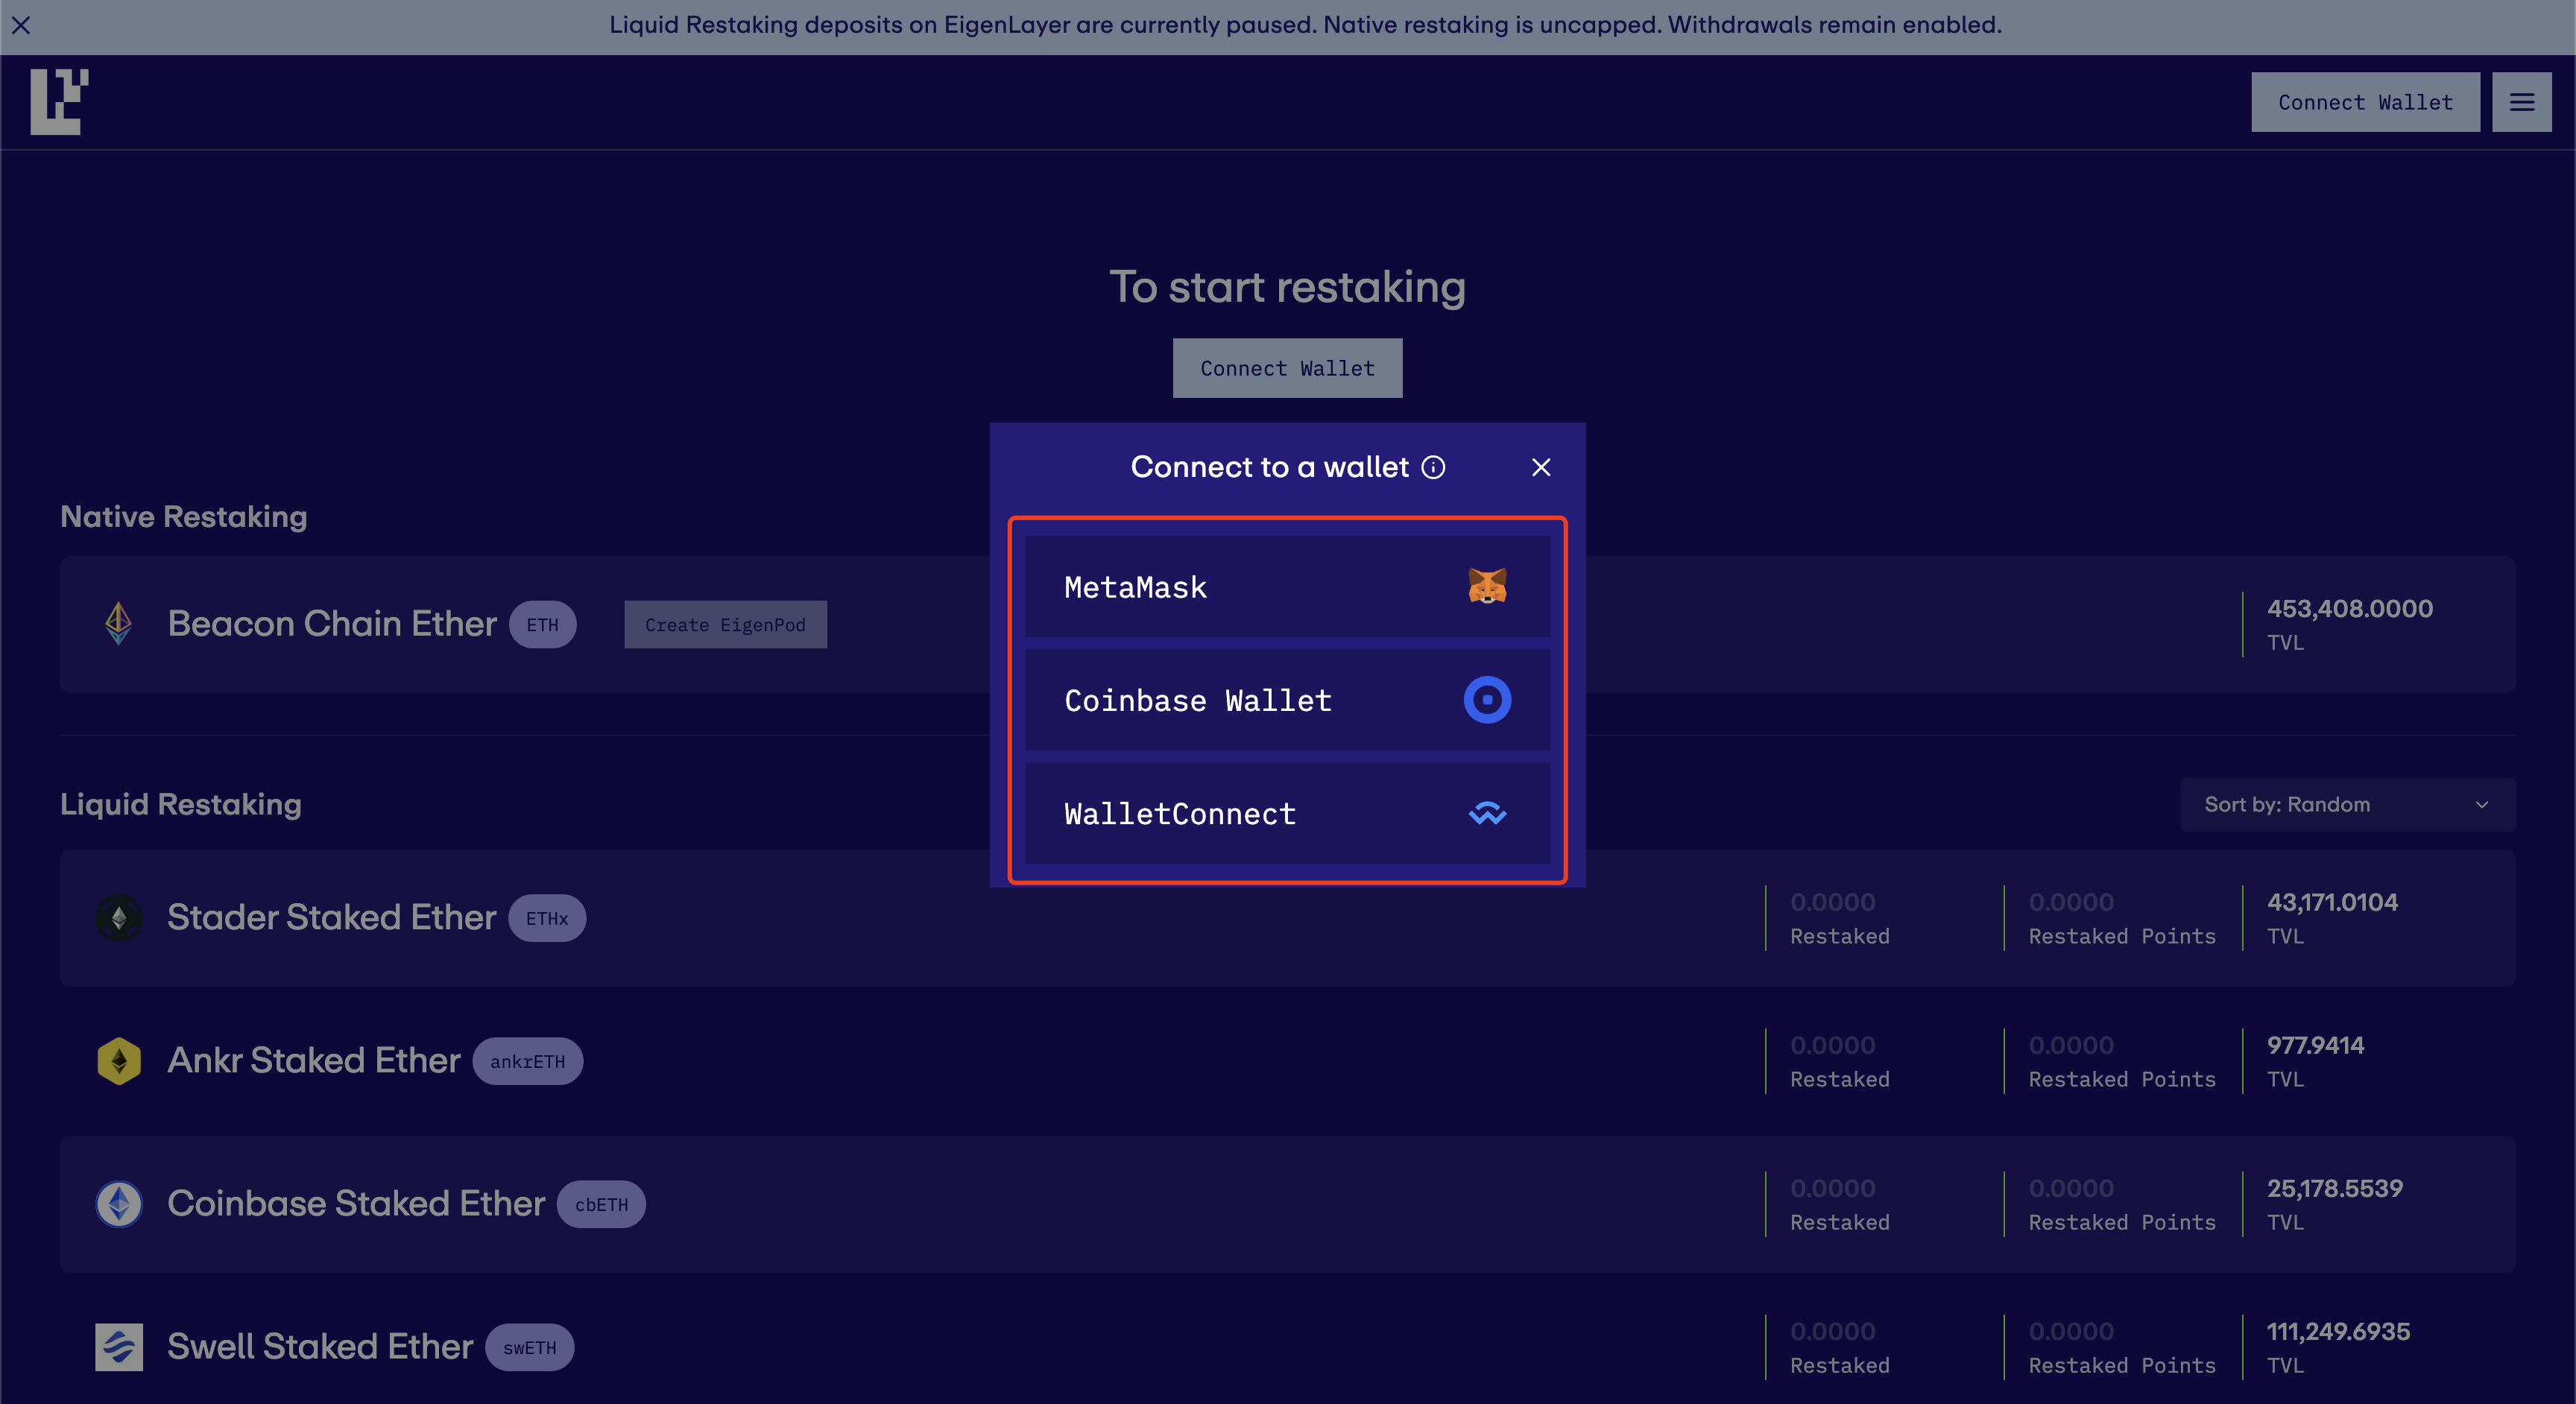
A dialog box will pop up, presenting a list of compatible wallets. Deliberately select your desired wallet by clicking on it.
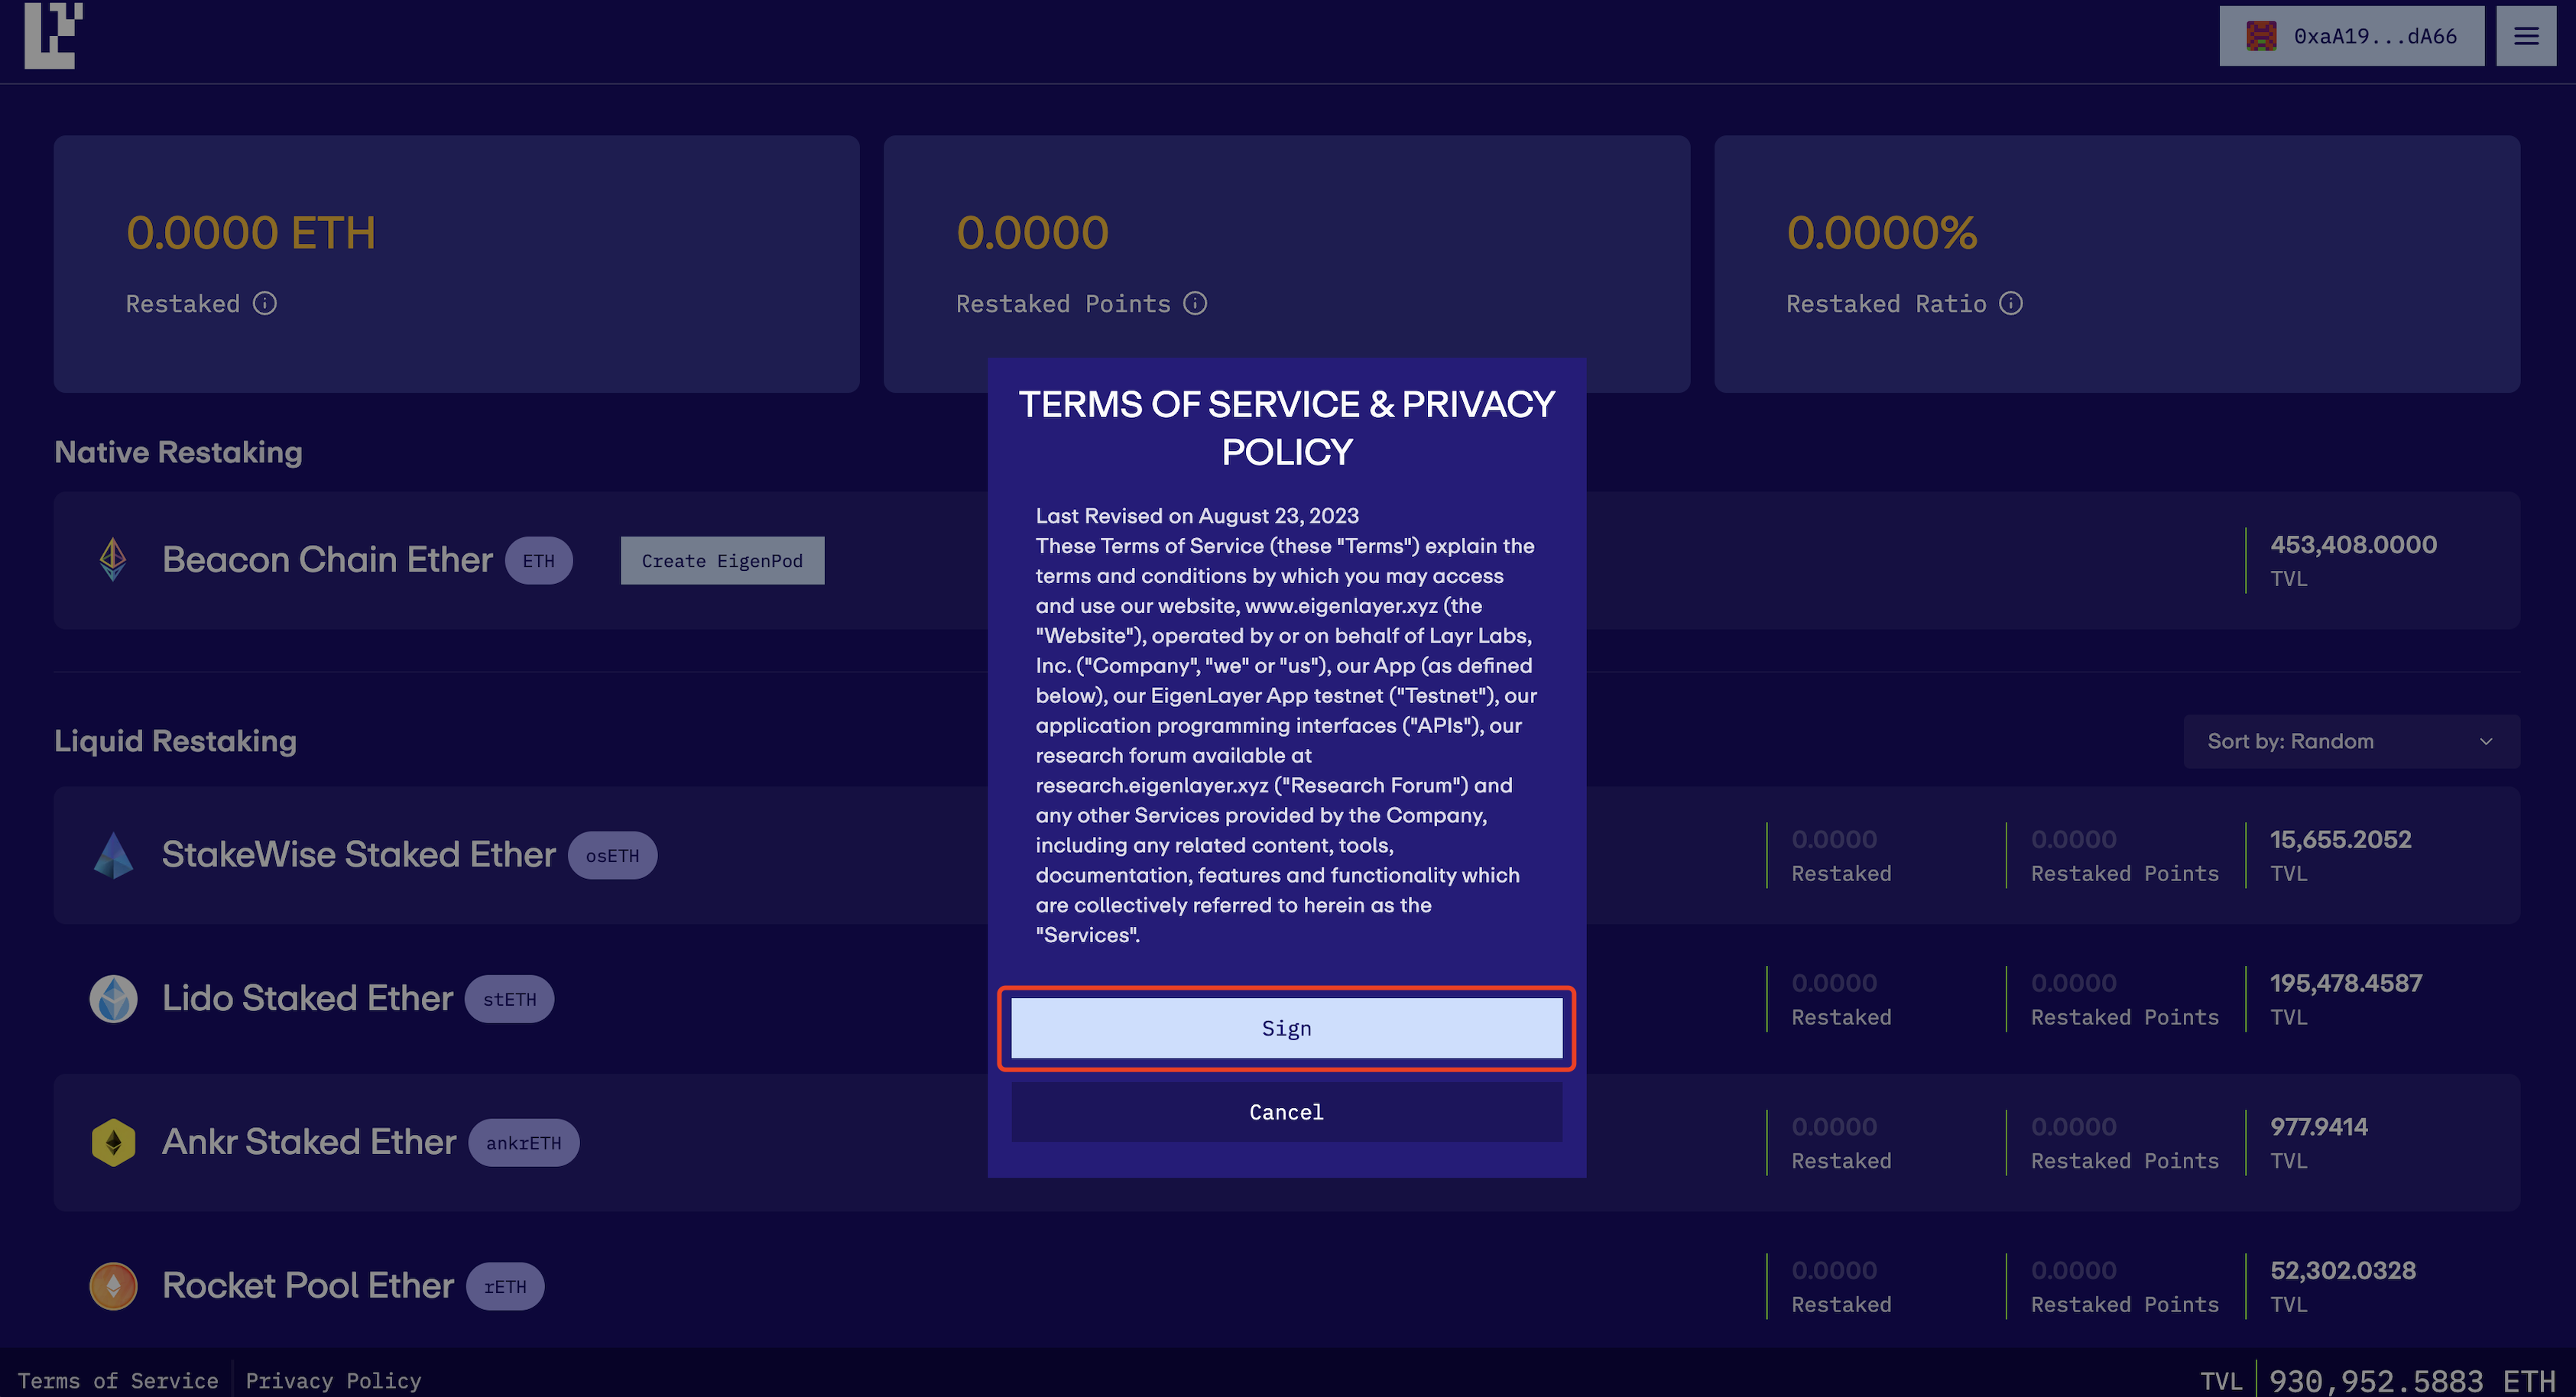
After wallet selection, you’ll be prompted to review the EigenLayer Terms of Service & Privacy Policy. Click “sign” to indicate your agreement. It's important to note that this is an off-chain action, processed through your Transaction Authorization Policy (TAP), and does not engage with the blockchain directly.
Next, your wallet extension will ask for your authorization via a signature request pop-up. Click “sign” to confirm and proceed. Once you’ve given your signature, your wallet is successfully connected to EigenLayer.
Step 3: Create EigenPod
You could find the option to “Create EigenPod” under Native Restaking, please click on this to proceed.
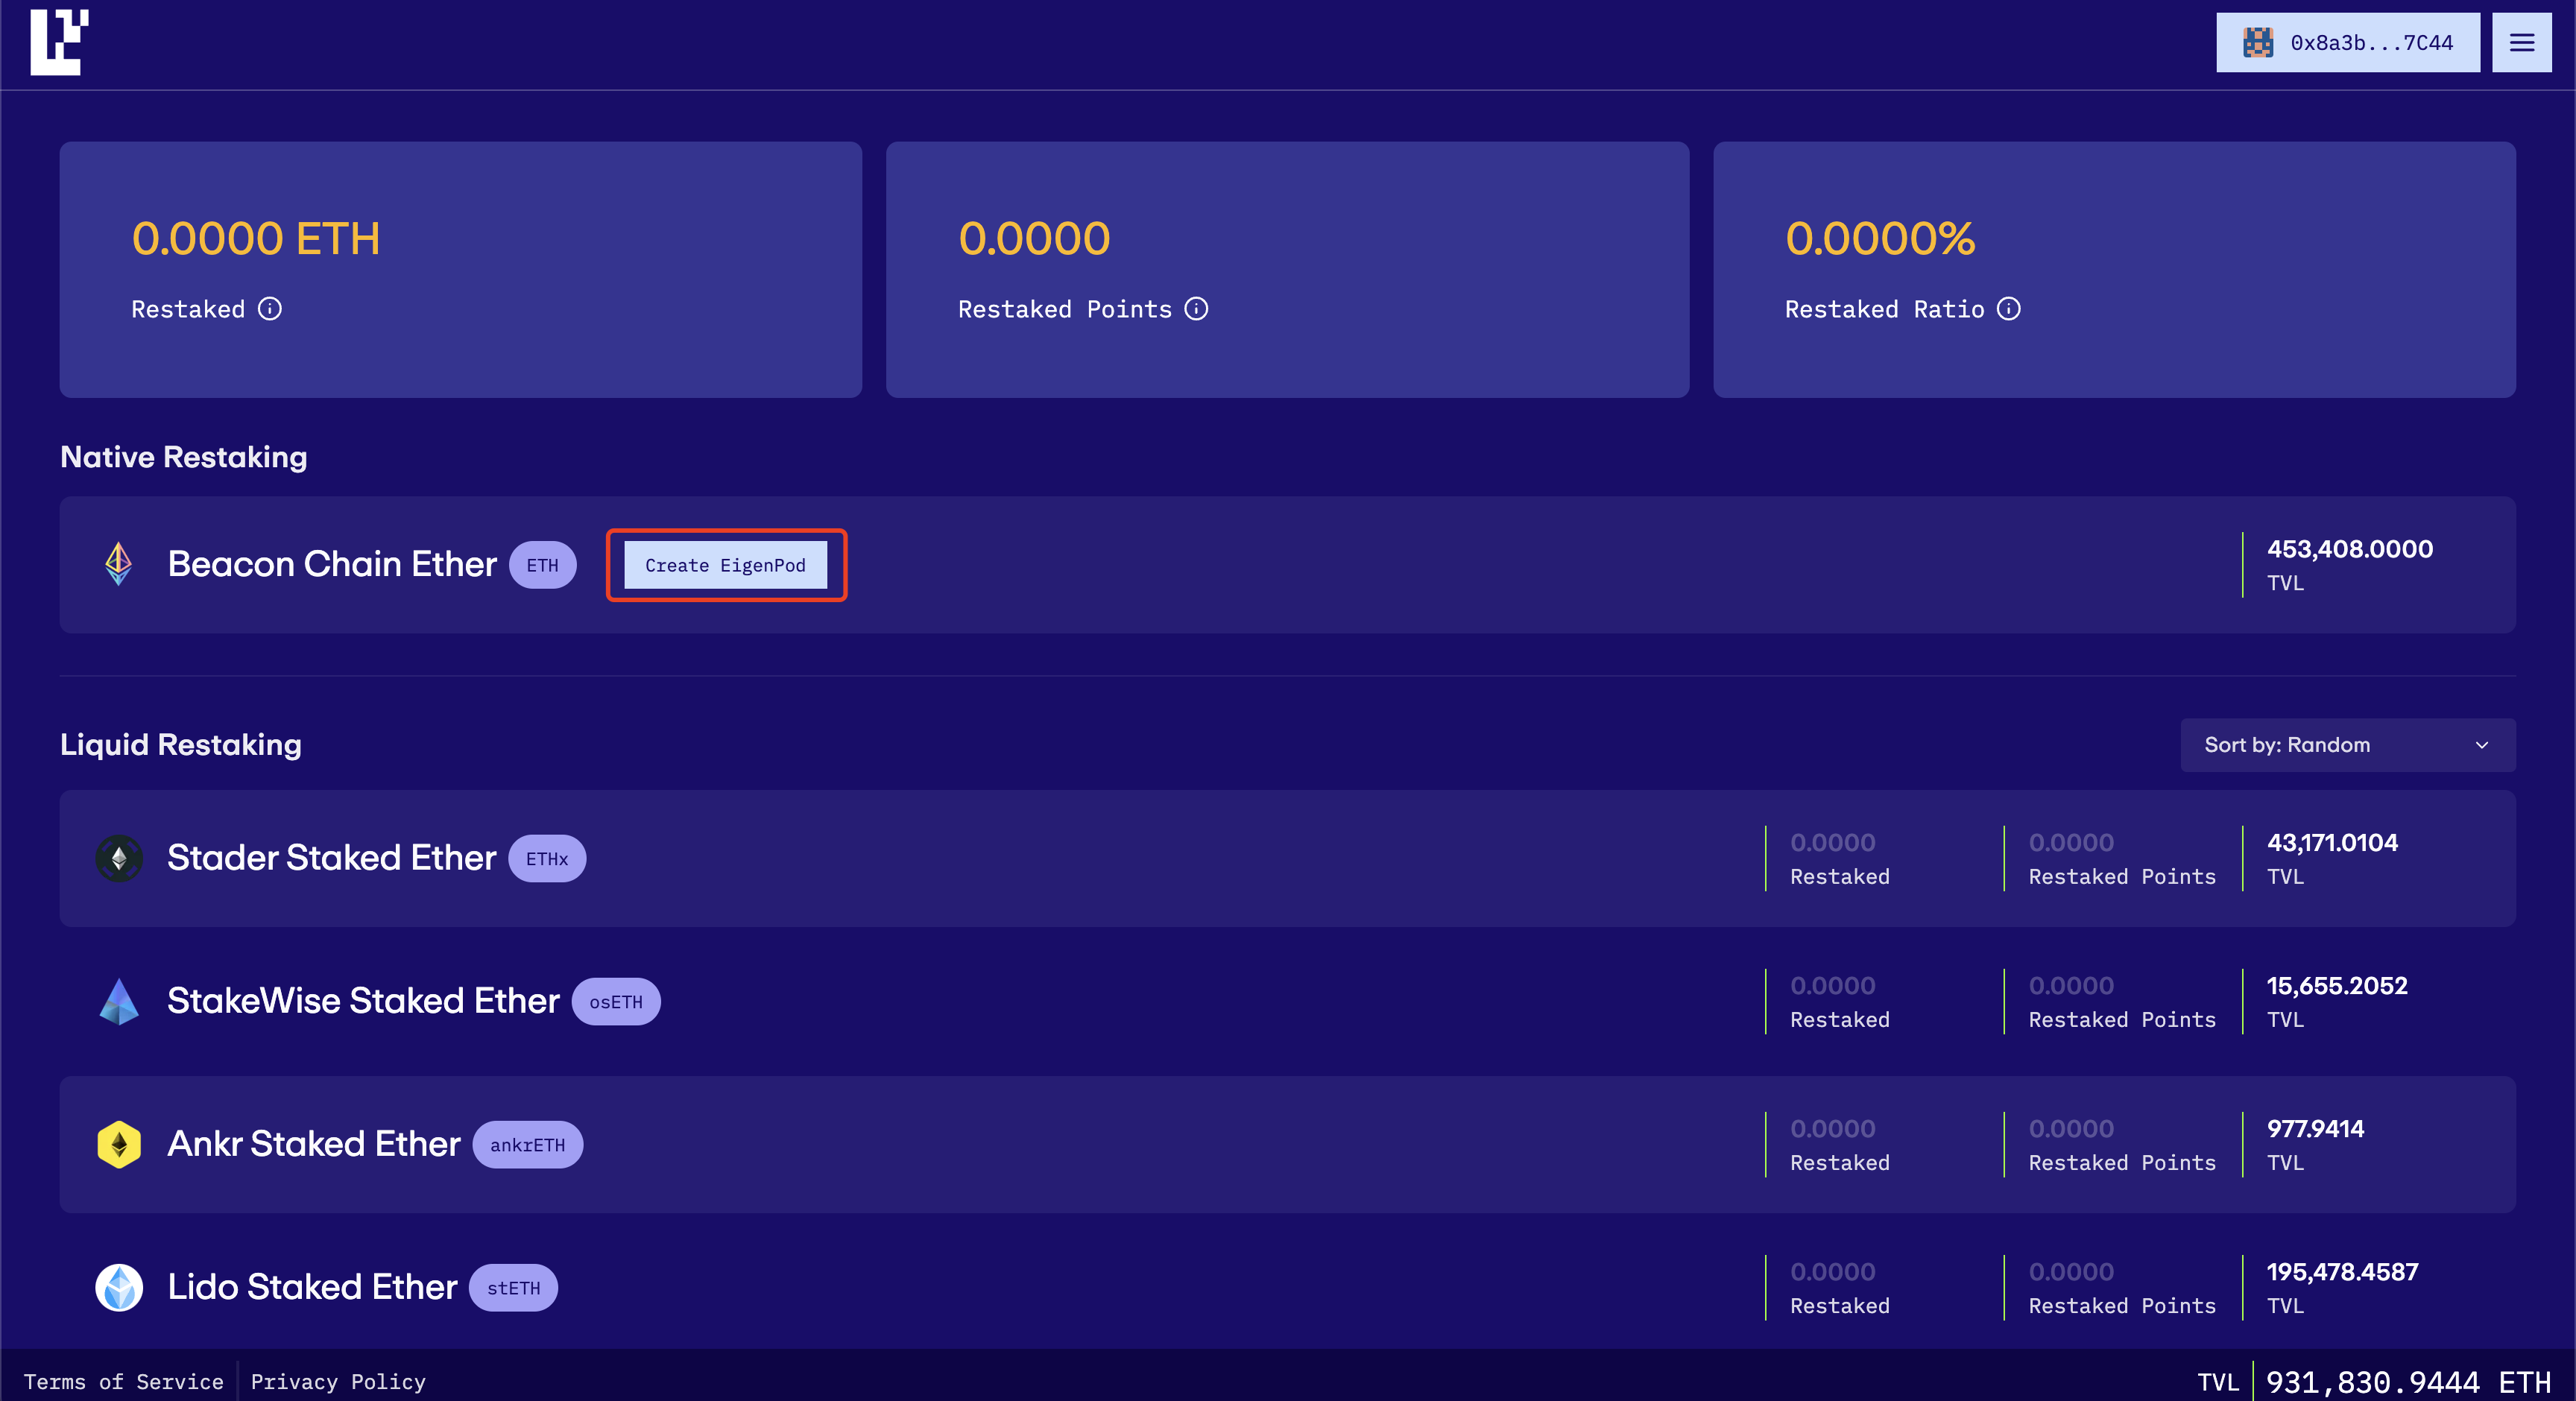
You will be prompted to click “Sign” in your wallet extension, after the process the EigenPod was successfully created as shown.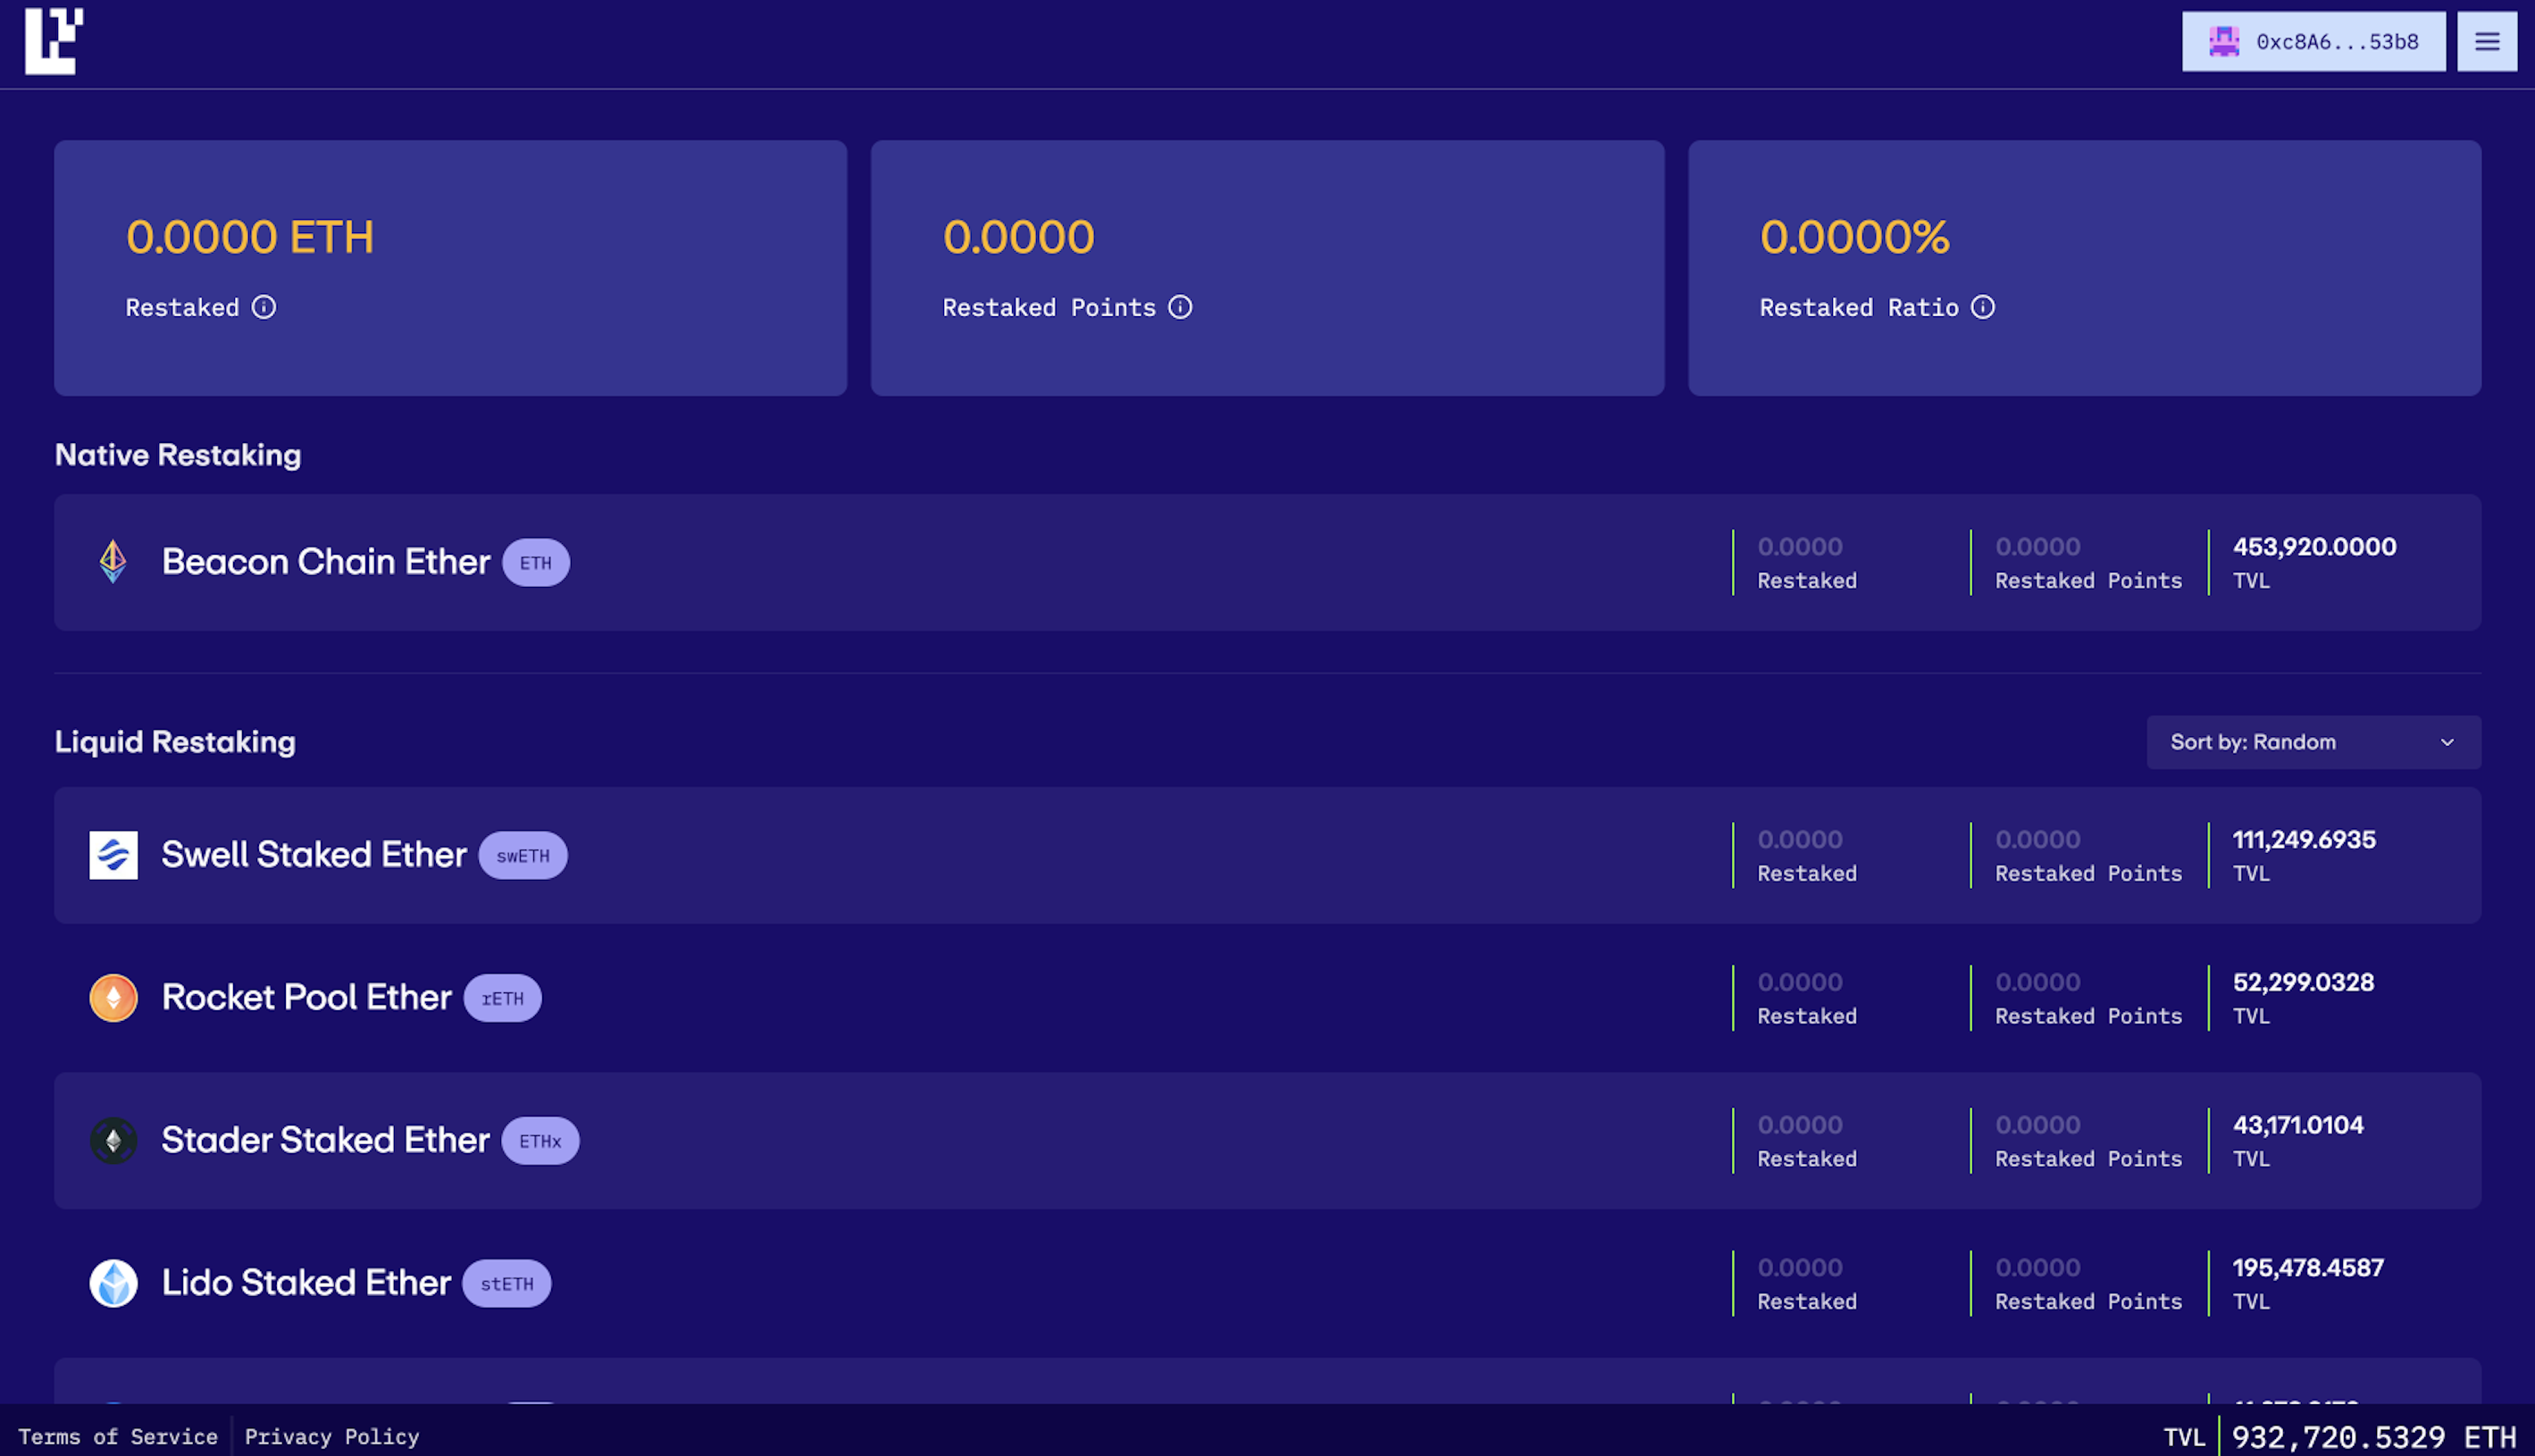
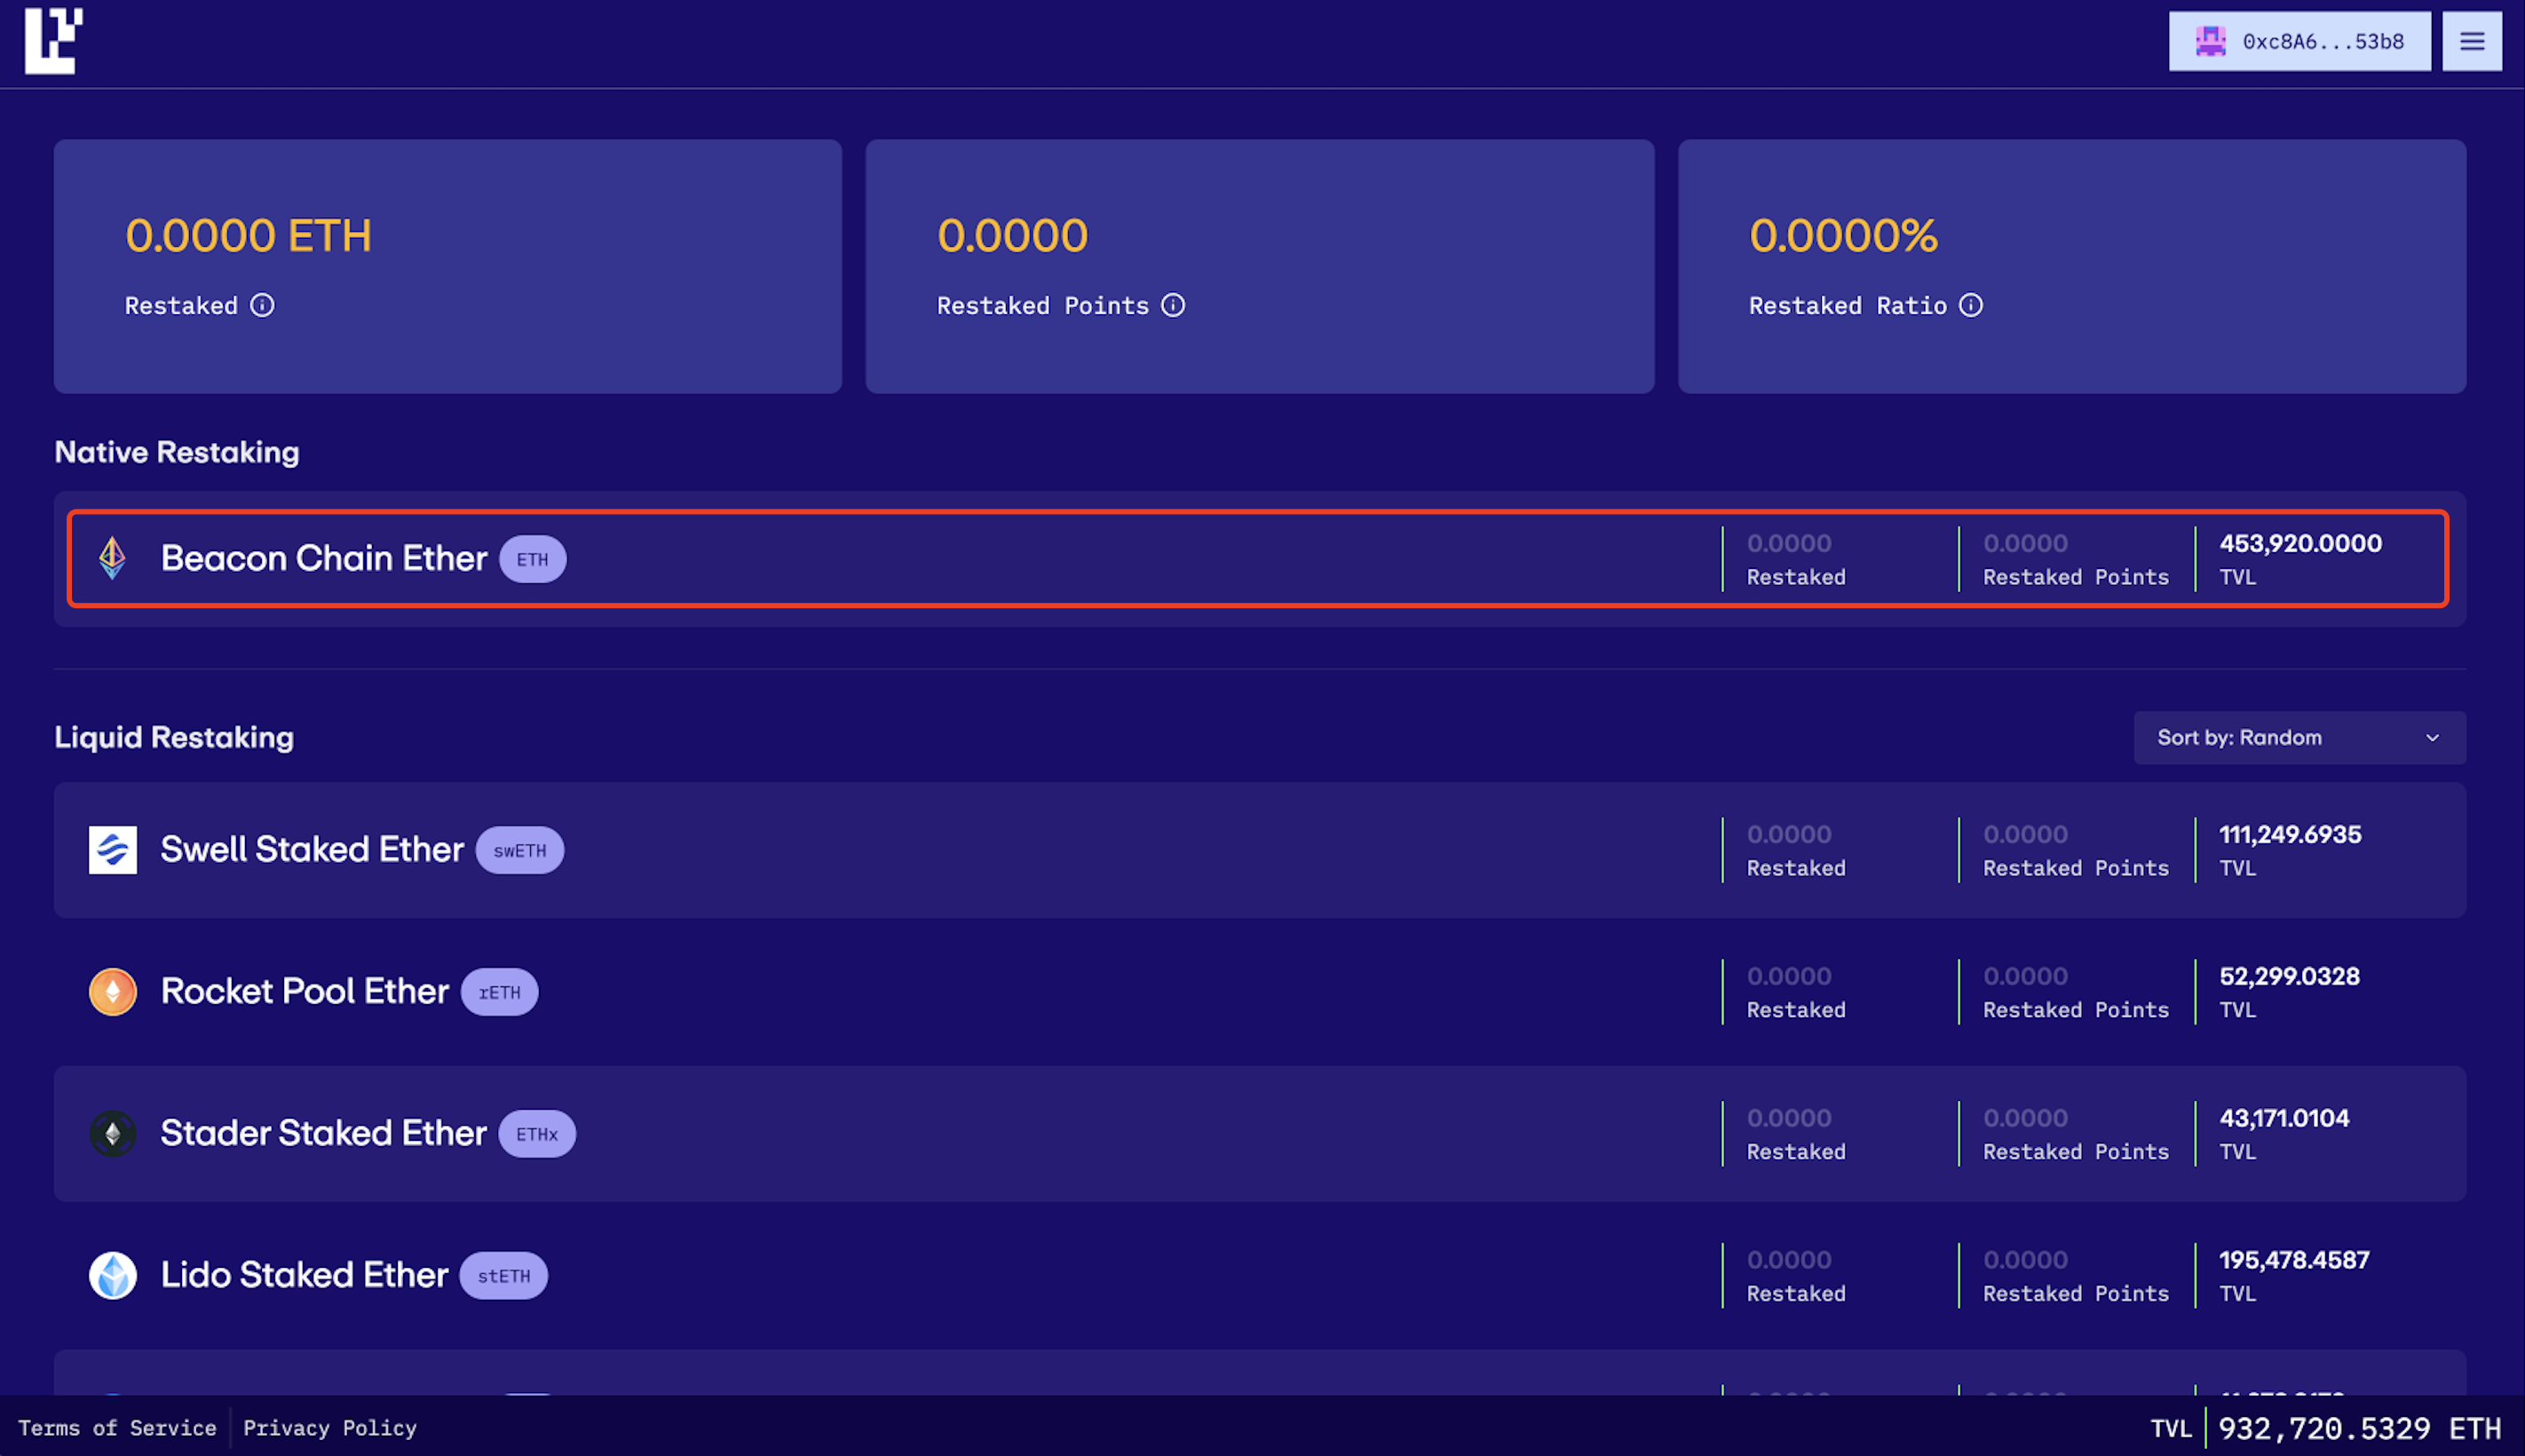
Step 4: Access the EigenPod Address
Start by clicking on “Beacon Chain Ether” located under the “Native Restaking” section on the EigenLayer Dashboard.
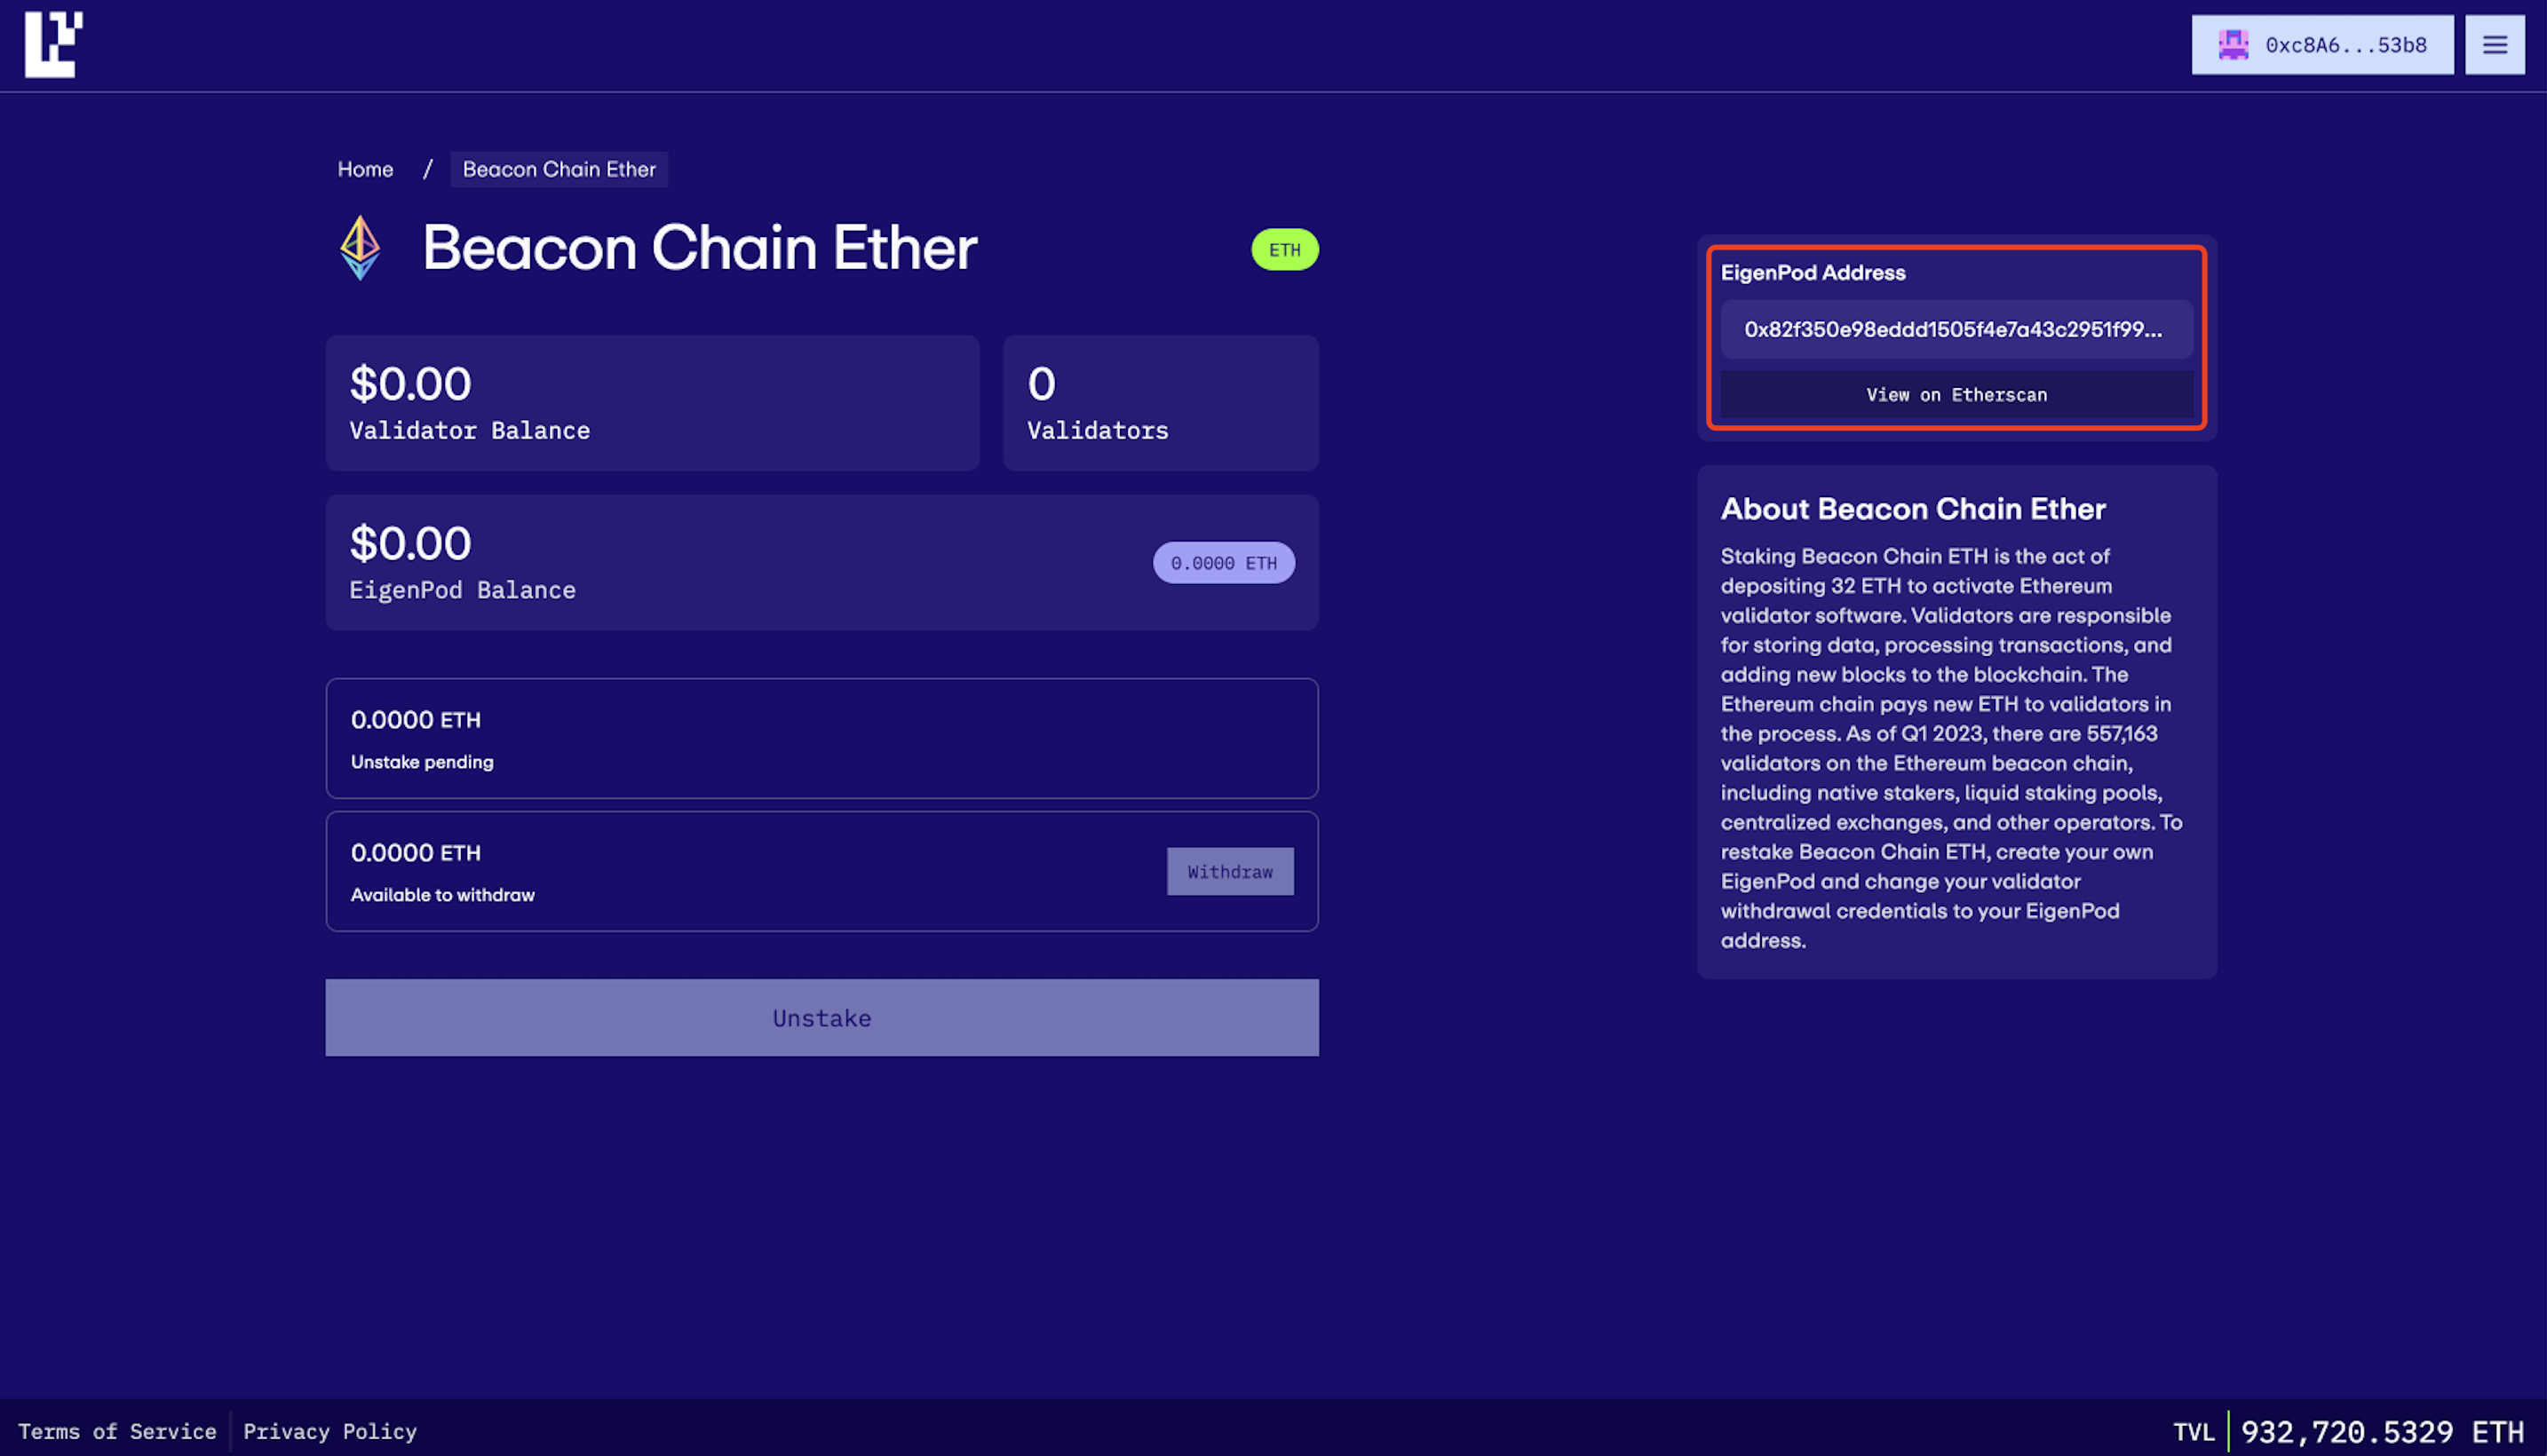
Your EigenPod address will be prominently displayed in the upper right corner of the page. Click “View on Etherscan” on the website to copy your EigenPod address. Ensure you keep this address secure and accessible, as it will be instrumental in upcoming steps of the restaking process.
Restake with InfStones
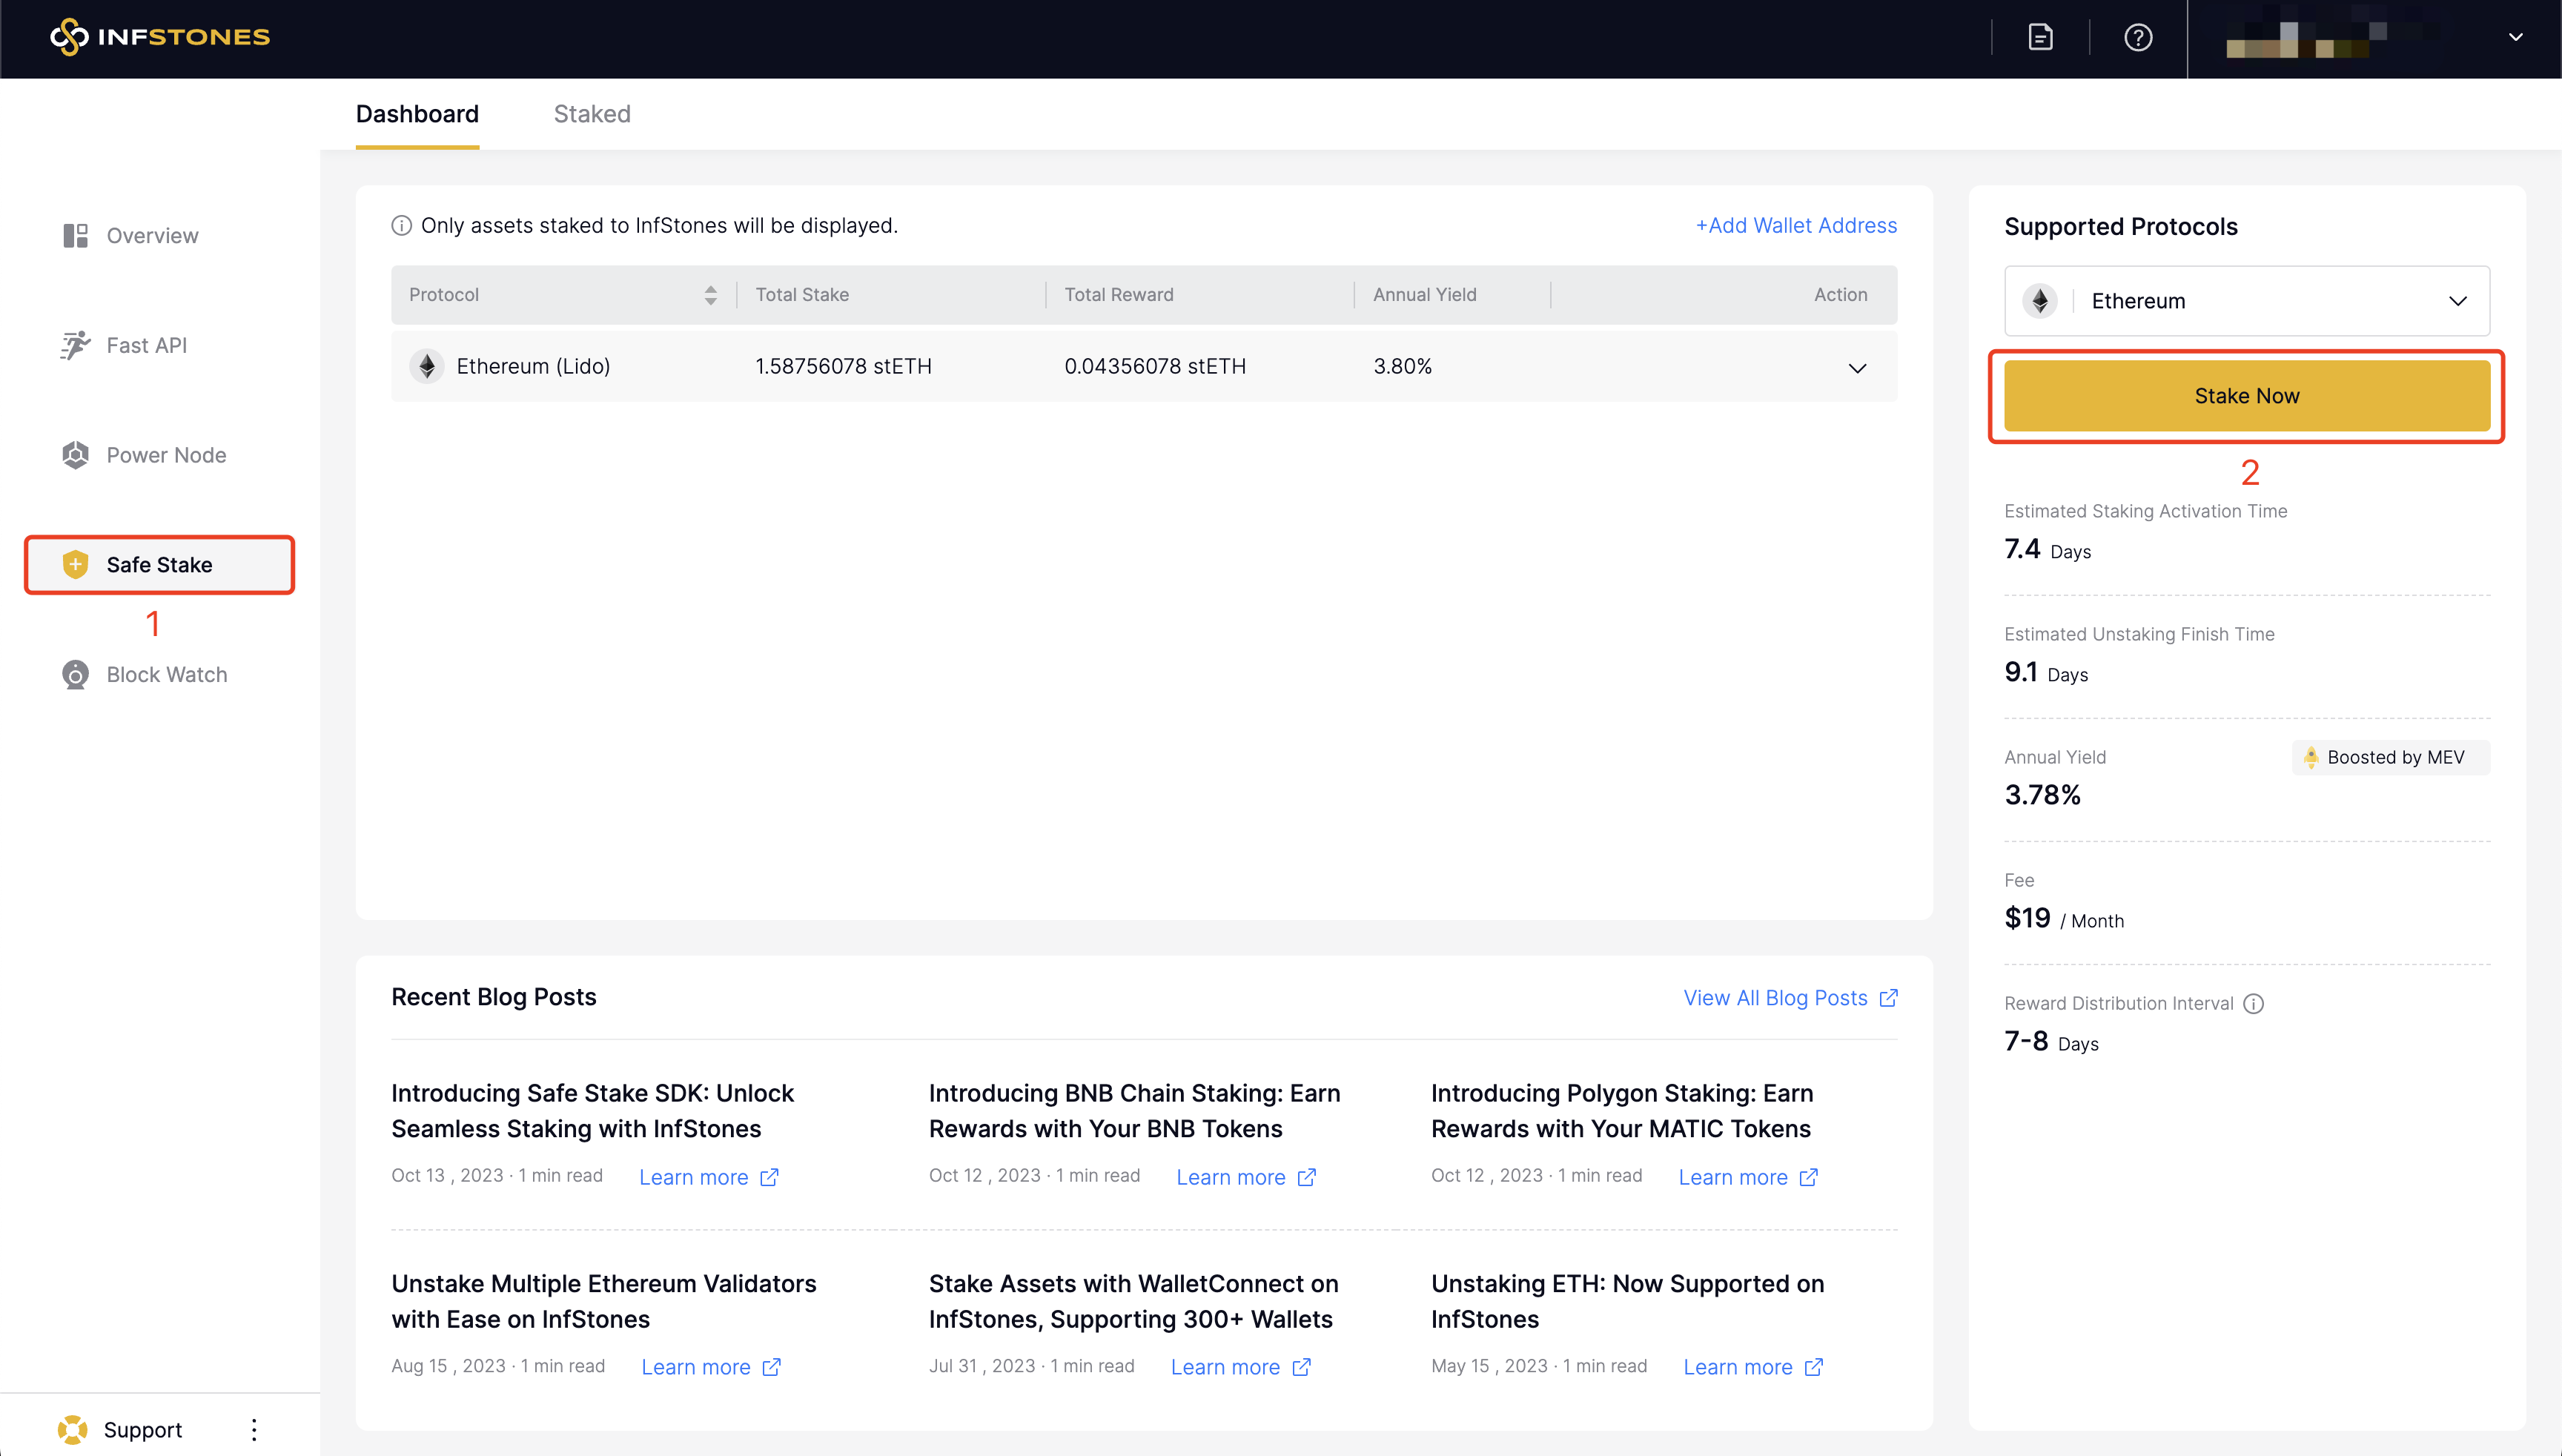
Step 5: Navigate to InfStones Safe Stake
First, access your InfStones dashboard and locate the Safe Stake section. Here, select Ethereum as your protocol of choice and then click on the “Stake Now” button.
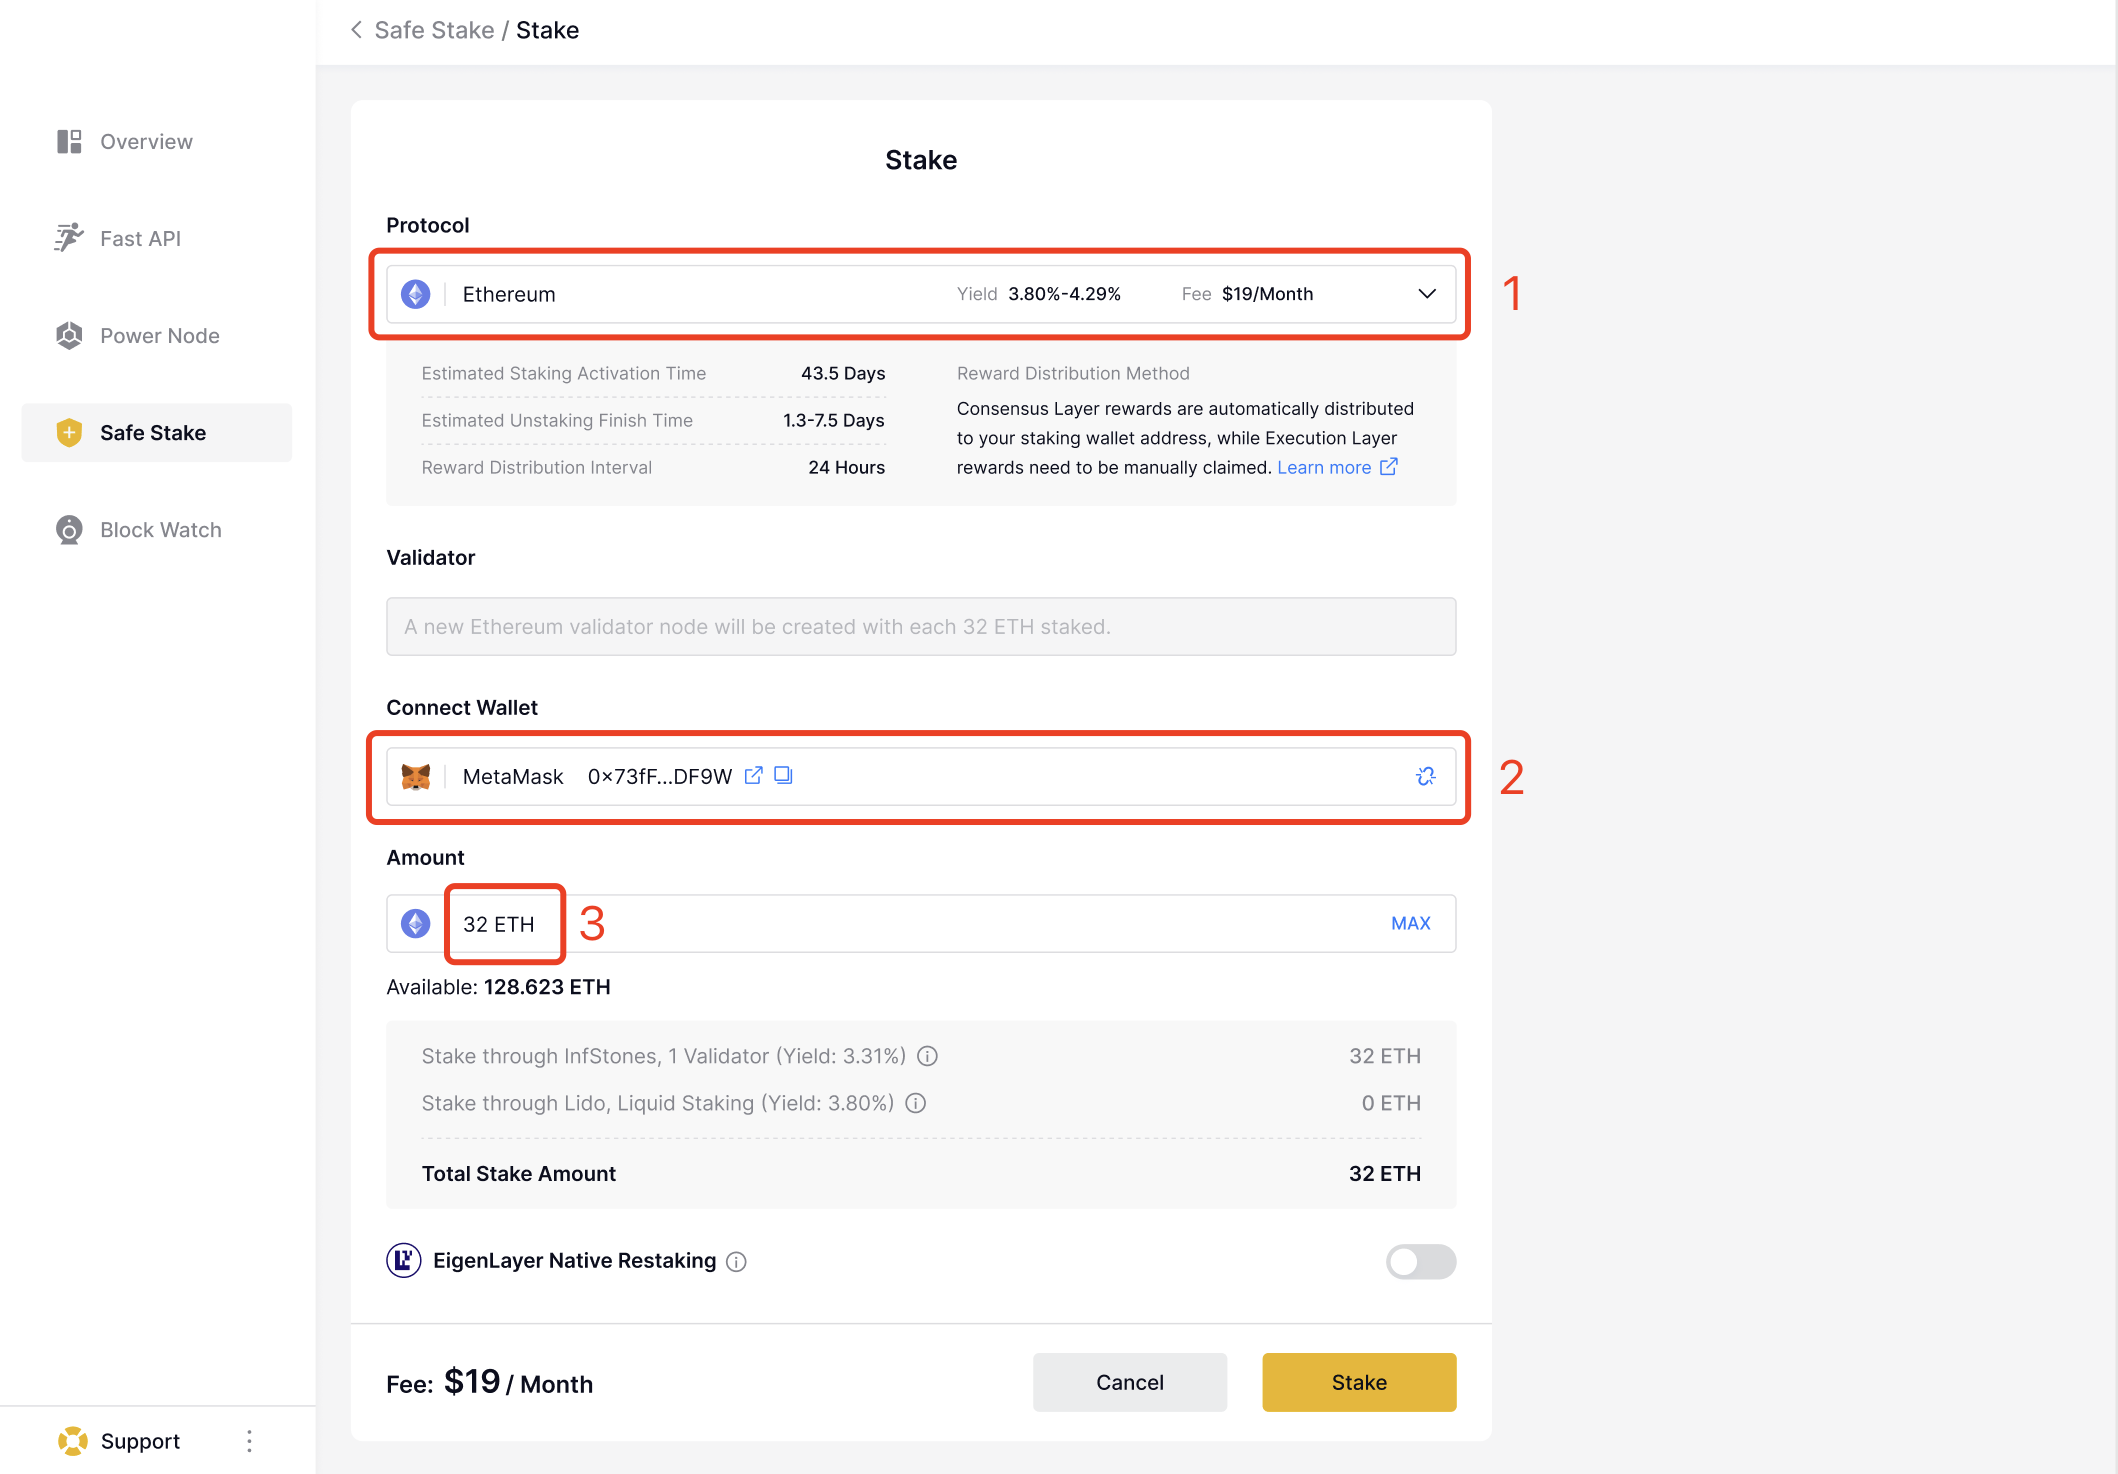
Step 6: Connect Wallet
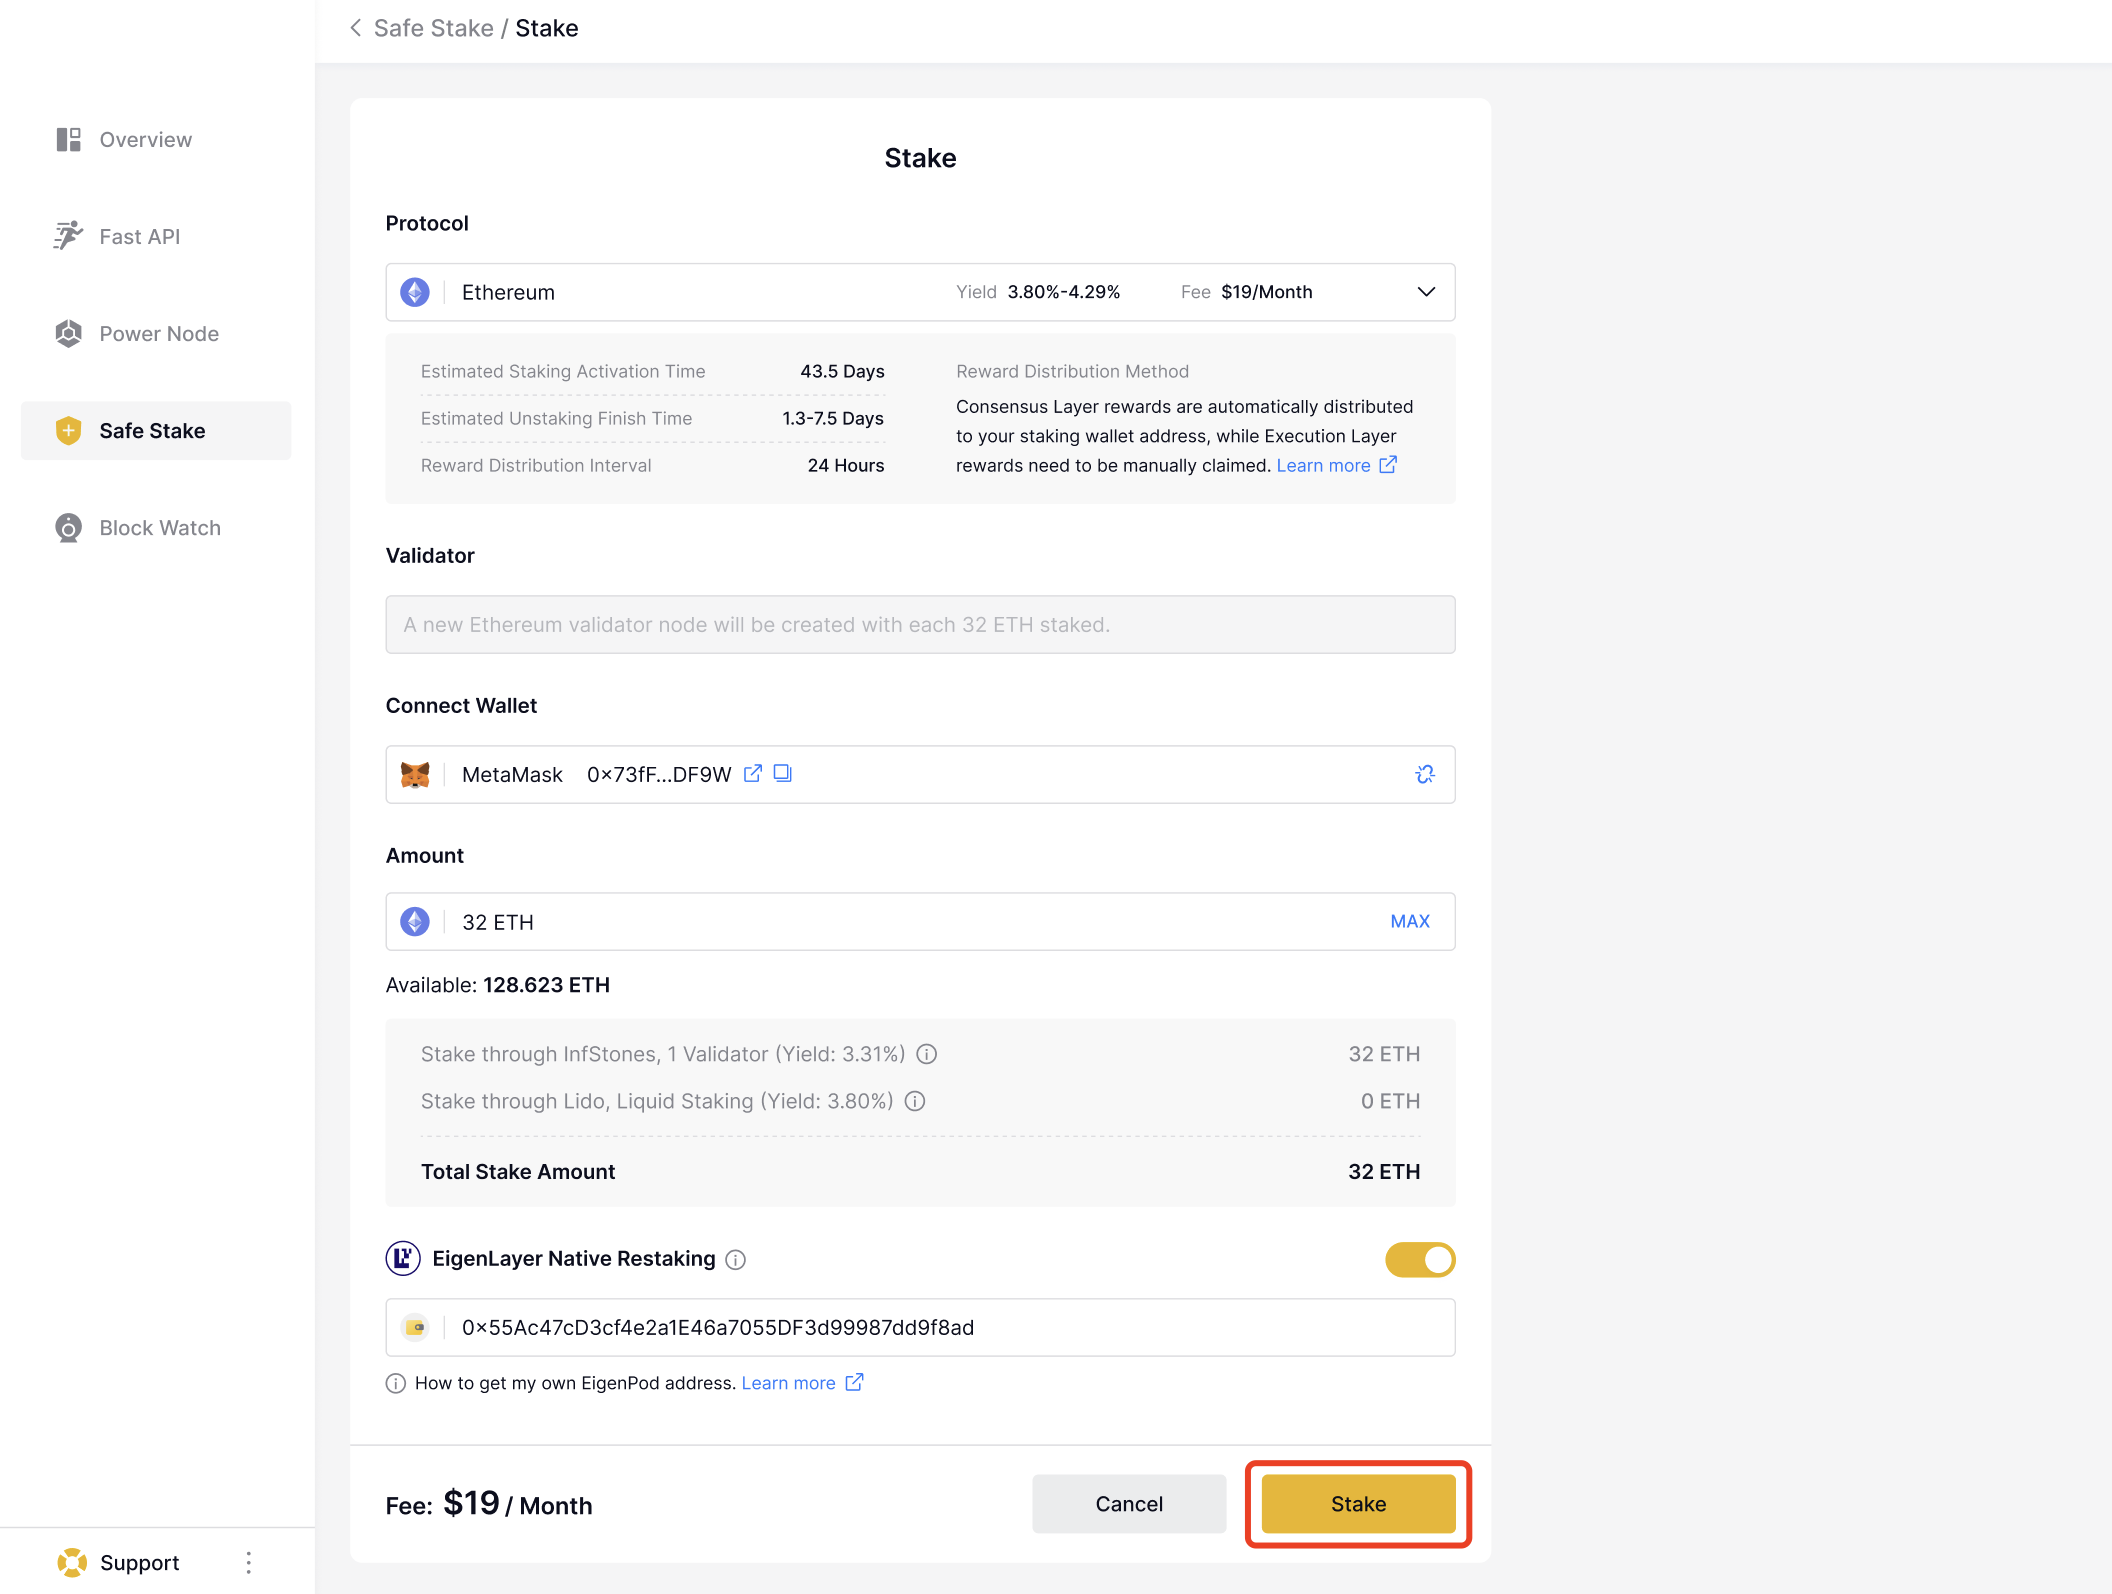
Please confirm the Protocol you need to stake as shown in the picture. The next essential step is to connect your wallet. Choose your preferred wallet option and follow the prompts to securely connect it. Once your wallet is connected, you will be required to enter the amount of ETH you wish to stake.
Step 7: Enable EigenLayer Native Restaking
Now you can look for the option to enable EigenLayer Native Restaking within the interface. Click this button and paste the EigenPod address you copied in STEP 4.
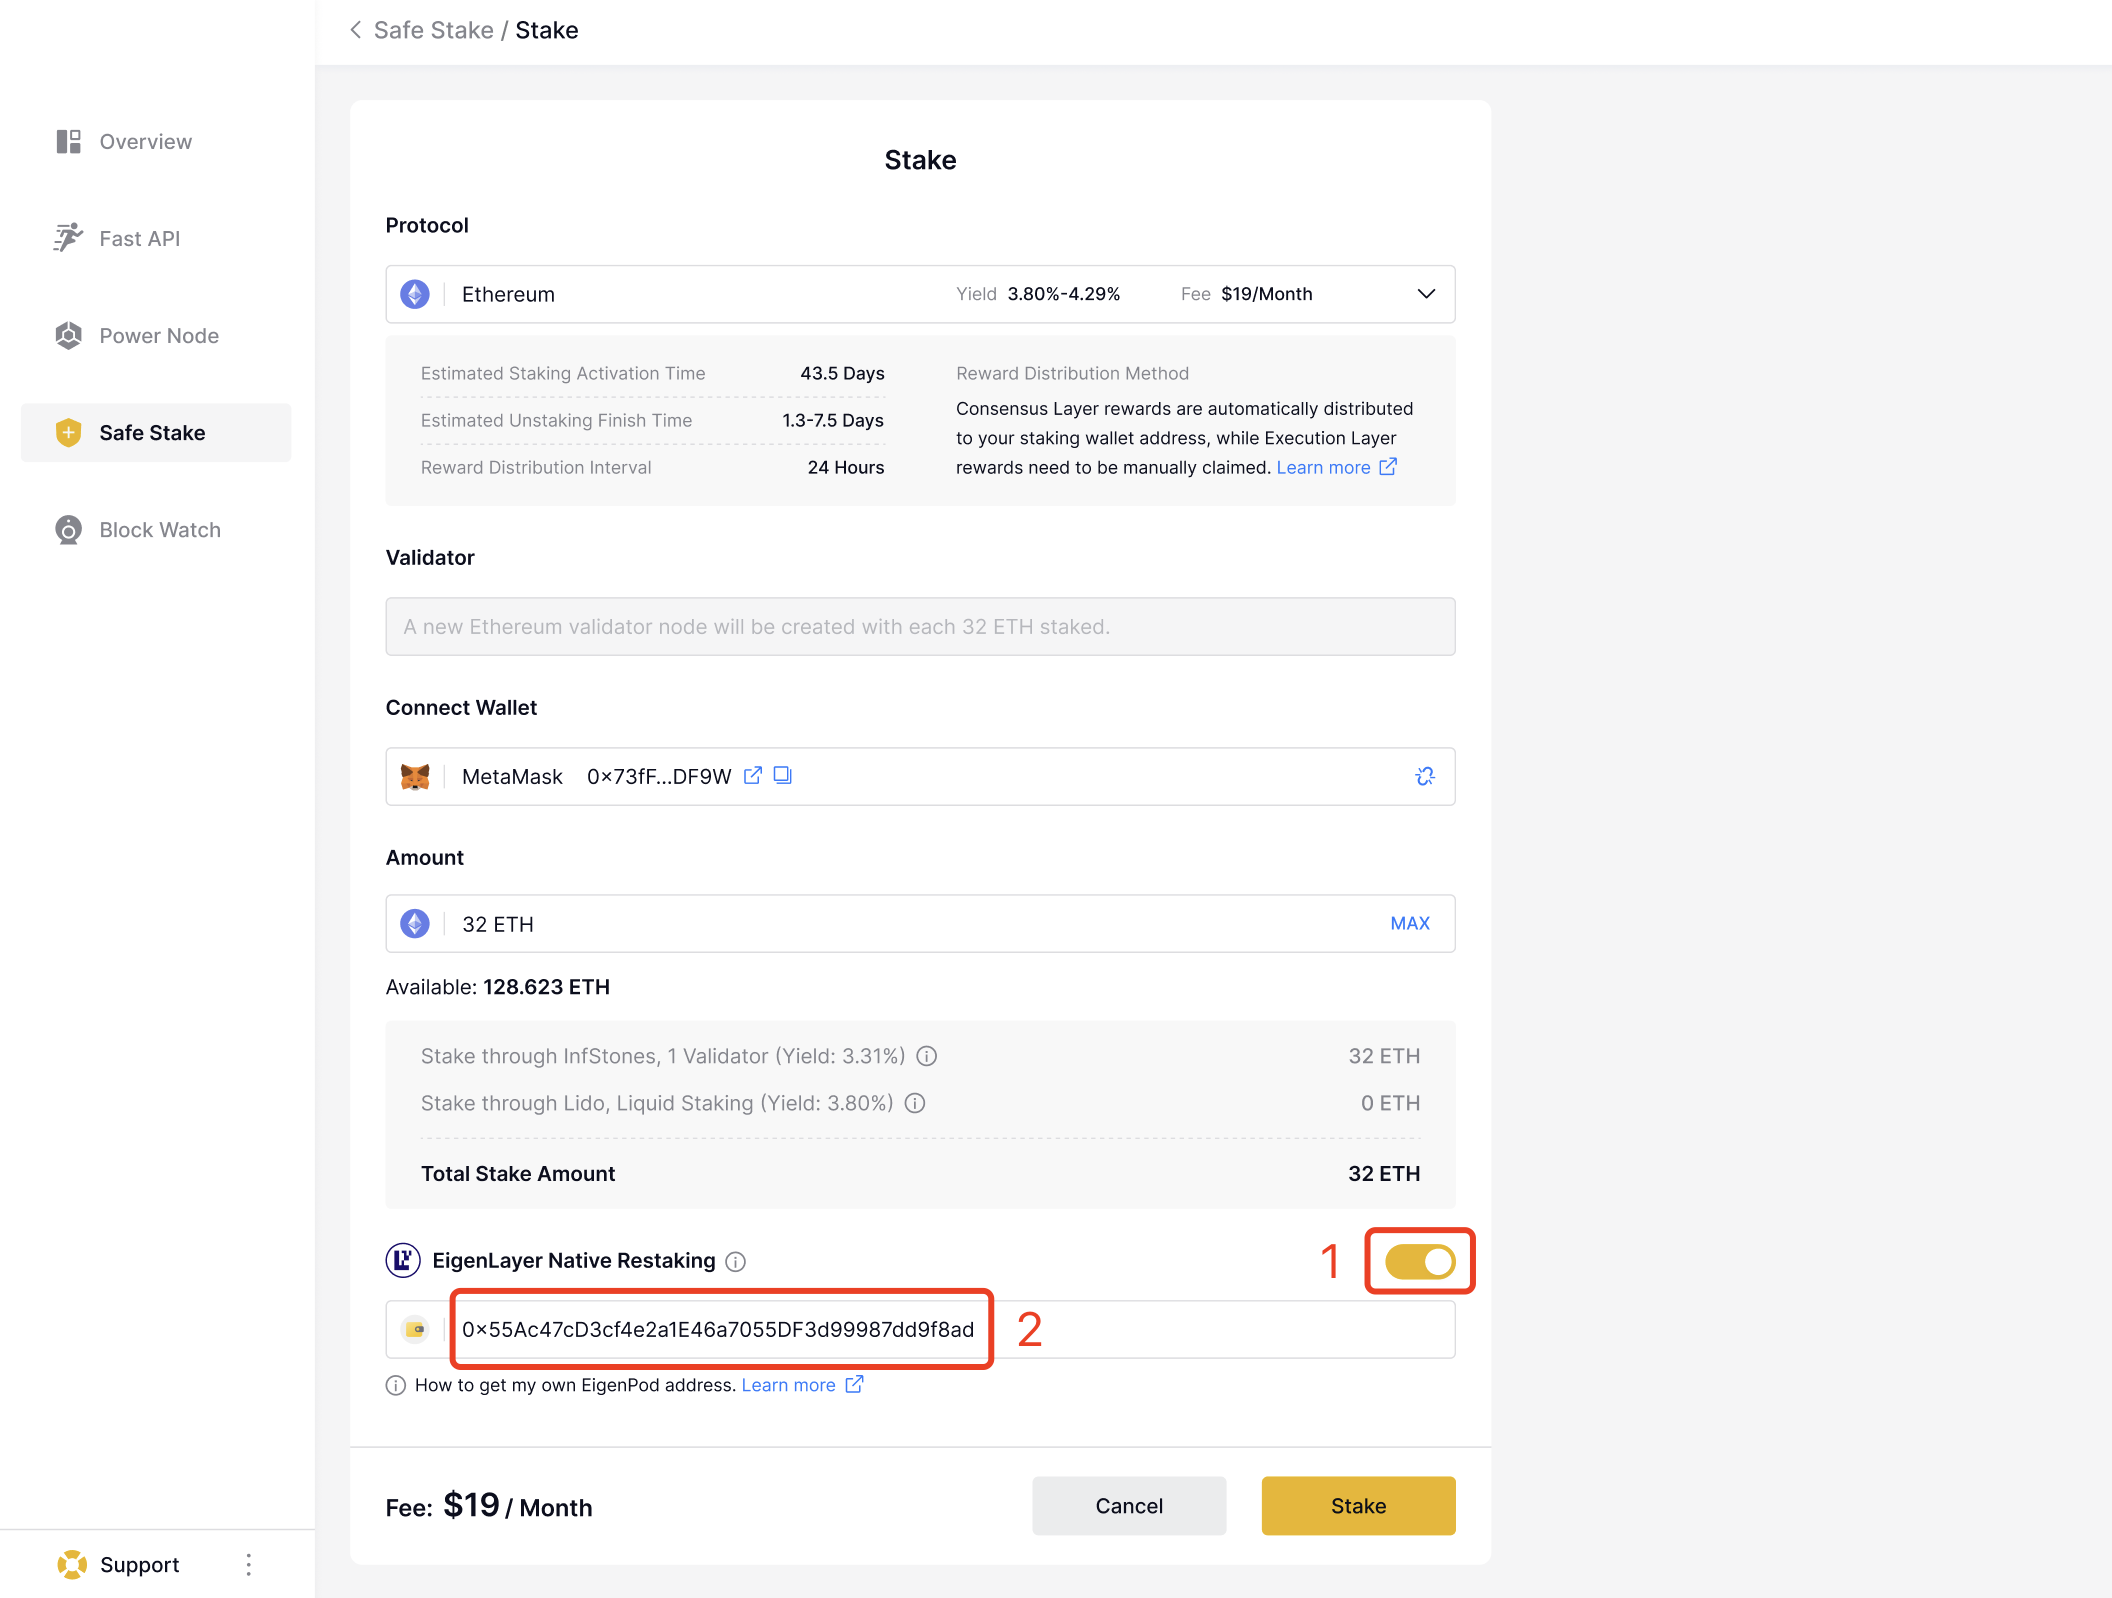
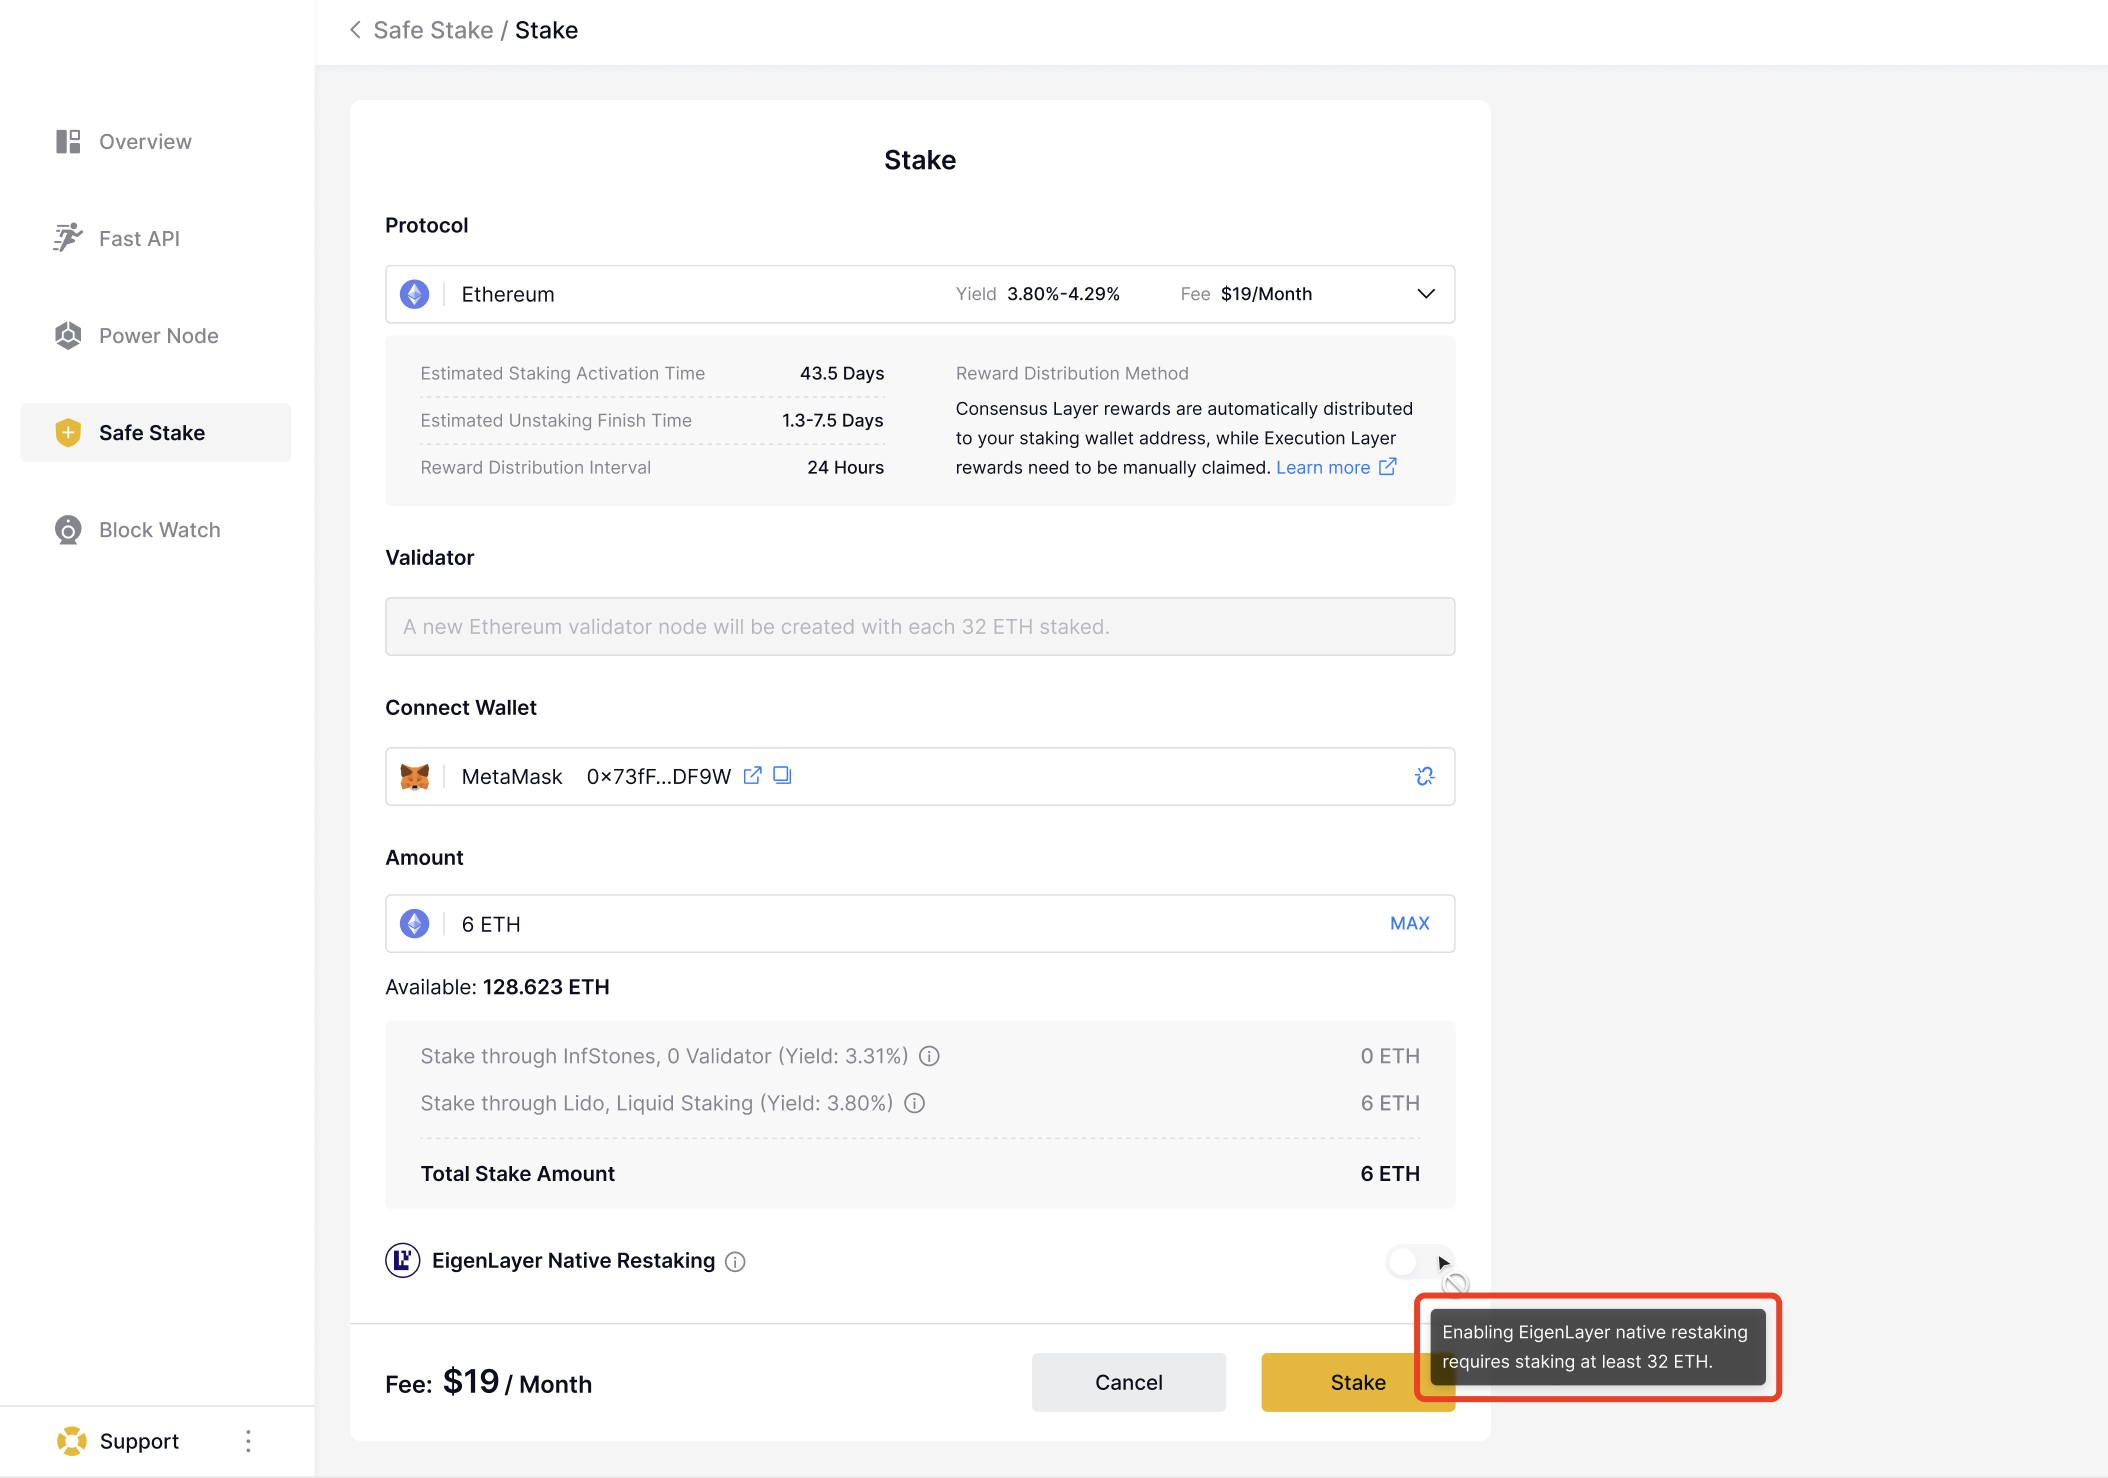
Before proceeding, please ensure that your stake amount meets the minimum requirement of 32 ETH, as set by EigenLayer for Native Restaking.
Step 8: Finalize Your Restake
With all details confirmed and your stake amount meeting the requirements, you can now click the “Stake” button. This action initiates the process of restaking your ETH on EigenLayer through InfStones.
Check EigenLayer Points
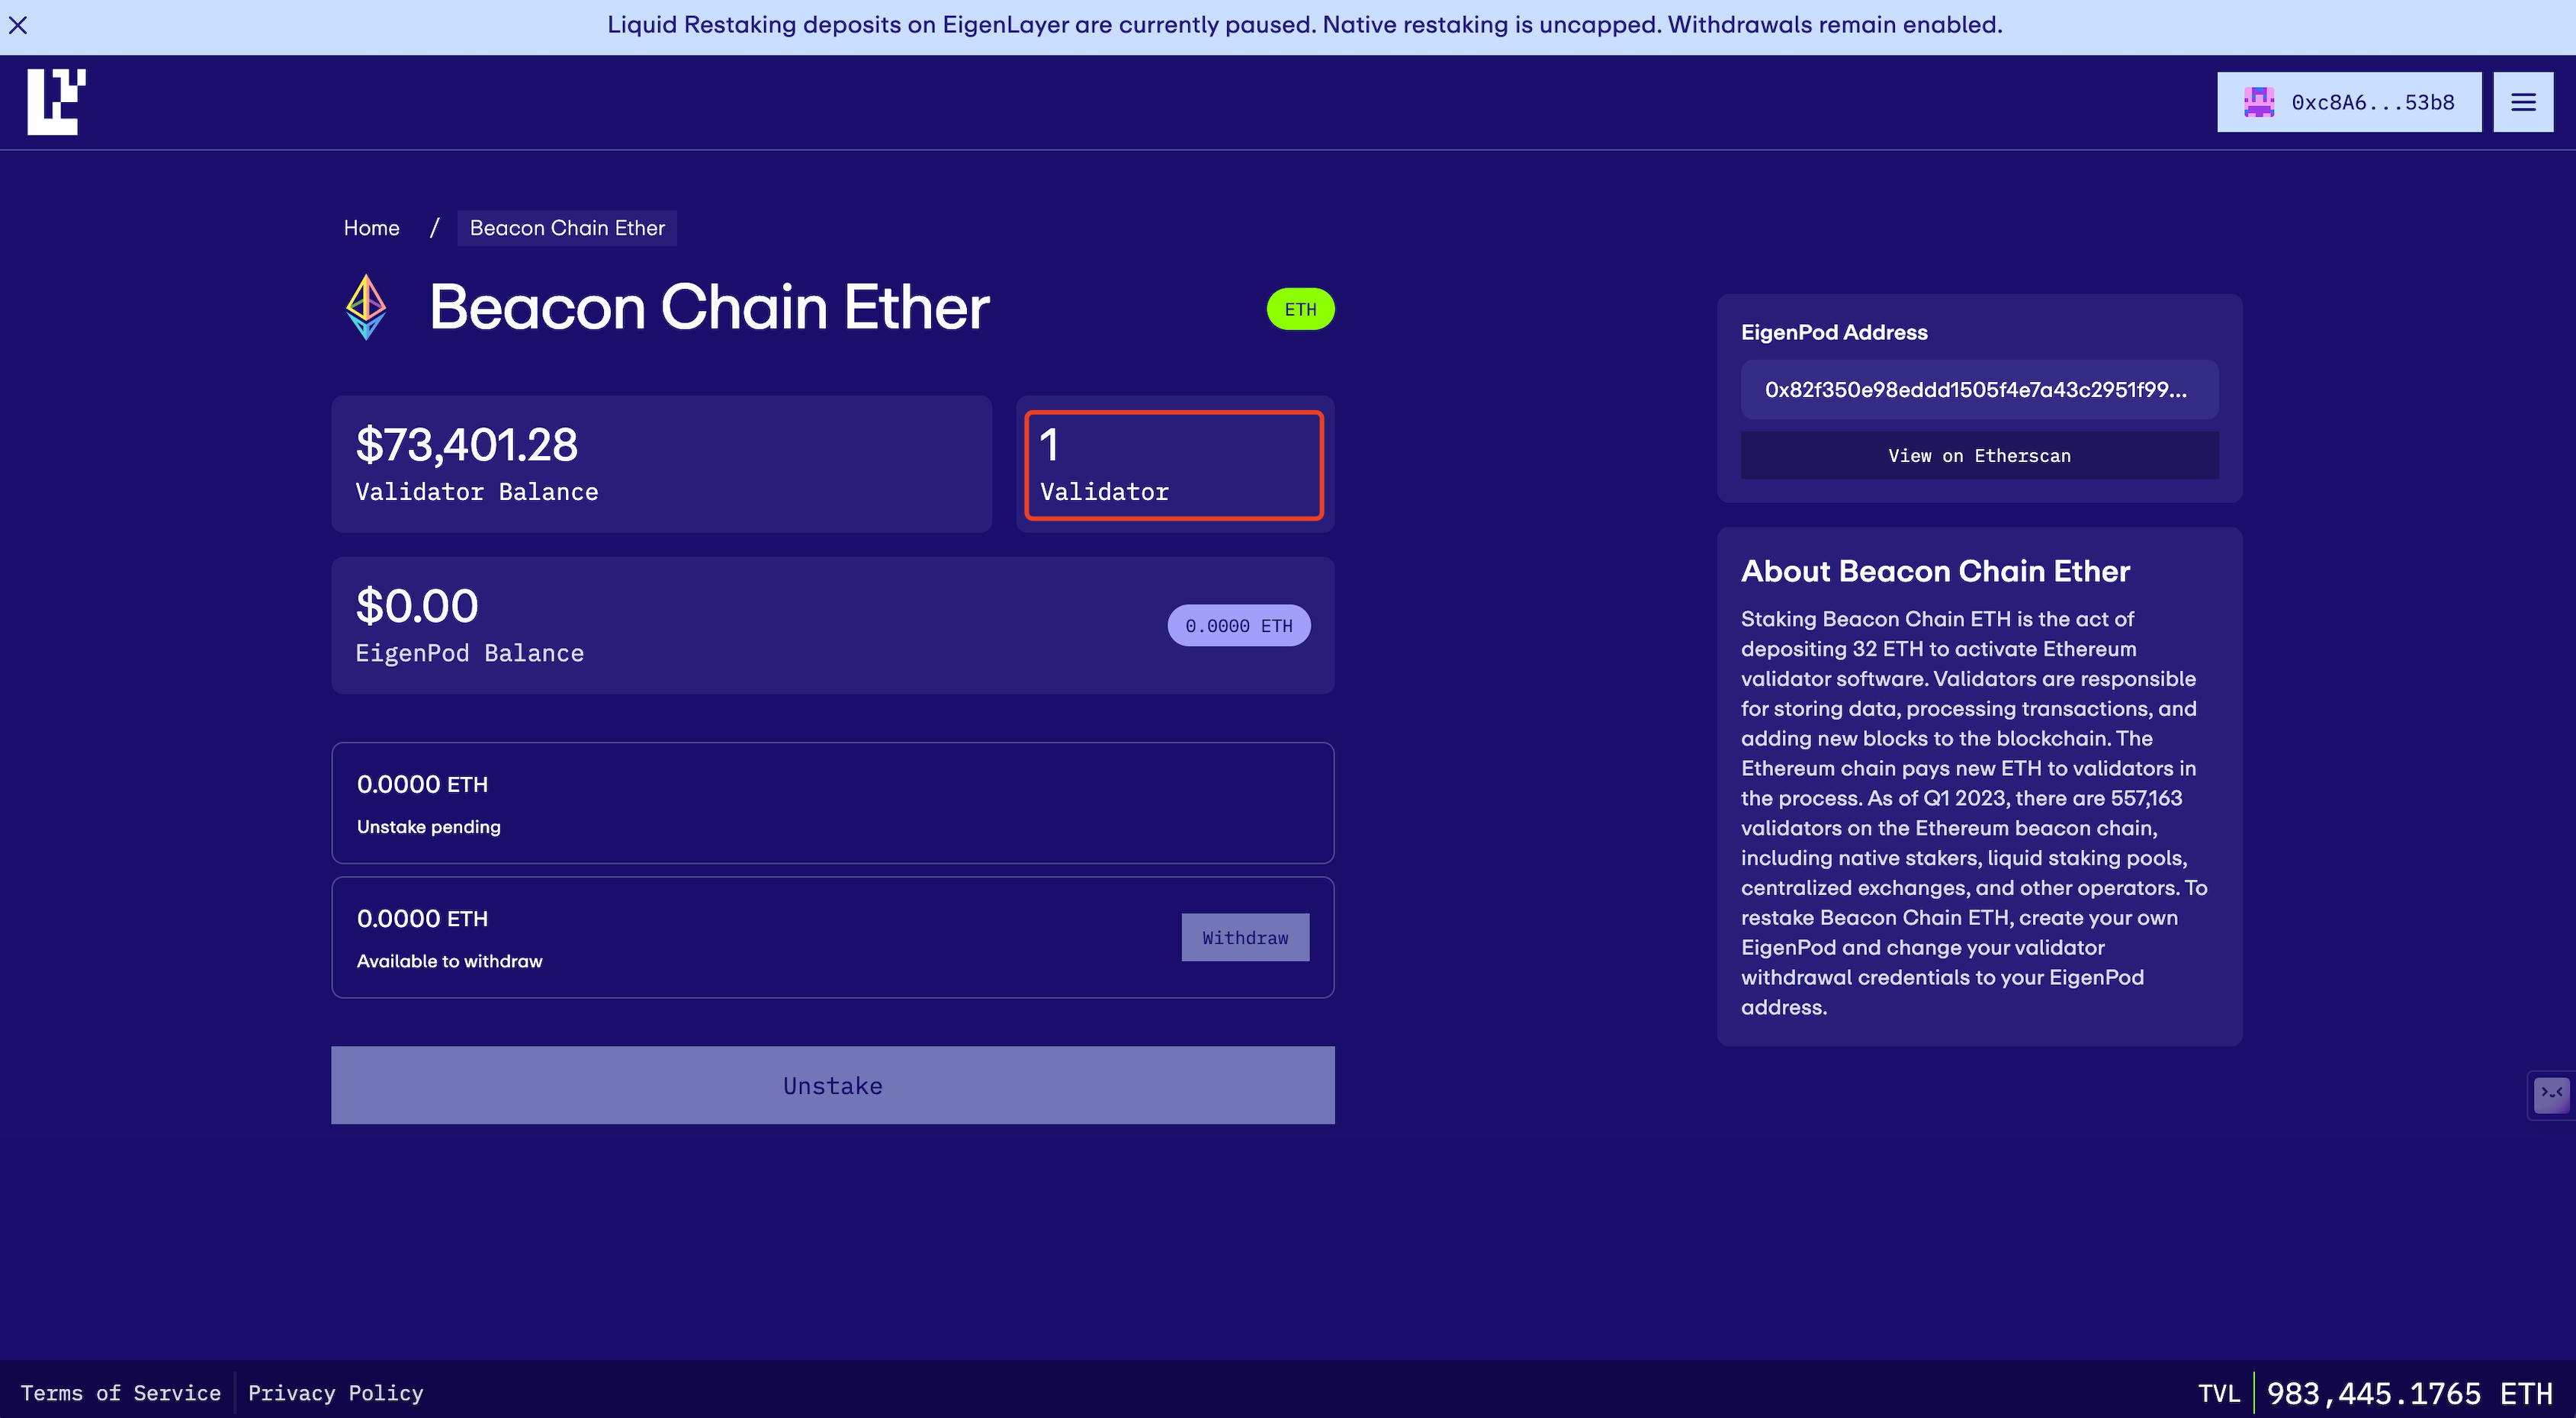
Step 9: Check the Validator Amount on EigenLayer
Finally, you could navigate to your EigenPod dashboard on the EigenLayer app and check if the number of restaked validators matches to ensure you have successfully restaked.
Step 10: Check EigenLayer Restaked Points
You can check your Restaked Points at any time by navigating to your EigenPod dashboard on the EigenLayer app.
.png)
Why Restake ETH with InfStones?
When it comes to participating in EigenLayer Restaking, choosing InfStones offers distinct advantages over other restaking solutions available in the market. Here’s why InfStones stands out:
1. No Upper Limit on Restaking Amount: Unlike restaking through LST deposits, participating in Native Restaking via InfStones does not impose any cap on how much ETH you can restake.
2. Enhanced Security for Your Assets: Unlike restaking through LST deposits, where your ETH assets are held within the EigenLayer contract, ETH restaked through InfStones' Native ETH restaking is securely stored in the Beacon Chain contract, which significantly reduces the risk of contract attacks.
3. Greater Liquidity with Easy Unstaking: With InfStones, you have the option to unstake and withdraw your funds at any time, offering a smaller liquidity risk compared to other methods.
4. Preferred Target for AVS Project Airdrops: Direct participation in EigenLayer Native Restaking through InfStones positions you as a prime candidate for AVS project airdrops, which means your chances of being included in the airdrop list are significantly higher.
InfStones is an advanced, enterprise-grade Platform as a Service (PaaS) blockchain infrastructure provider trusted by the top blockchain companies in the world. InfStones’ AI-based infrastructure provides developers worldwide with a rugged, powerful node management platform alongside an easy-to-use API. With over 20,000 nodes supported on over 80 blockchains, InfStones gives developers all the control they need - reliability, speed, efficiency, security, and scalability - for cross-chain DeFi, NFT, GameFi, and decentralized application development.
InfStones is trusted by the biggest blockchain companies in the world including Binance, CoinList, BitGo, OKX, Chainlink, Polygon, Harmony, and KuCoin, among a hundred other customers. InfStones is dedicated to developing the next evolution of a better world through limitless Web3 innovation.
DIN is Joining InfStones Node Launchpool – Earn Extra Rewards on Your License Delegation!
InfStones Loyalty Points - EigenLayer Season 1 Conclusion & What's Next
Introduce InfStones CARV Perk: Unlock Extra Airdrop and Exclusive Benefit