


In the evolving landscape of Ethereum restaking, InfStones in collaboration with EigenLayer provides a streamlined and secure pathway for restaking ETH, claiming rewards, and unstaking. This all-in-one guide is designed to equip you with the necessary steps to navigate each phase of your investment journey, ensuring a seamless and rewarding experience in the Ethereum ecosystem.
How to Restake ETH
For a detailed guide on restaking your ETH, we invite you to consult our earlier blog.
Create Your EigenPod on EigenLayer
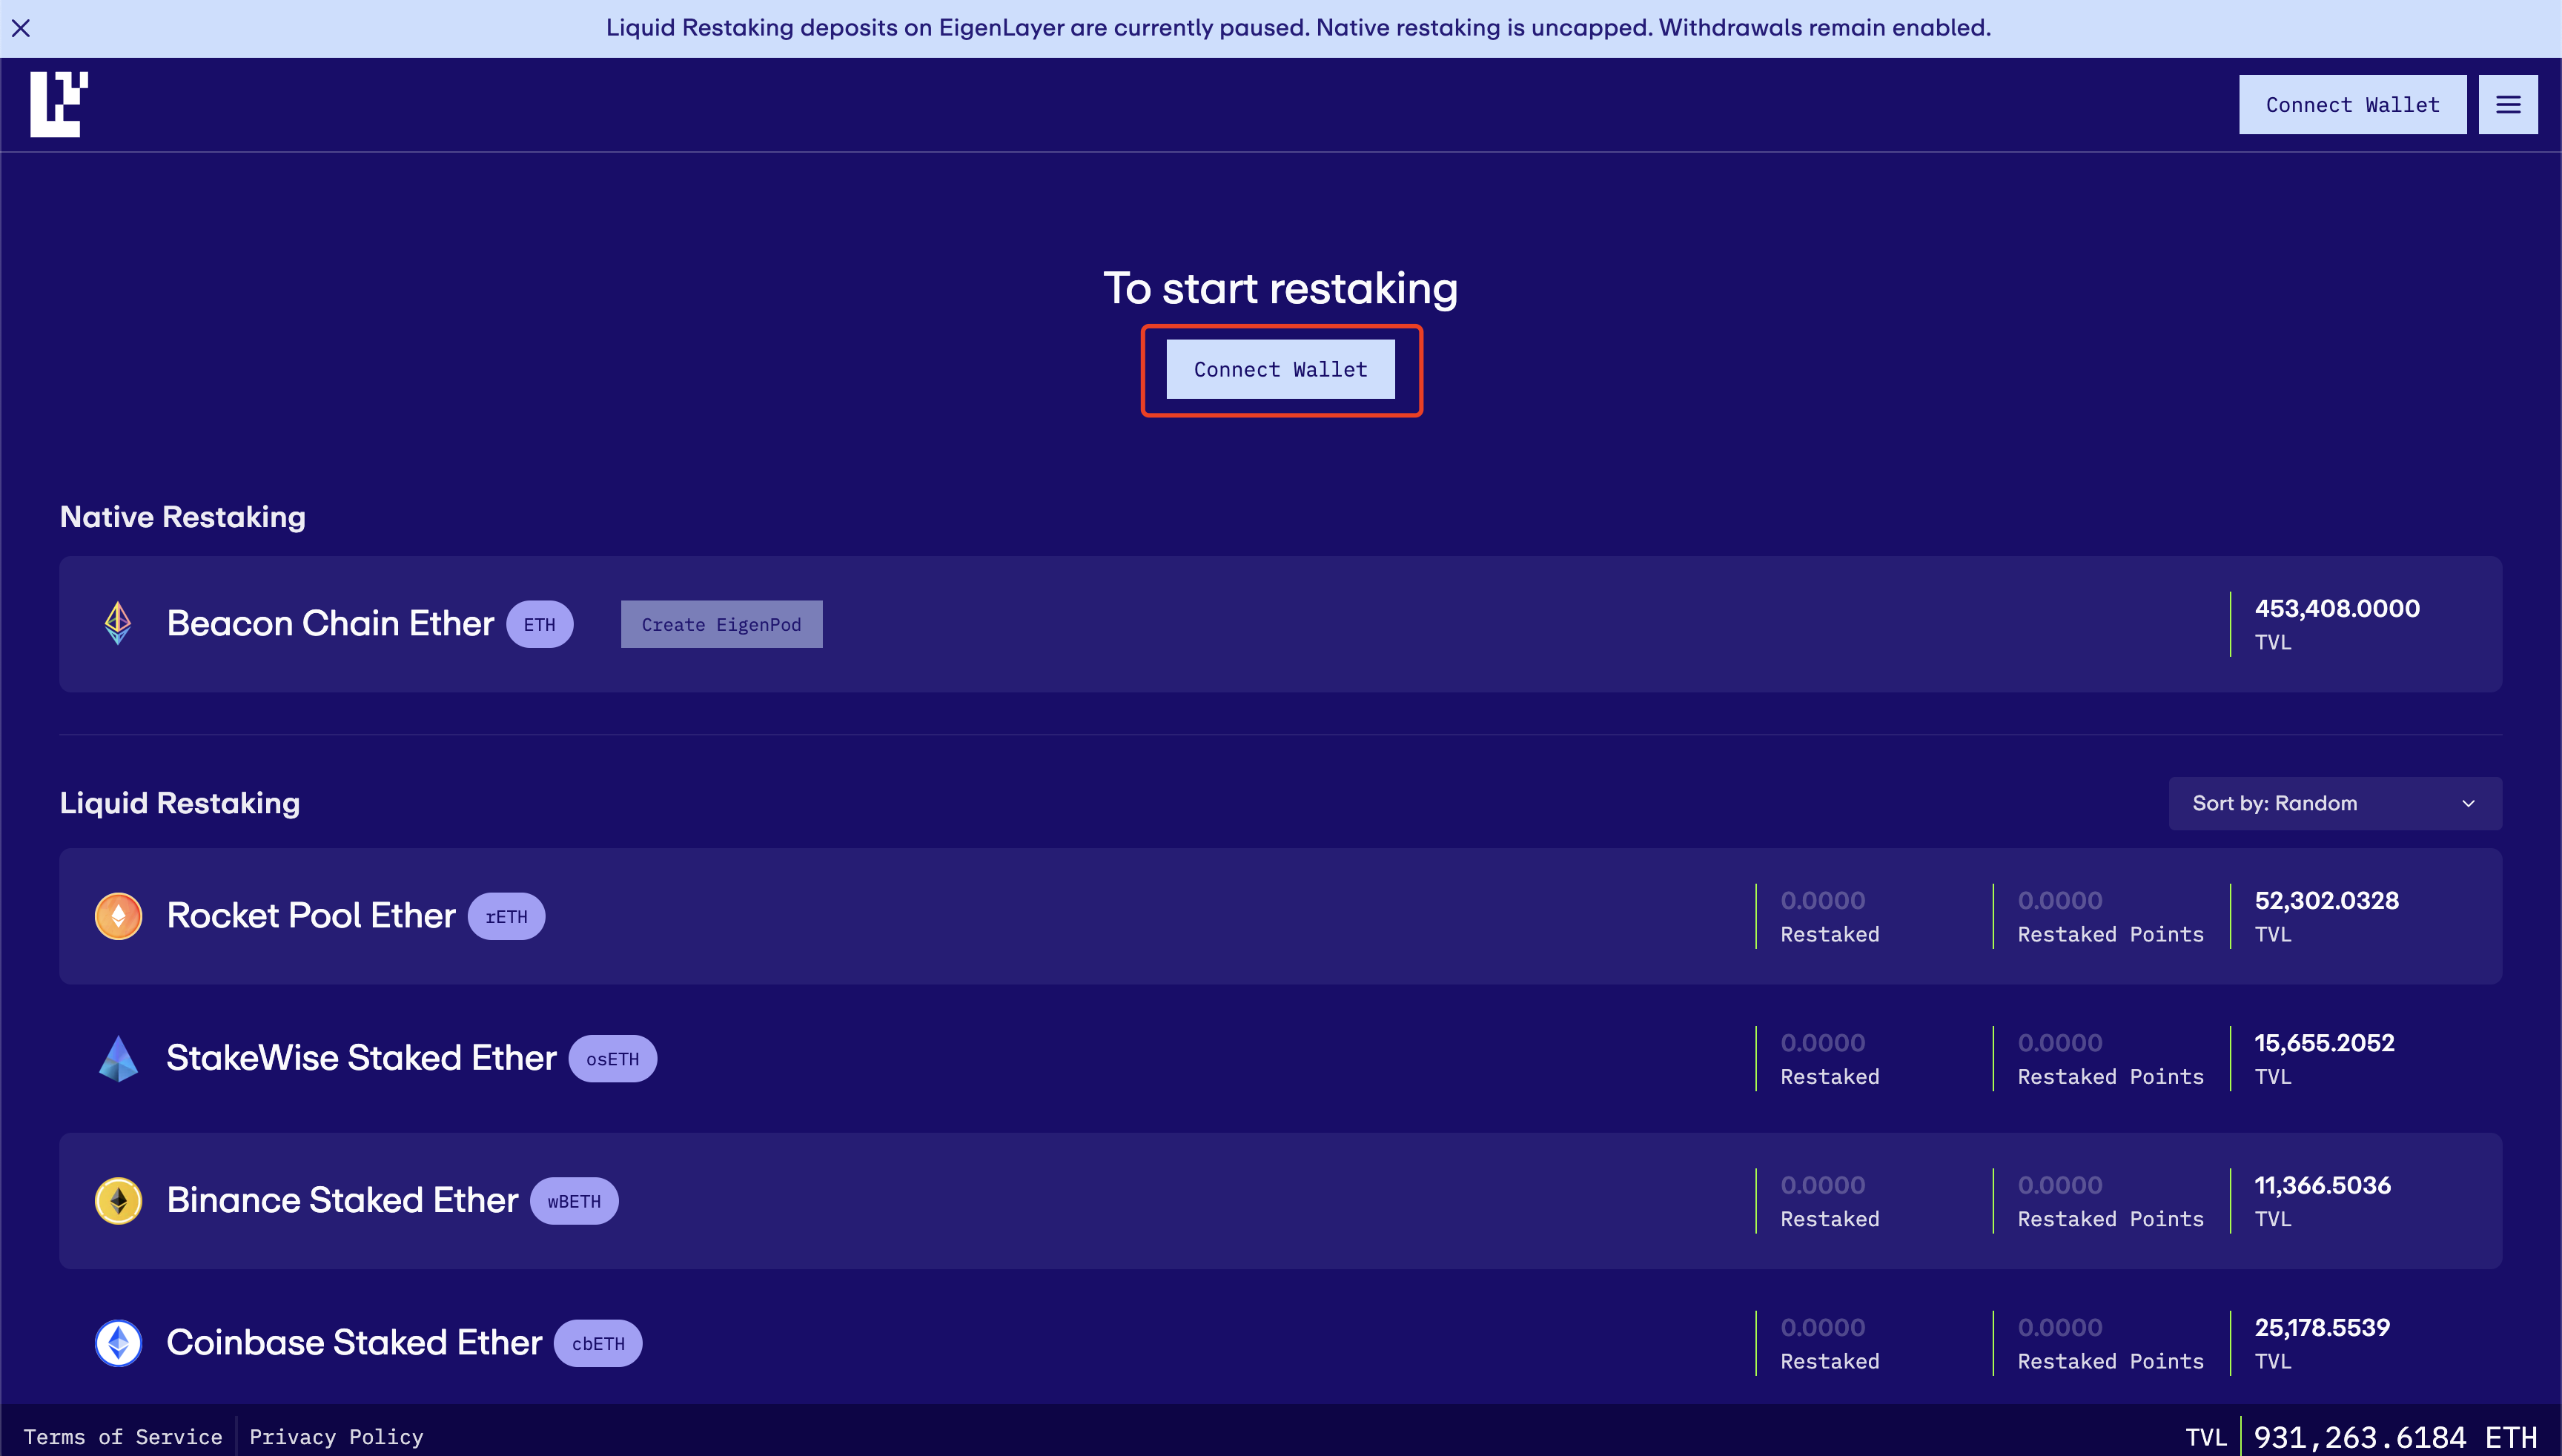
Step 1: Access EigenLayer
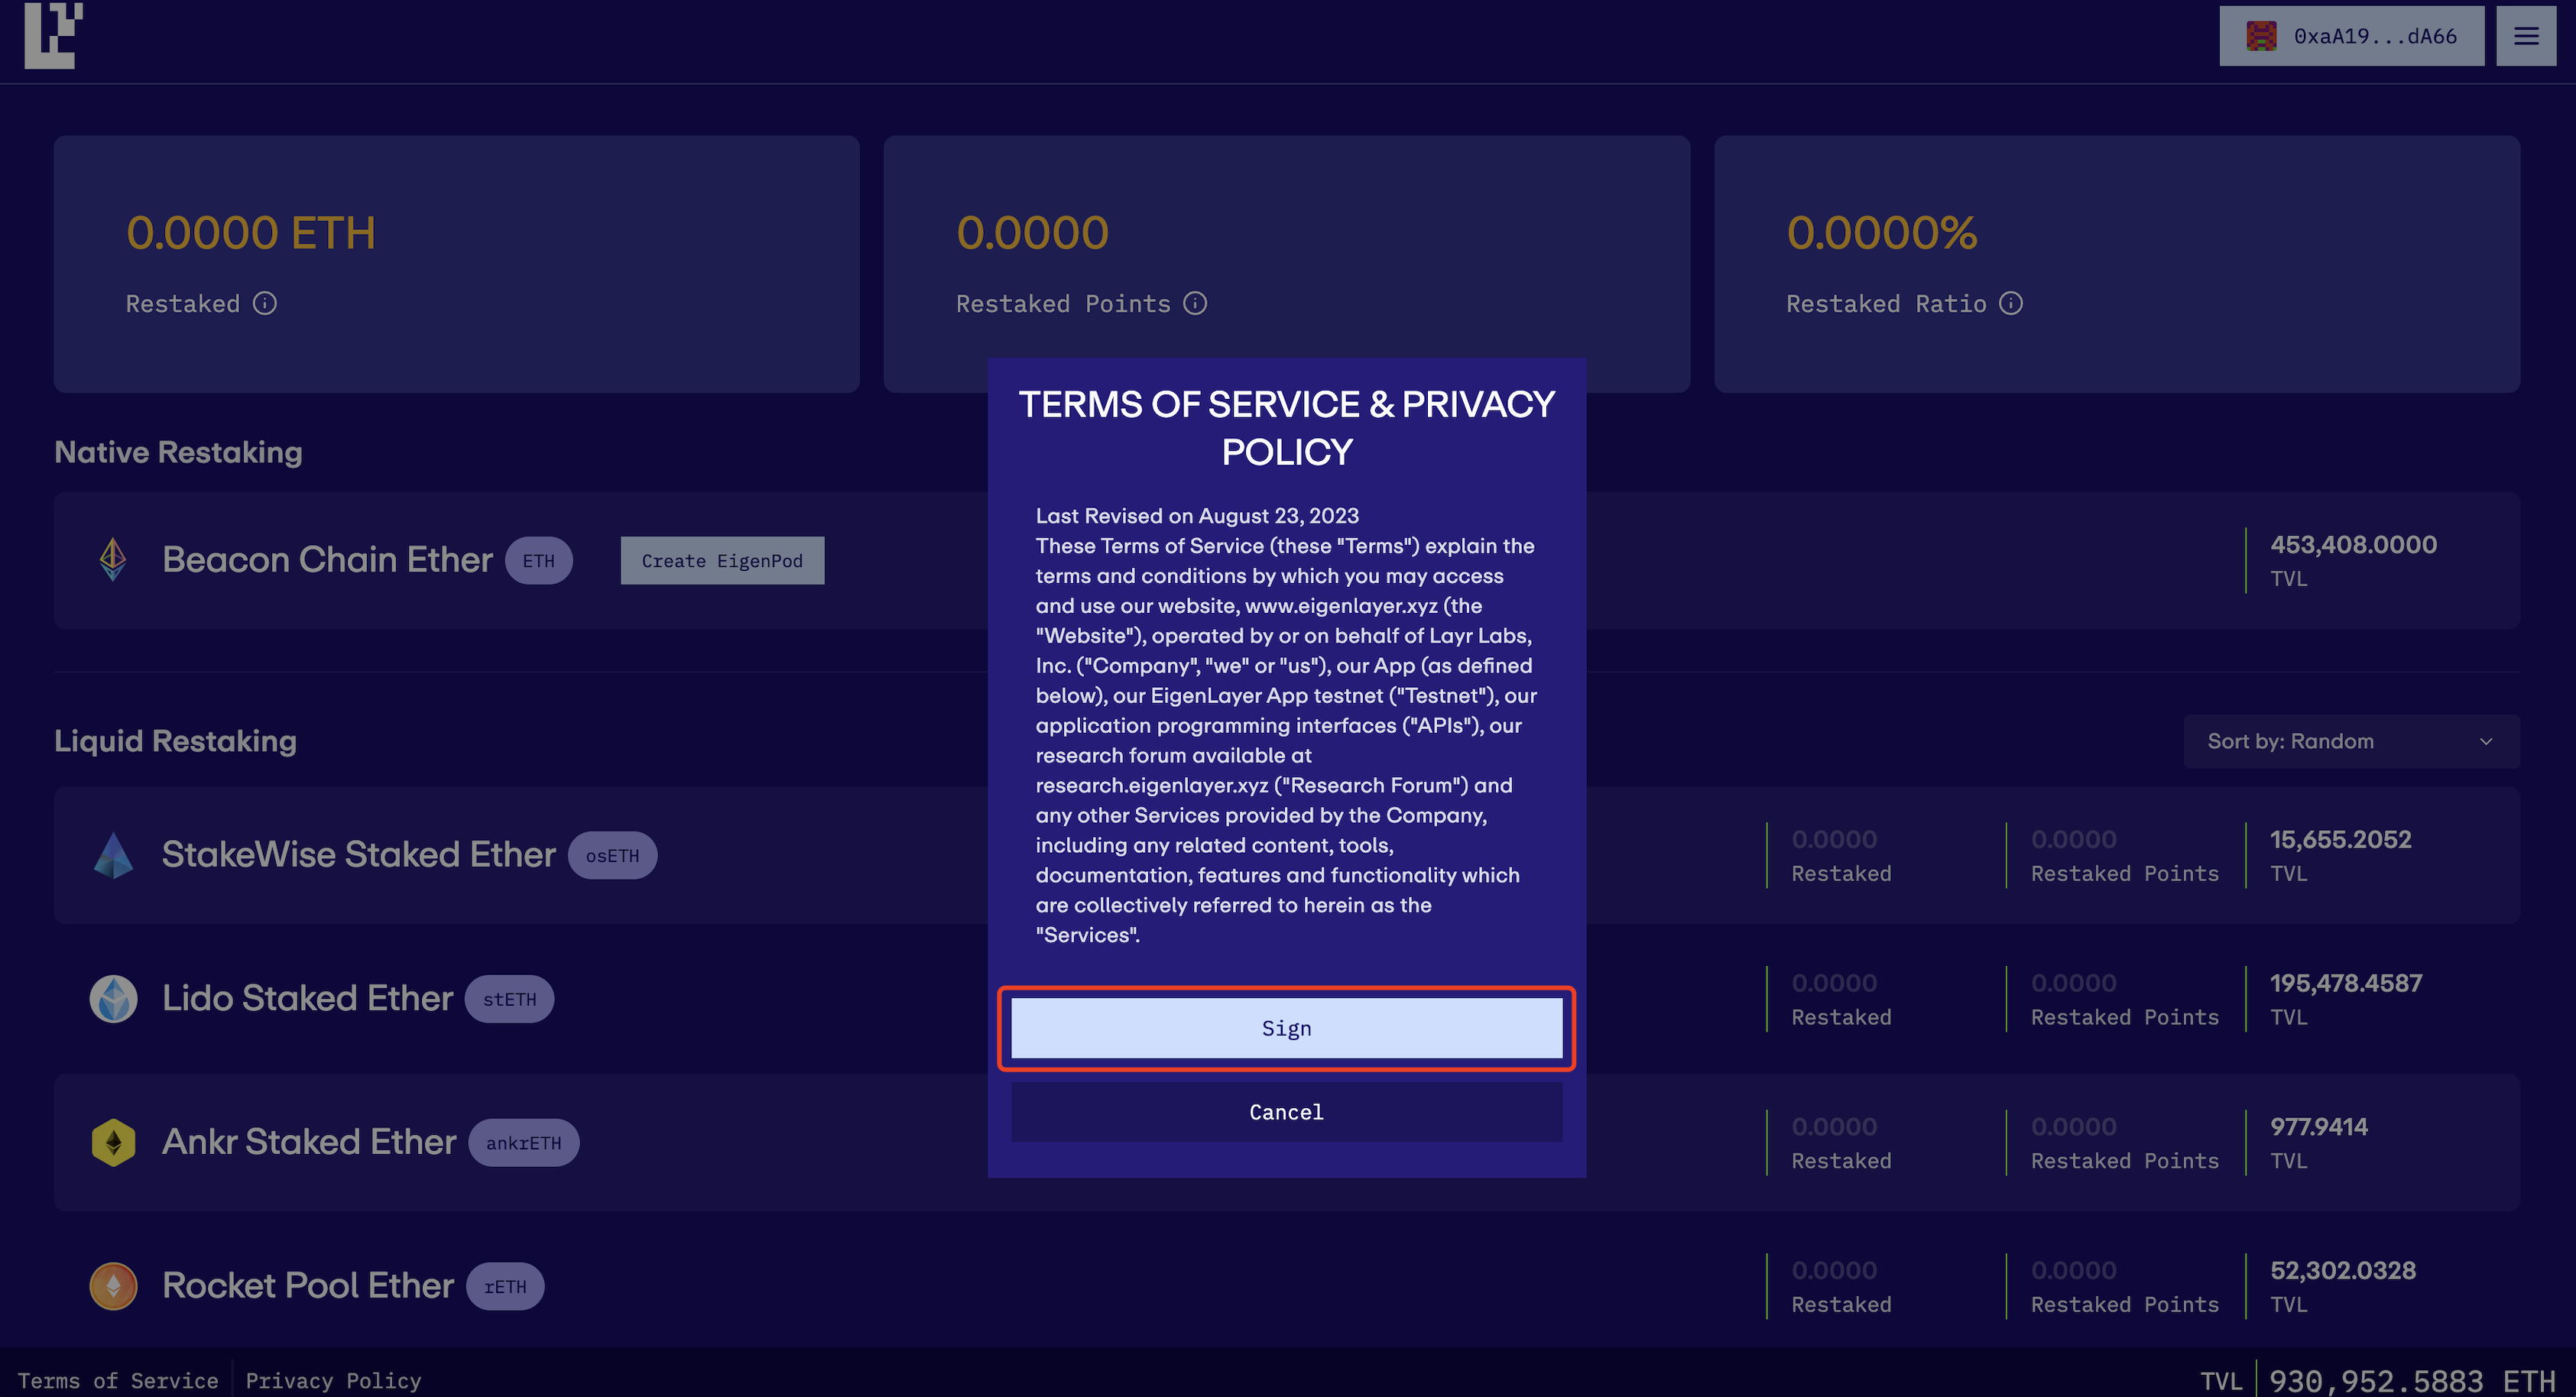
You can start by opening the EigenLayer Dashboard, connecting your wallet, and signing the EigenLayer Terms of Service & Privacy Policy.
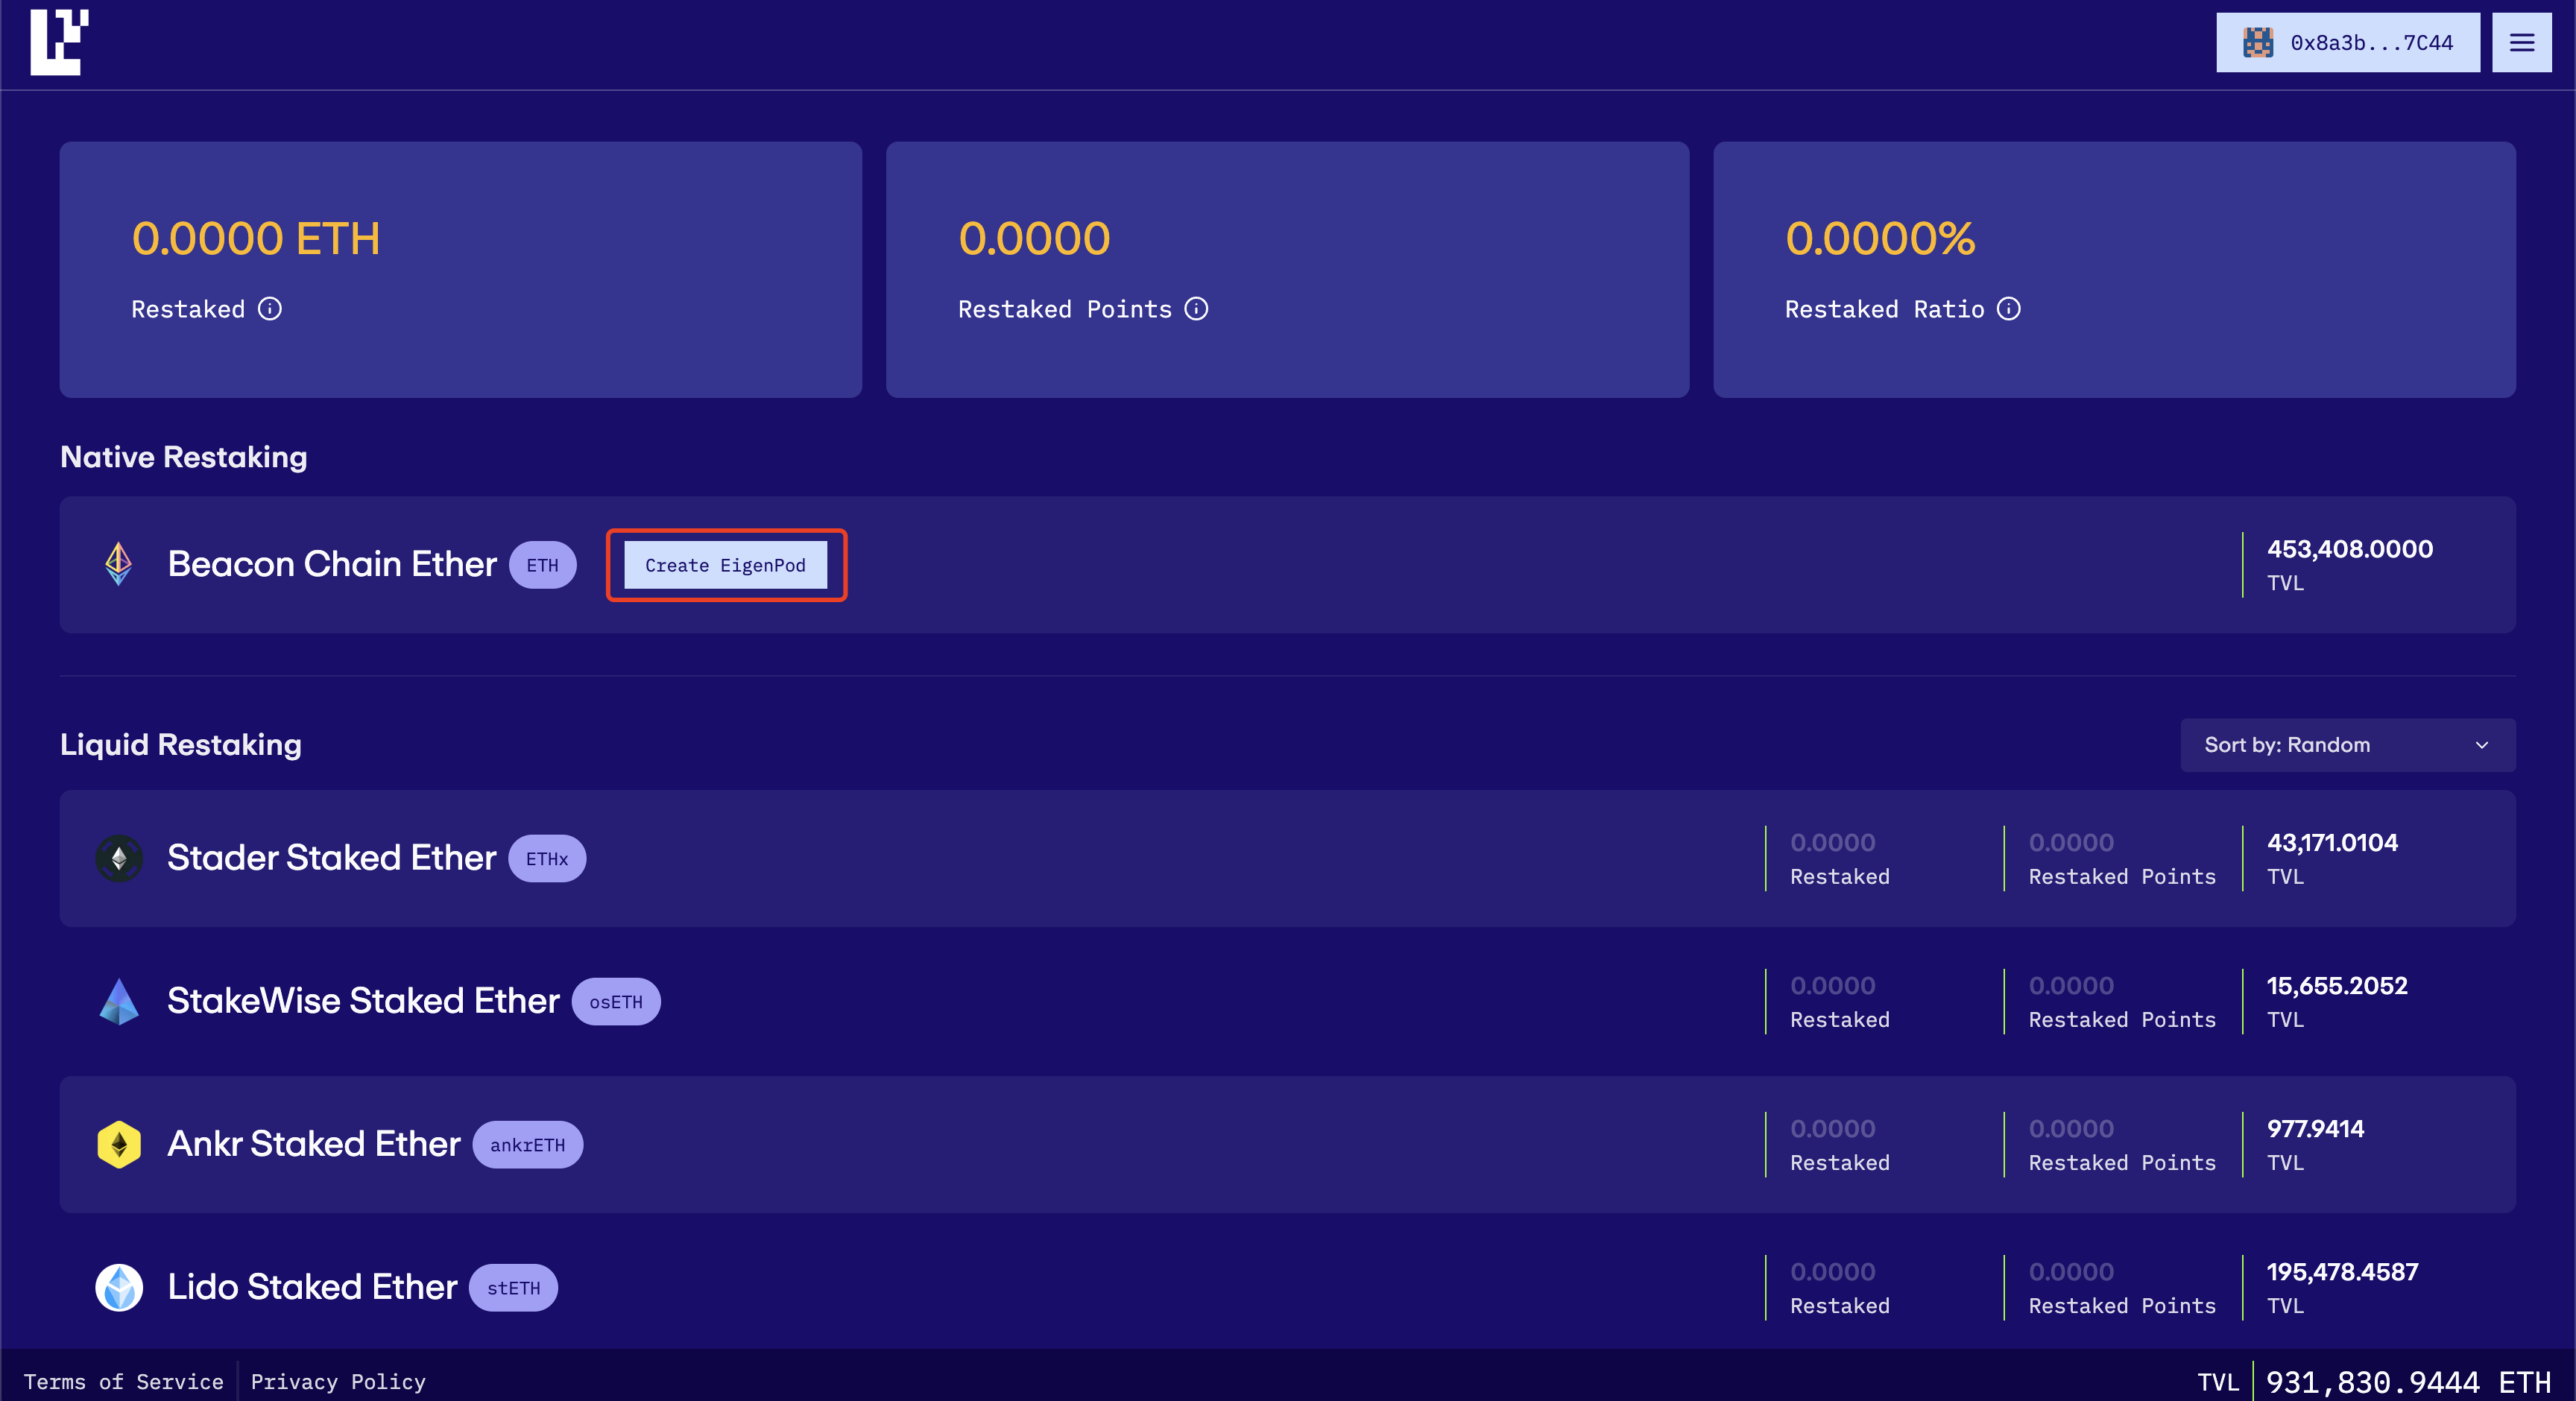
Step 2: Create Your EigenPod
You can proceed by clicking on “Create EigenPod” and follow the instructions to sign in your wallet extension. After successfully creating the EigenPod will be shown under the “Native Restaking".
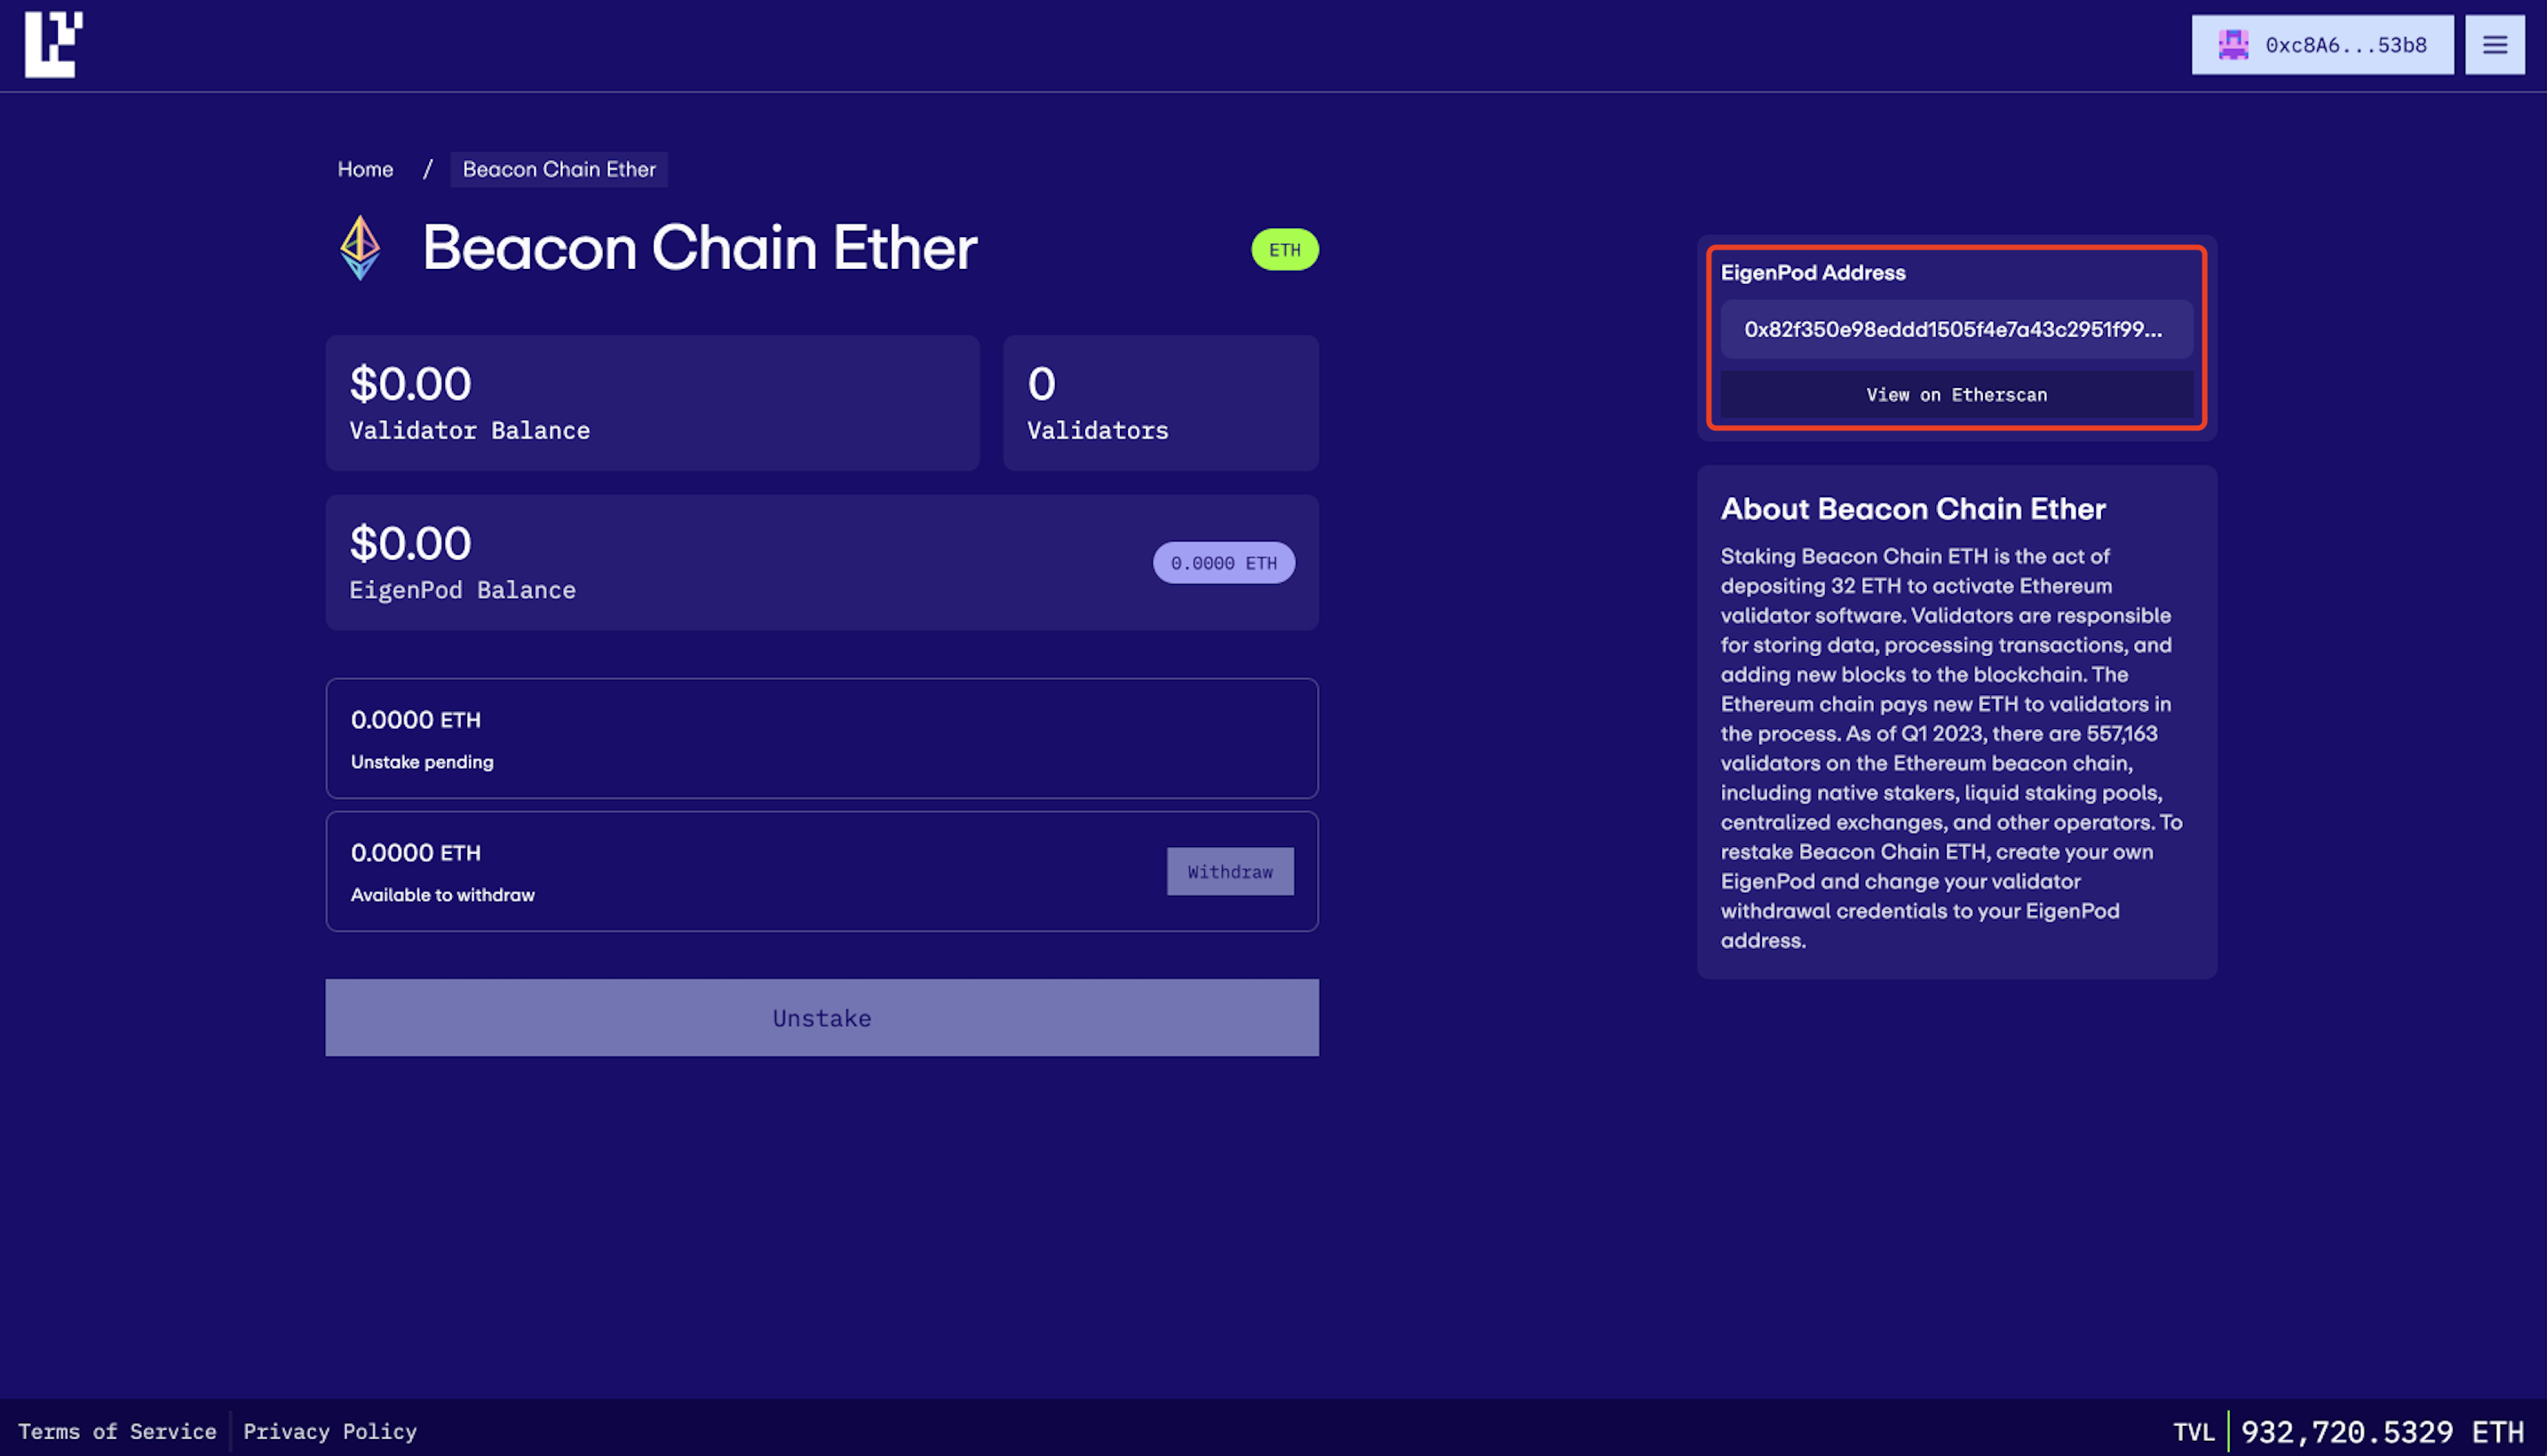
Please click into the EigenPod.

You will find your EigenPod address, please store it somewhere safe as it will be used in the following steps.
Restake with InfStones
Step 1: Access InfStones
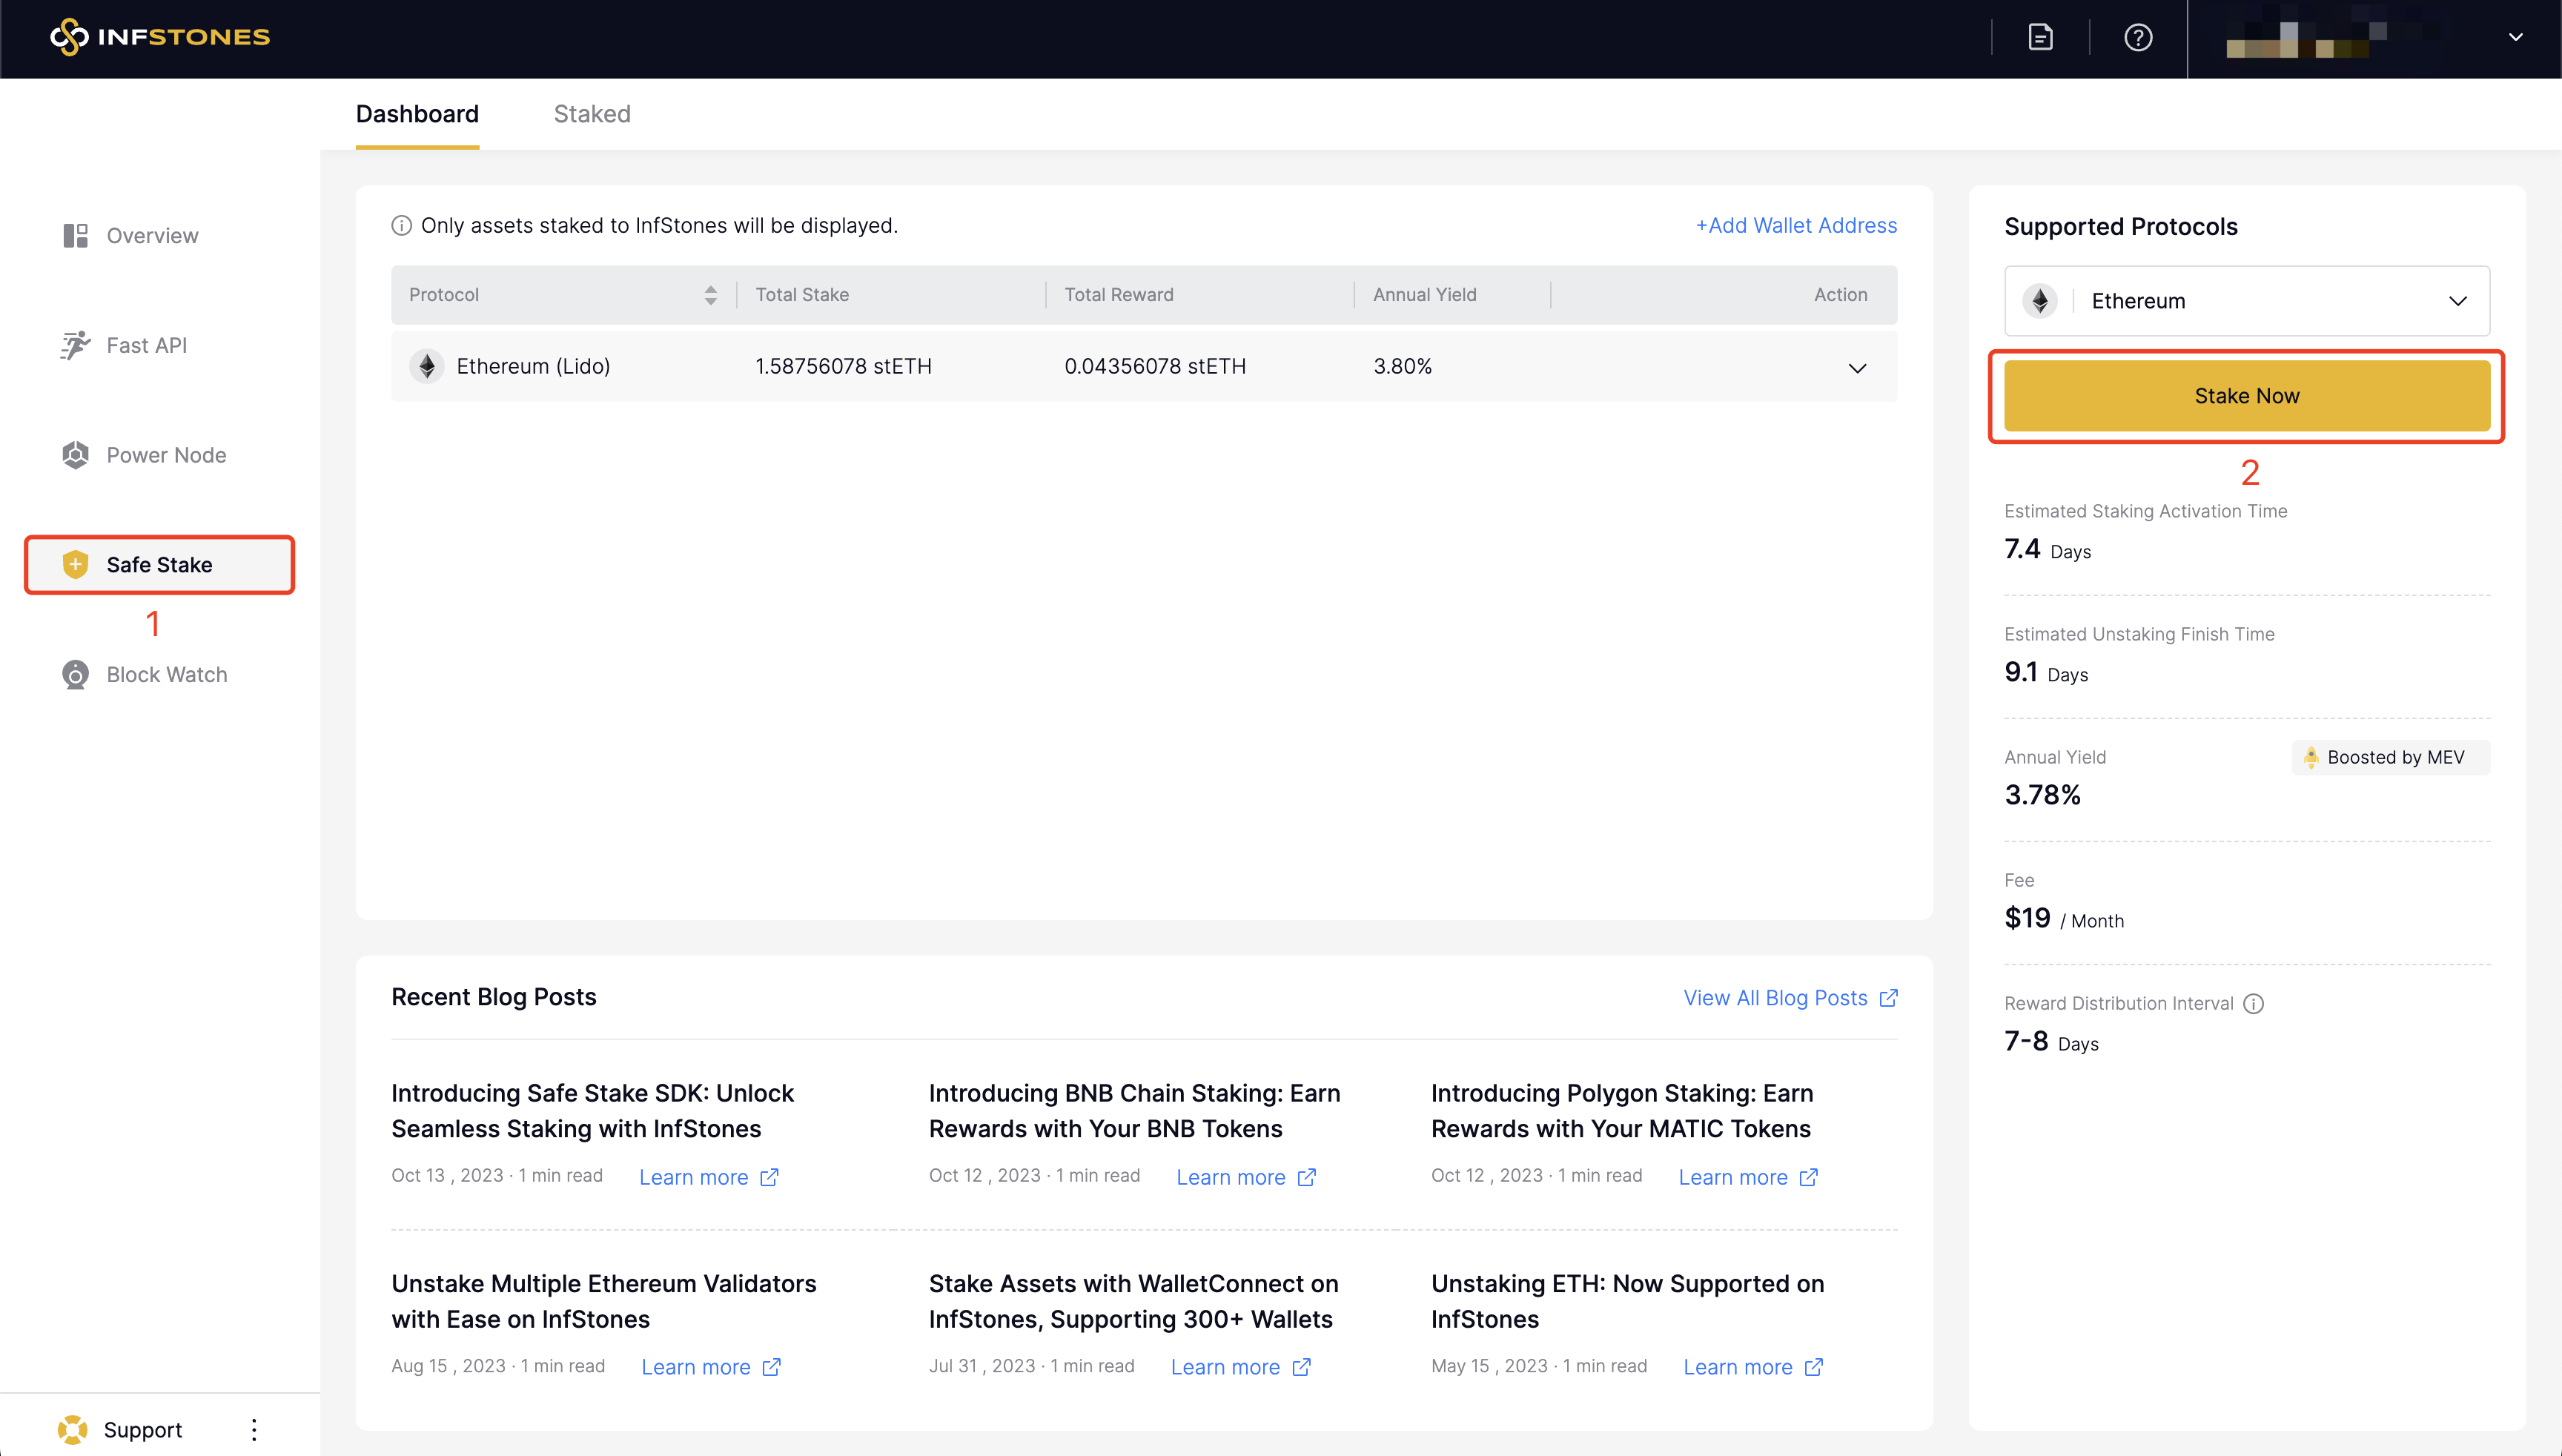
Begin by visiting the InfStones official website. Navigate to the Safe Stake section and enter your dashboard. You need to select Ethereum as your protocol of choice and then click on the “Stake Now” button.
Step 2: Restake Your ETH
After connecting your wallet and inputting the amount of ETH you need to restake, which should be more than 32 ETH, you can enable EigenLayer Native Restaking within the interface by clicking the button and pasting the EigenPod address you copied in the previous steps.
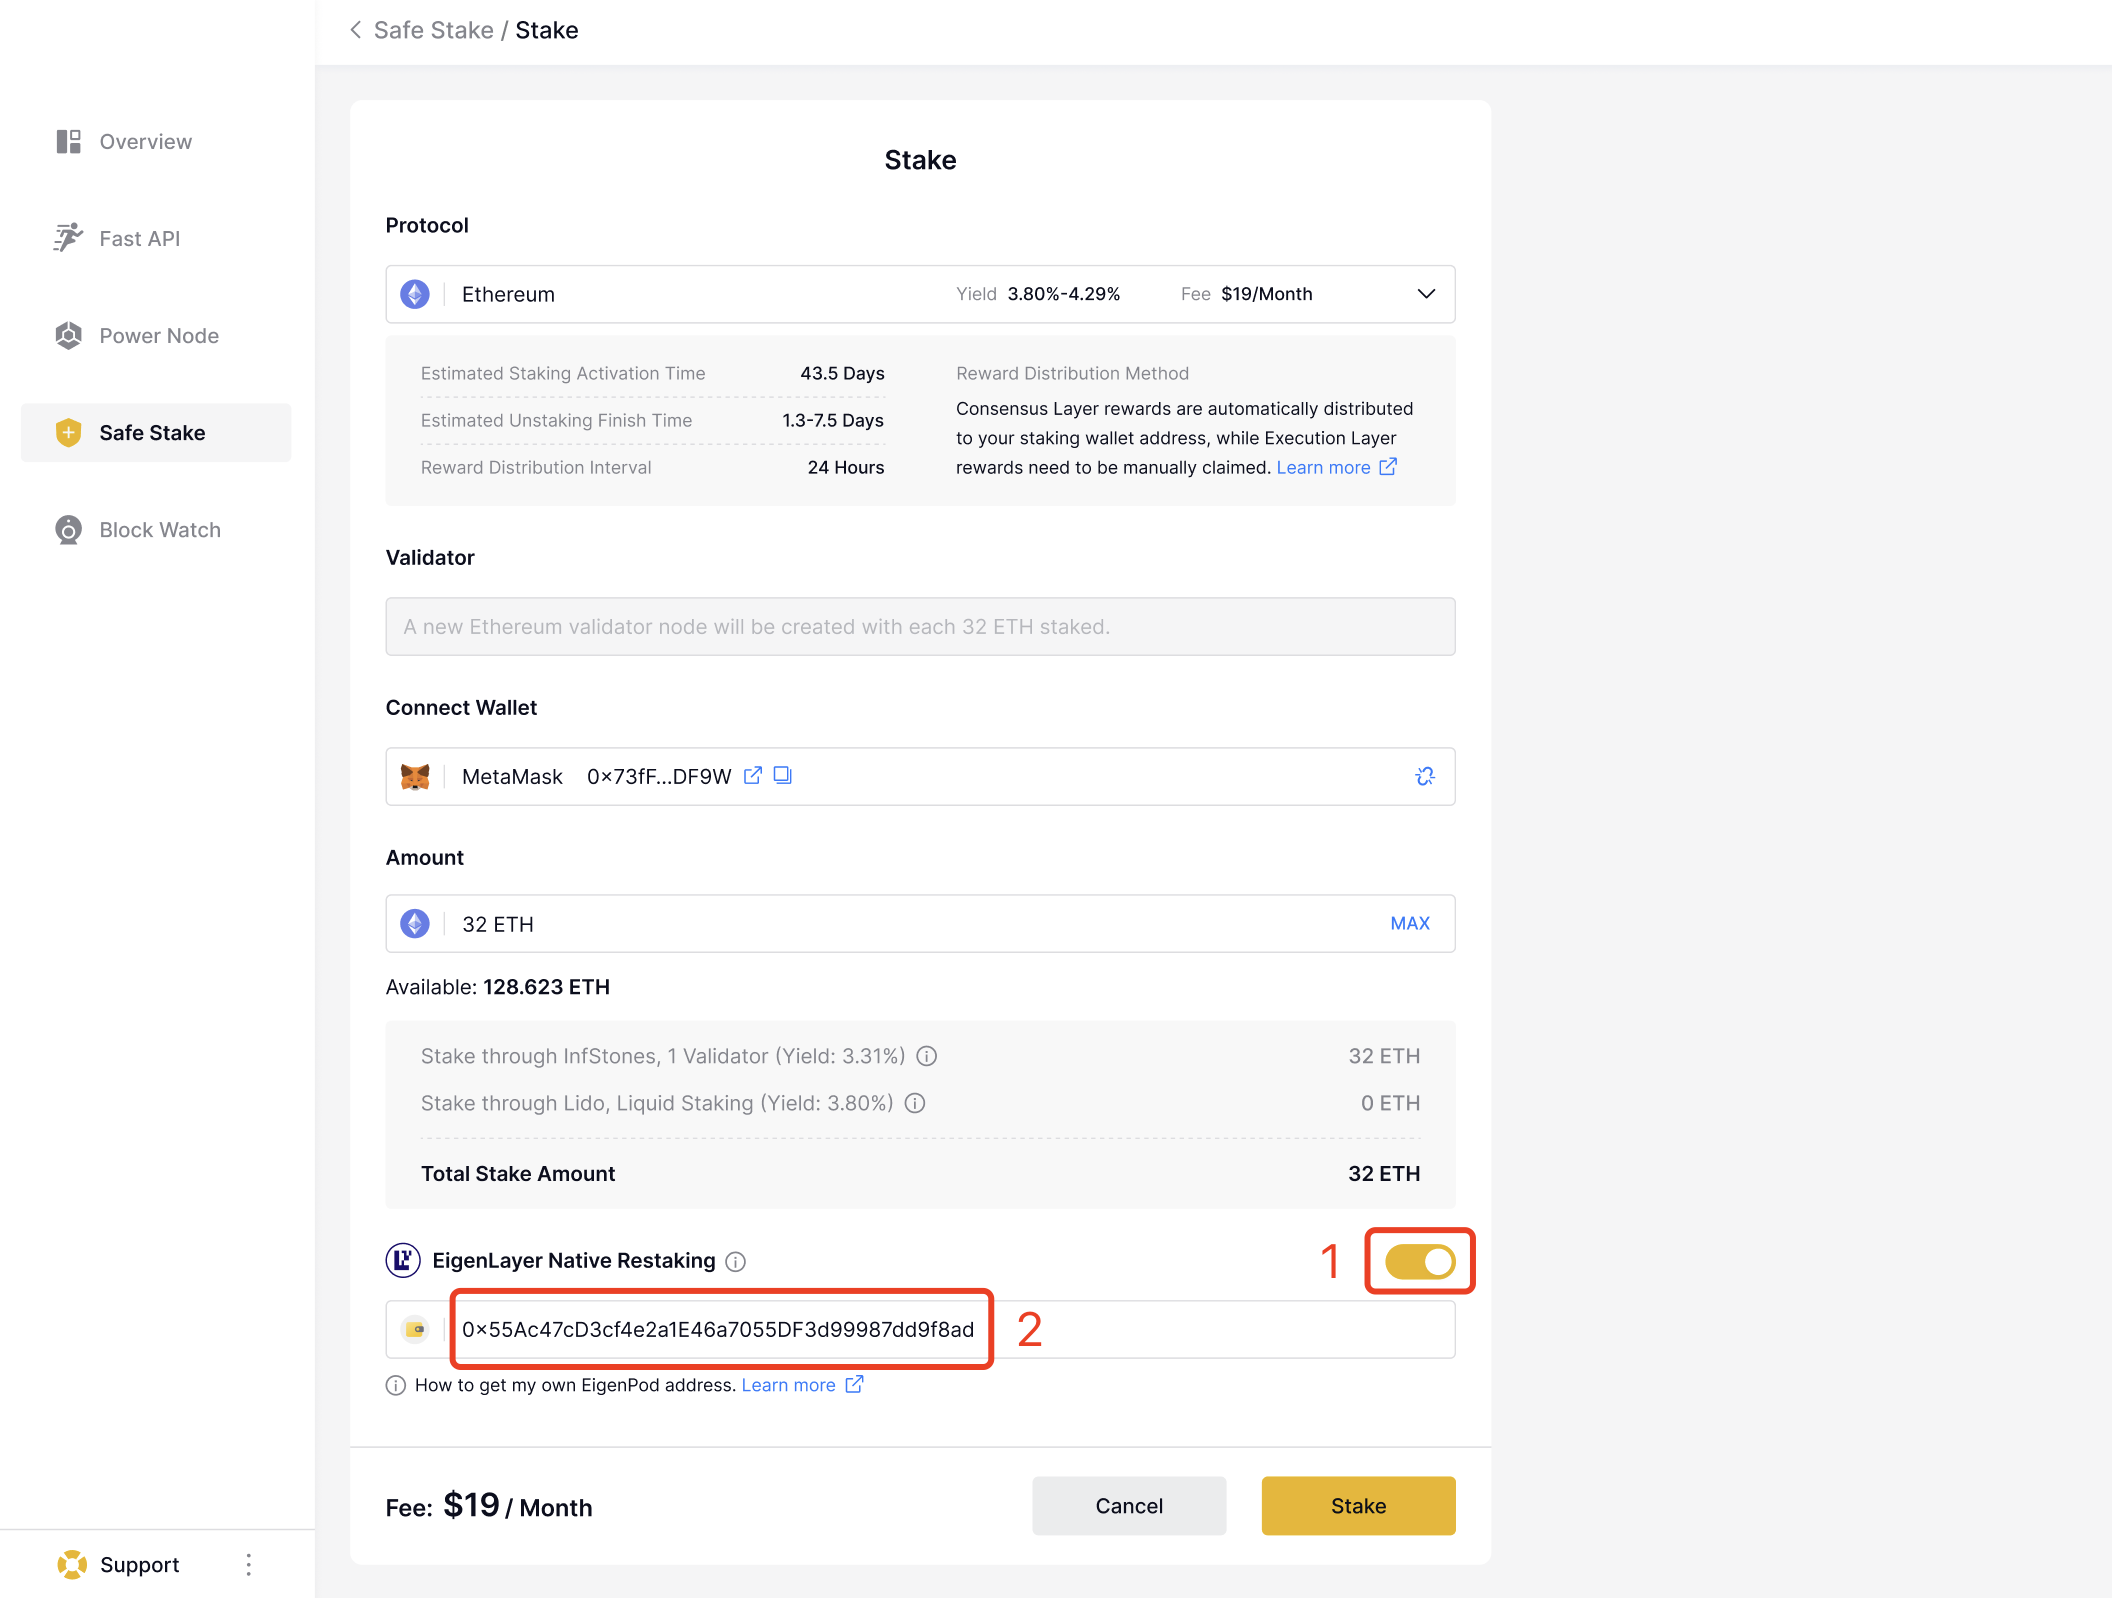
Finally, with all details confirmed, you can now click the “Stake” button to proceed to the payment gateway. After paying the monthly fee required by InfStones, your restaking process has been completed.
How to Claim Rewards
For an in-depth walkthrough on how to claim your rewards, feel free to explore our previously published blog.
Claim Your MEV Reward on InfStones
Step 1: View Claimable Reward Redeem Card
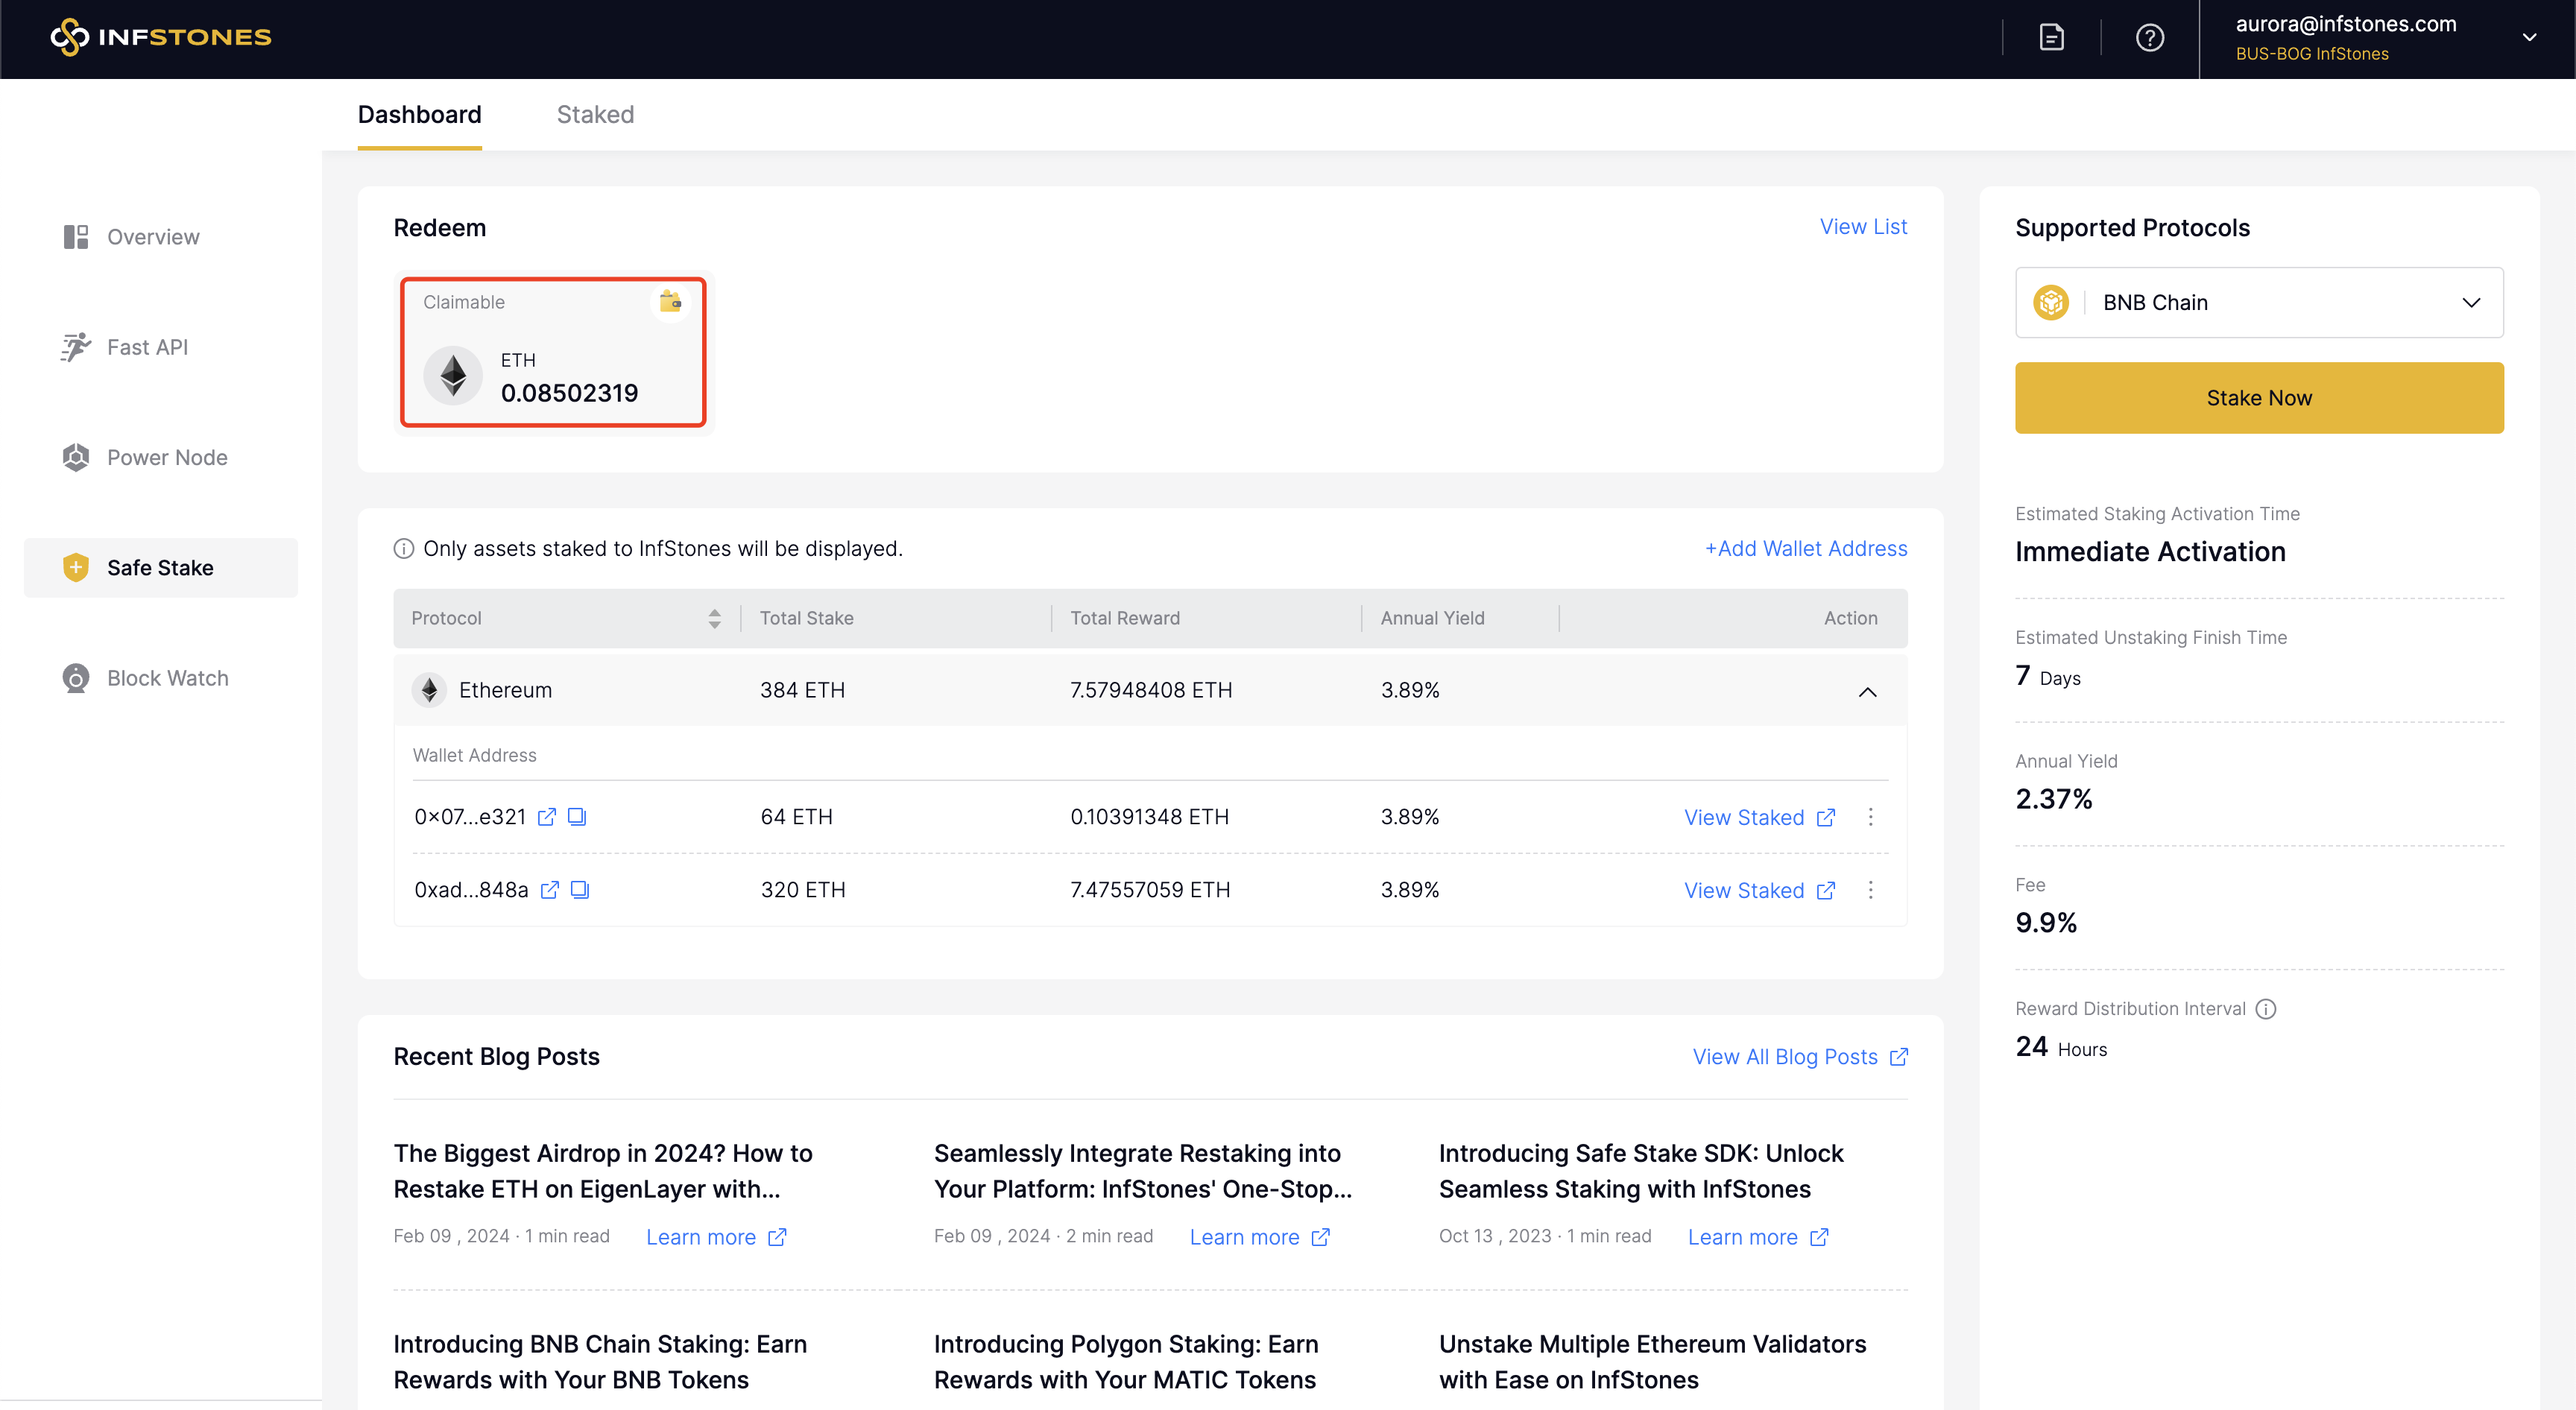
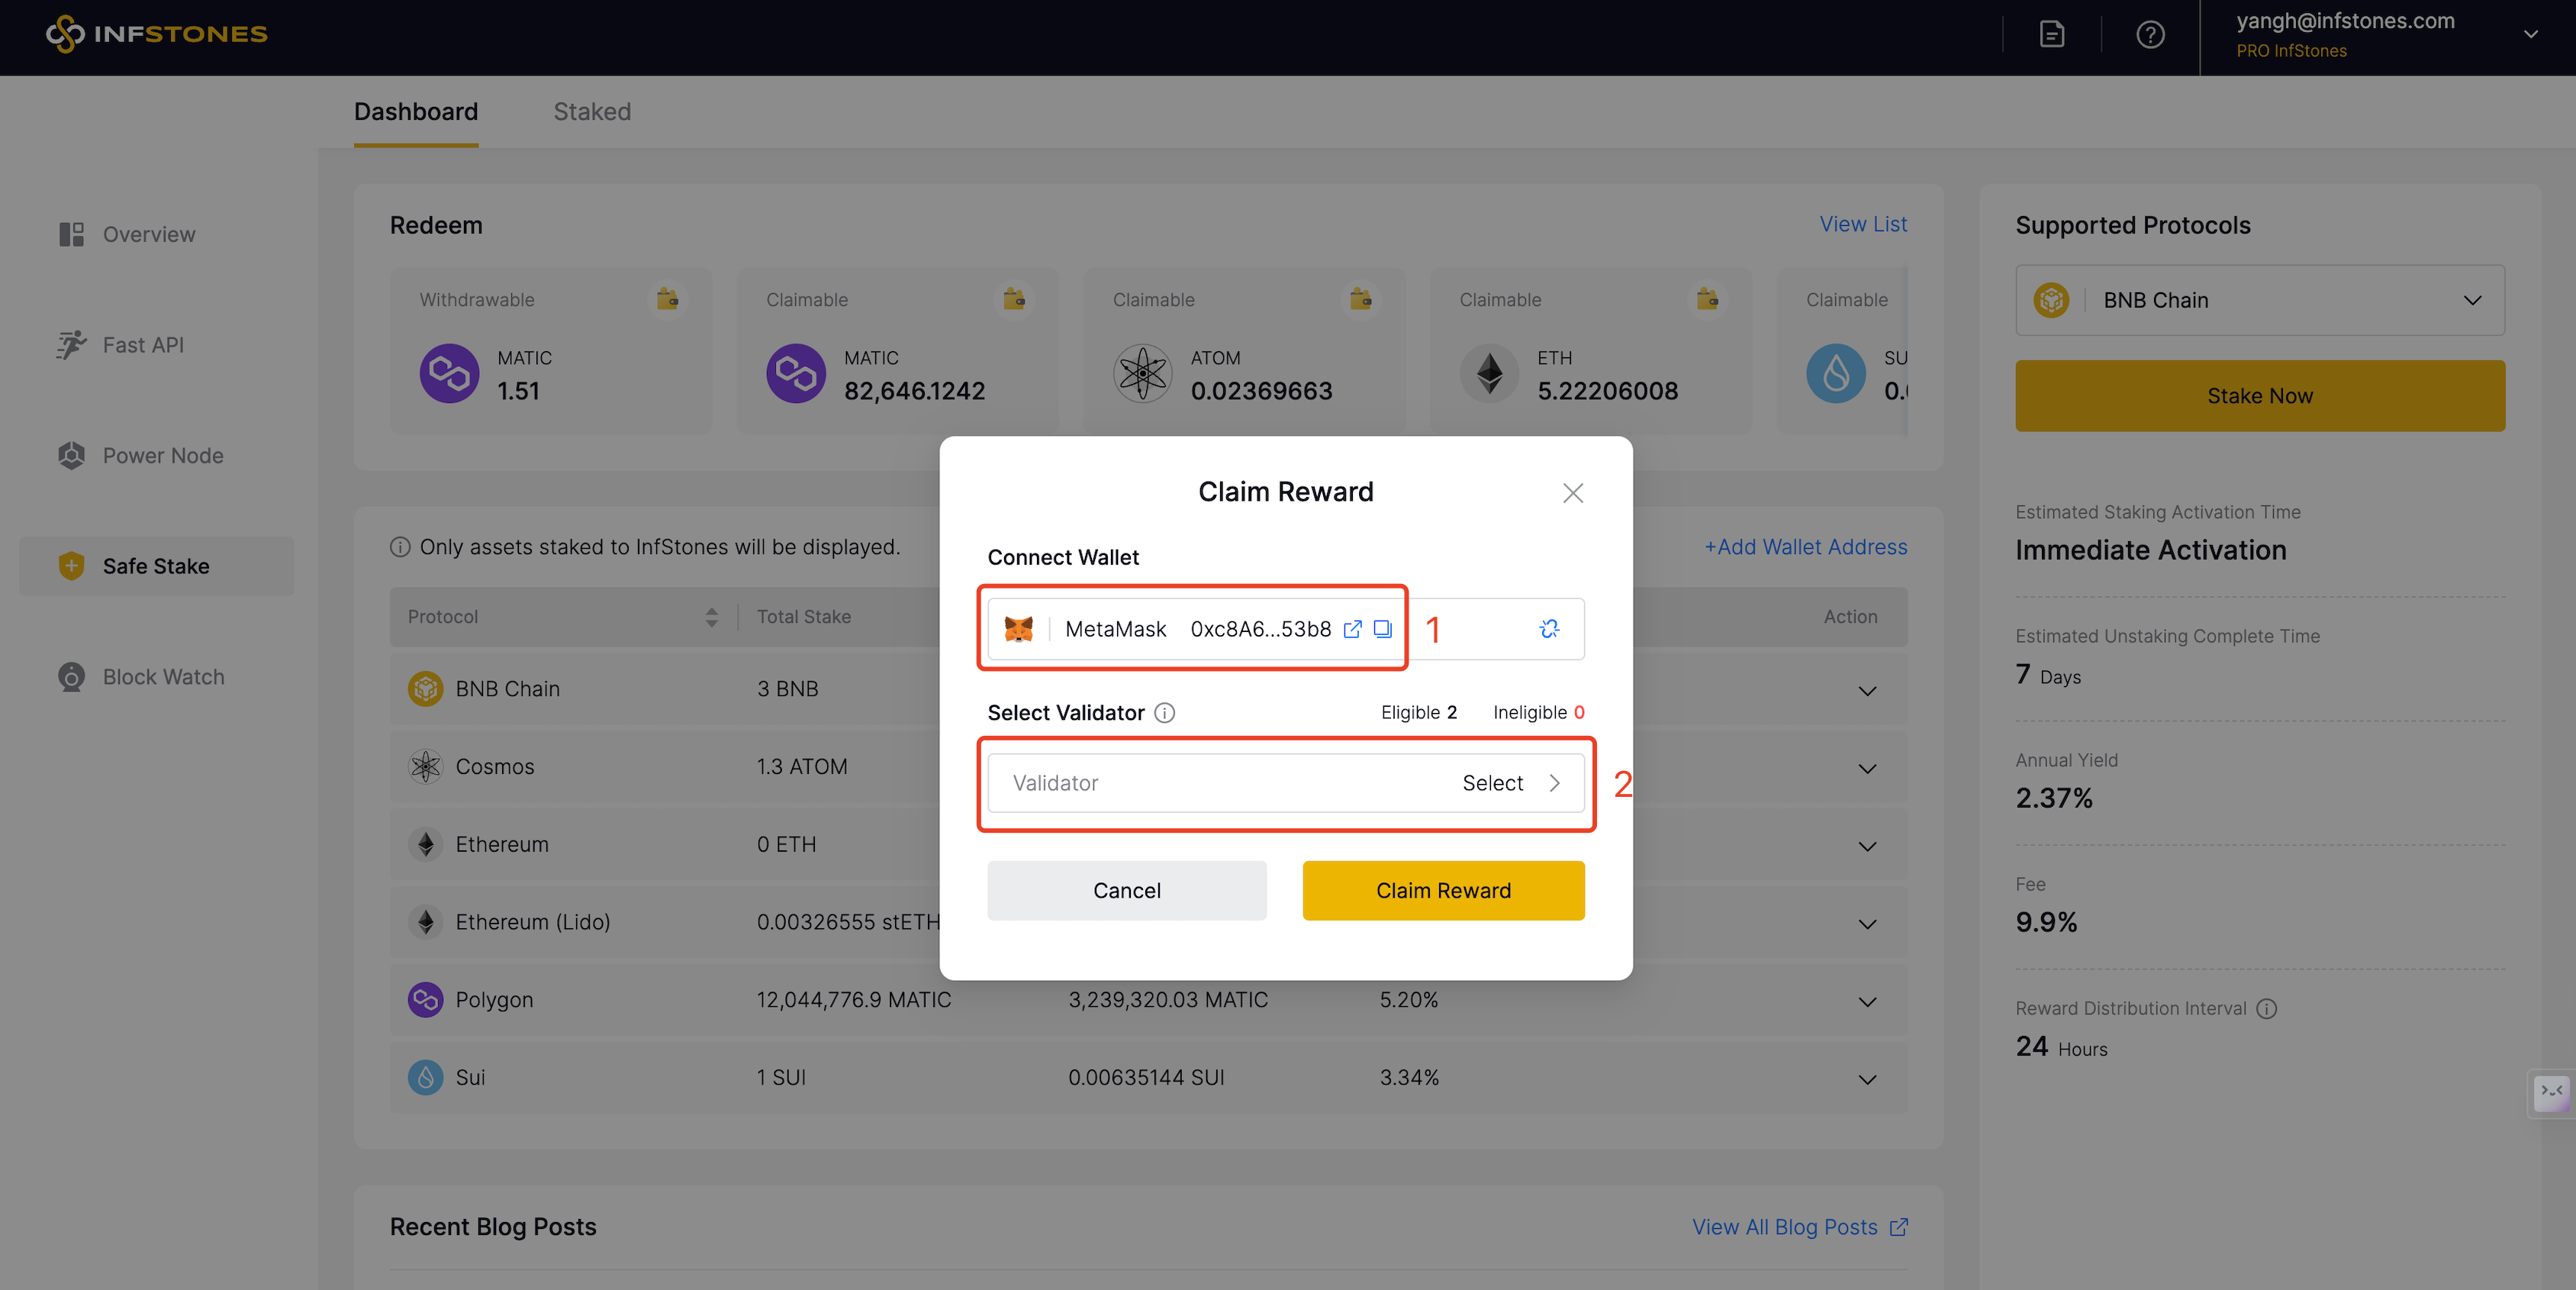
You can directly click on your “Redeem” card on InfStones’ Safe Stake dashboard, which will allow you to connect your wallet and select your validators.
Step 2: Select Validators
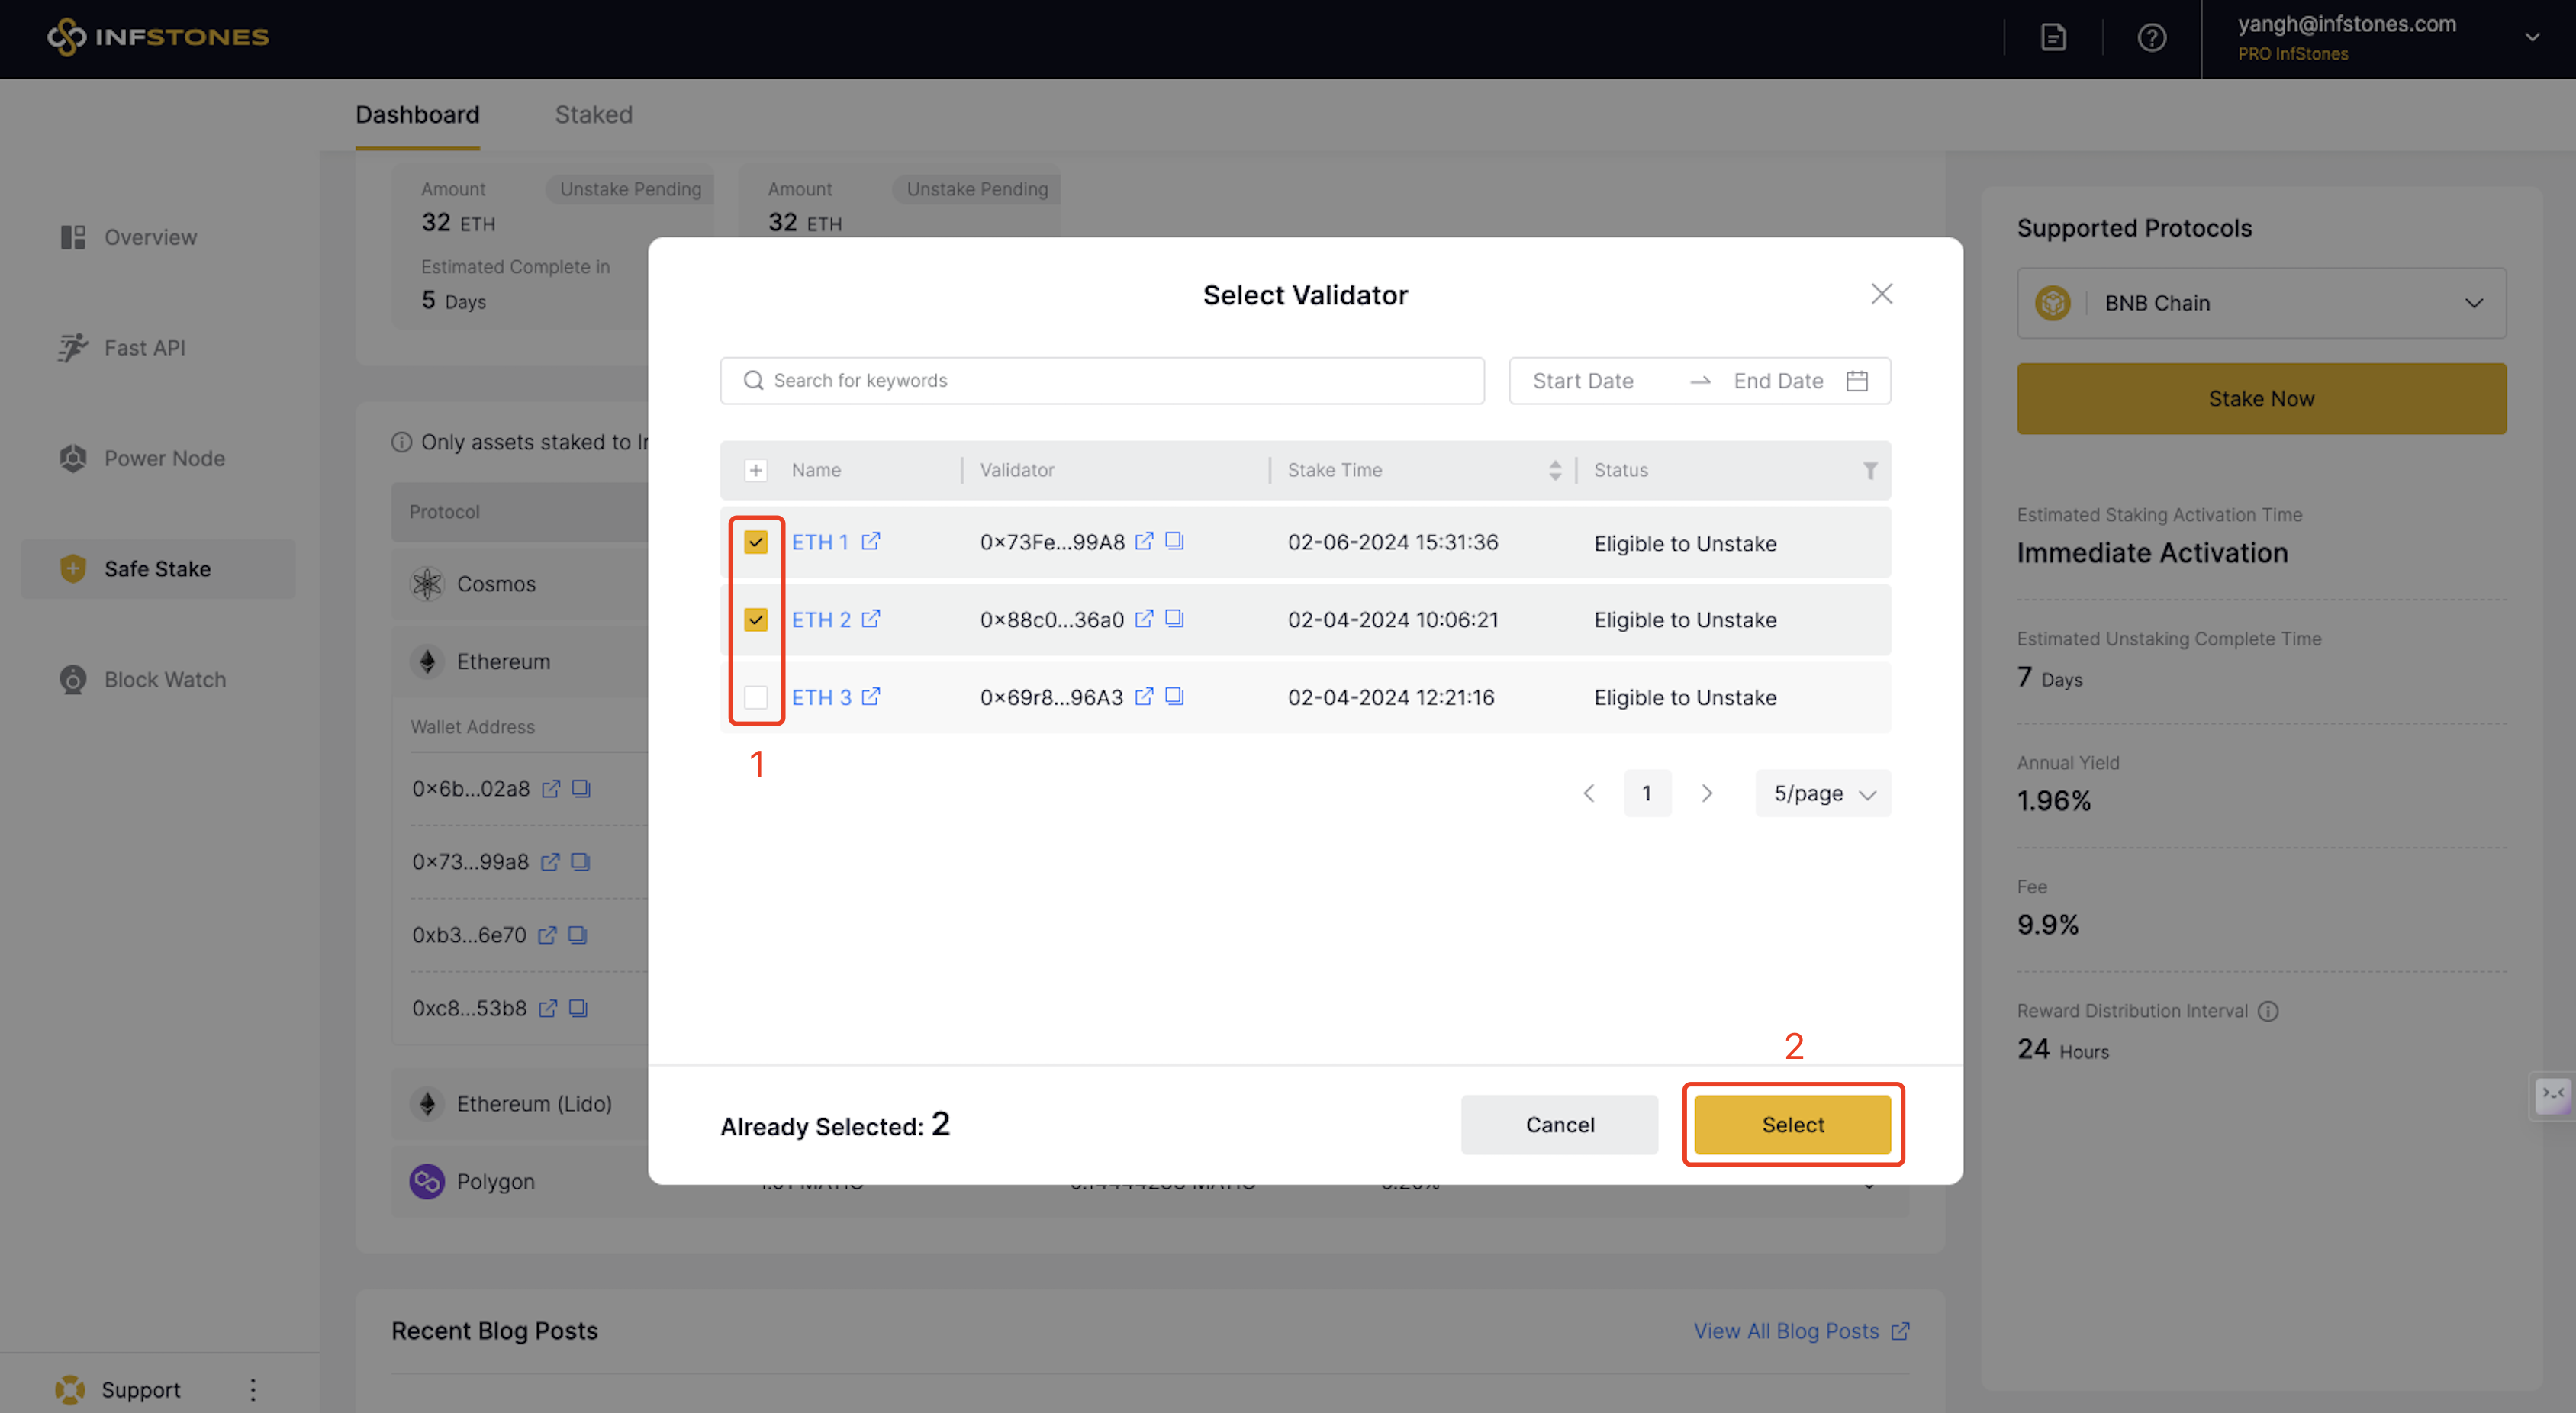
Connect your wallet and click on “Select”.
This process will allow you to select multiple validators at one time. Simply tick the small boxes located in front of your chosen validator’s name and click “Select”.
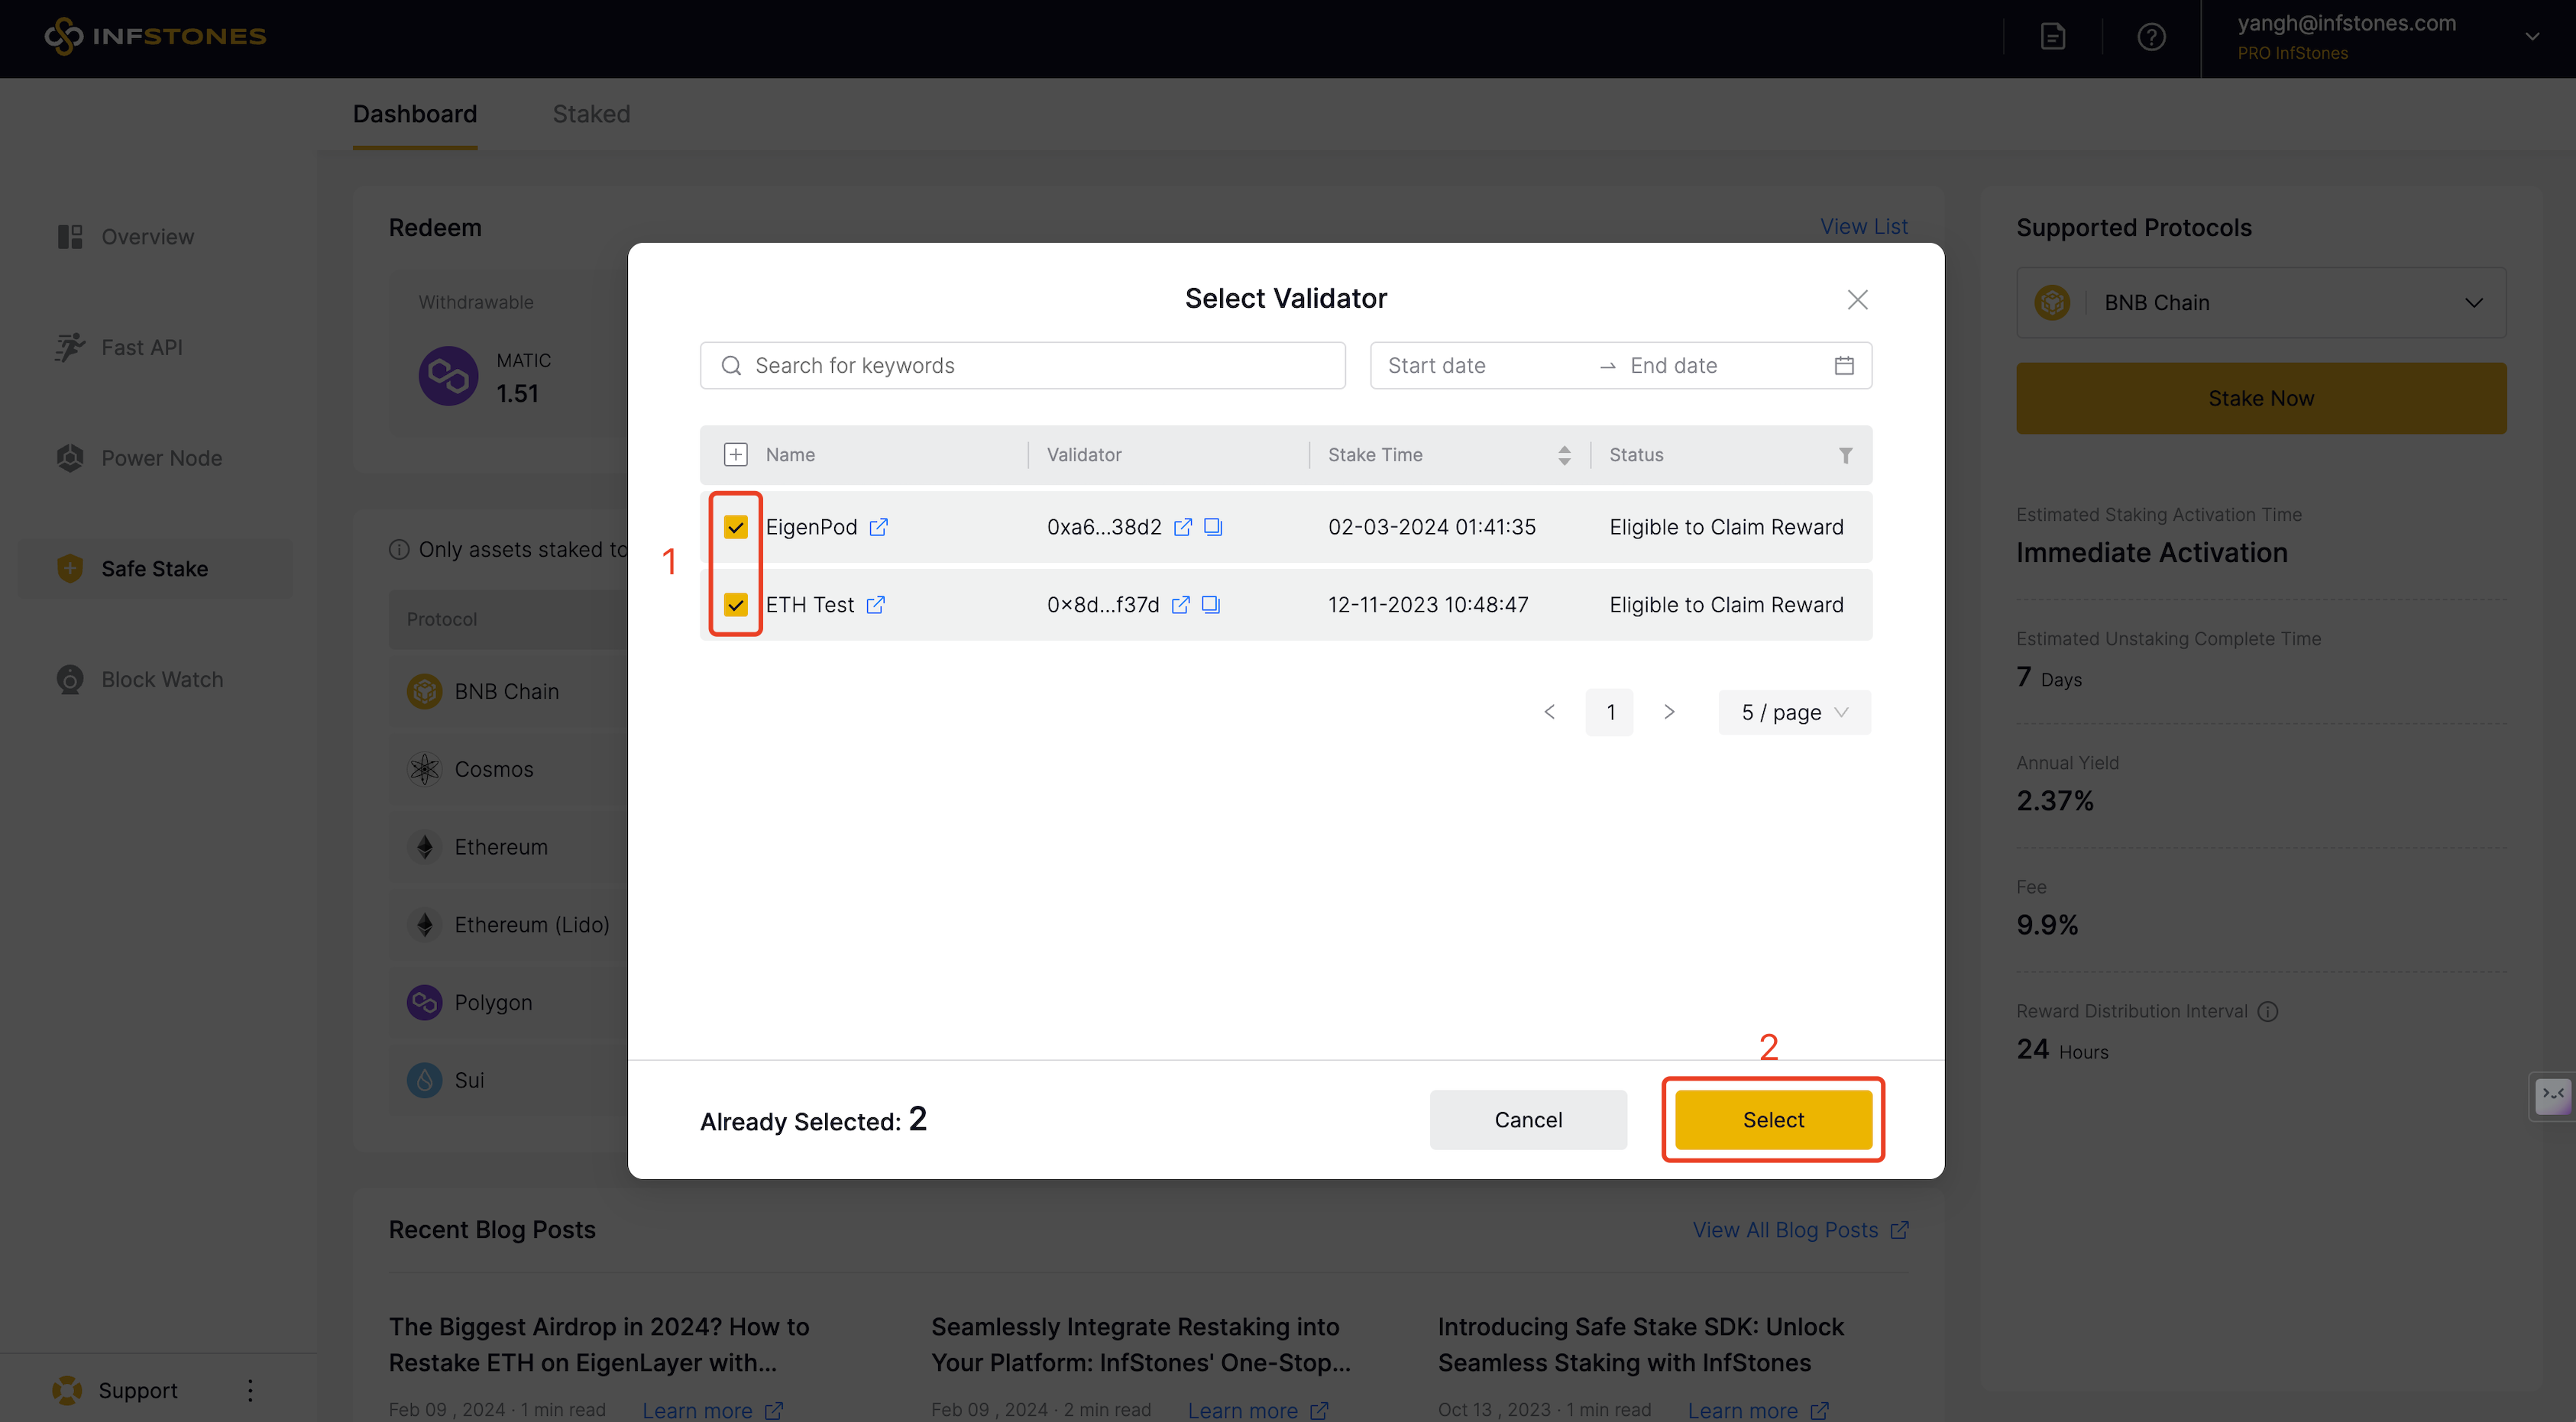
Step 3: Claim MEV Rewards
After pinpointing the validators with rewards available for a claim, simply click “Claim Reward” to effortlessly connect your restaking with your returns on the InfStones platform.

Claim Your Consensus Layer Reward on EigenLayer
Step 1: Check Your EigenPod Balance
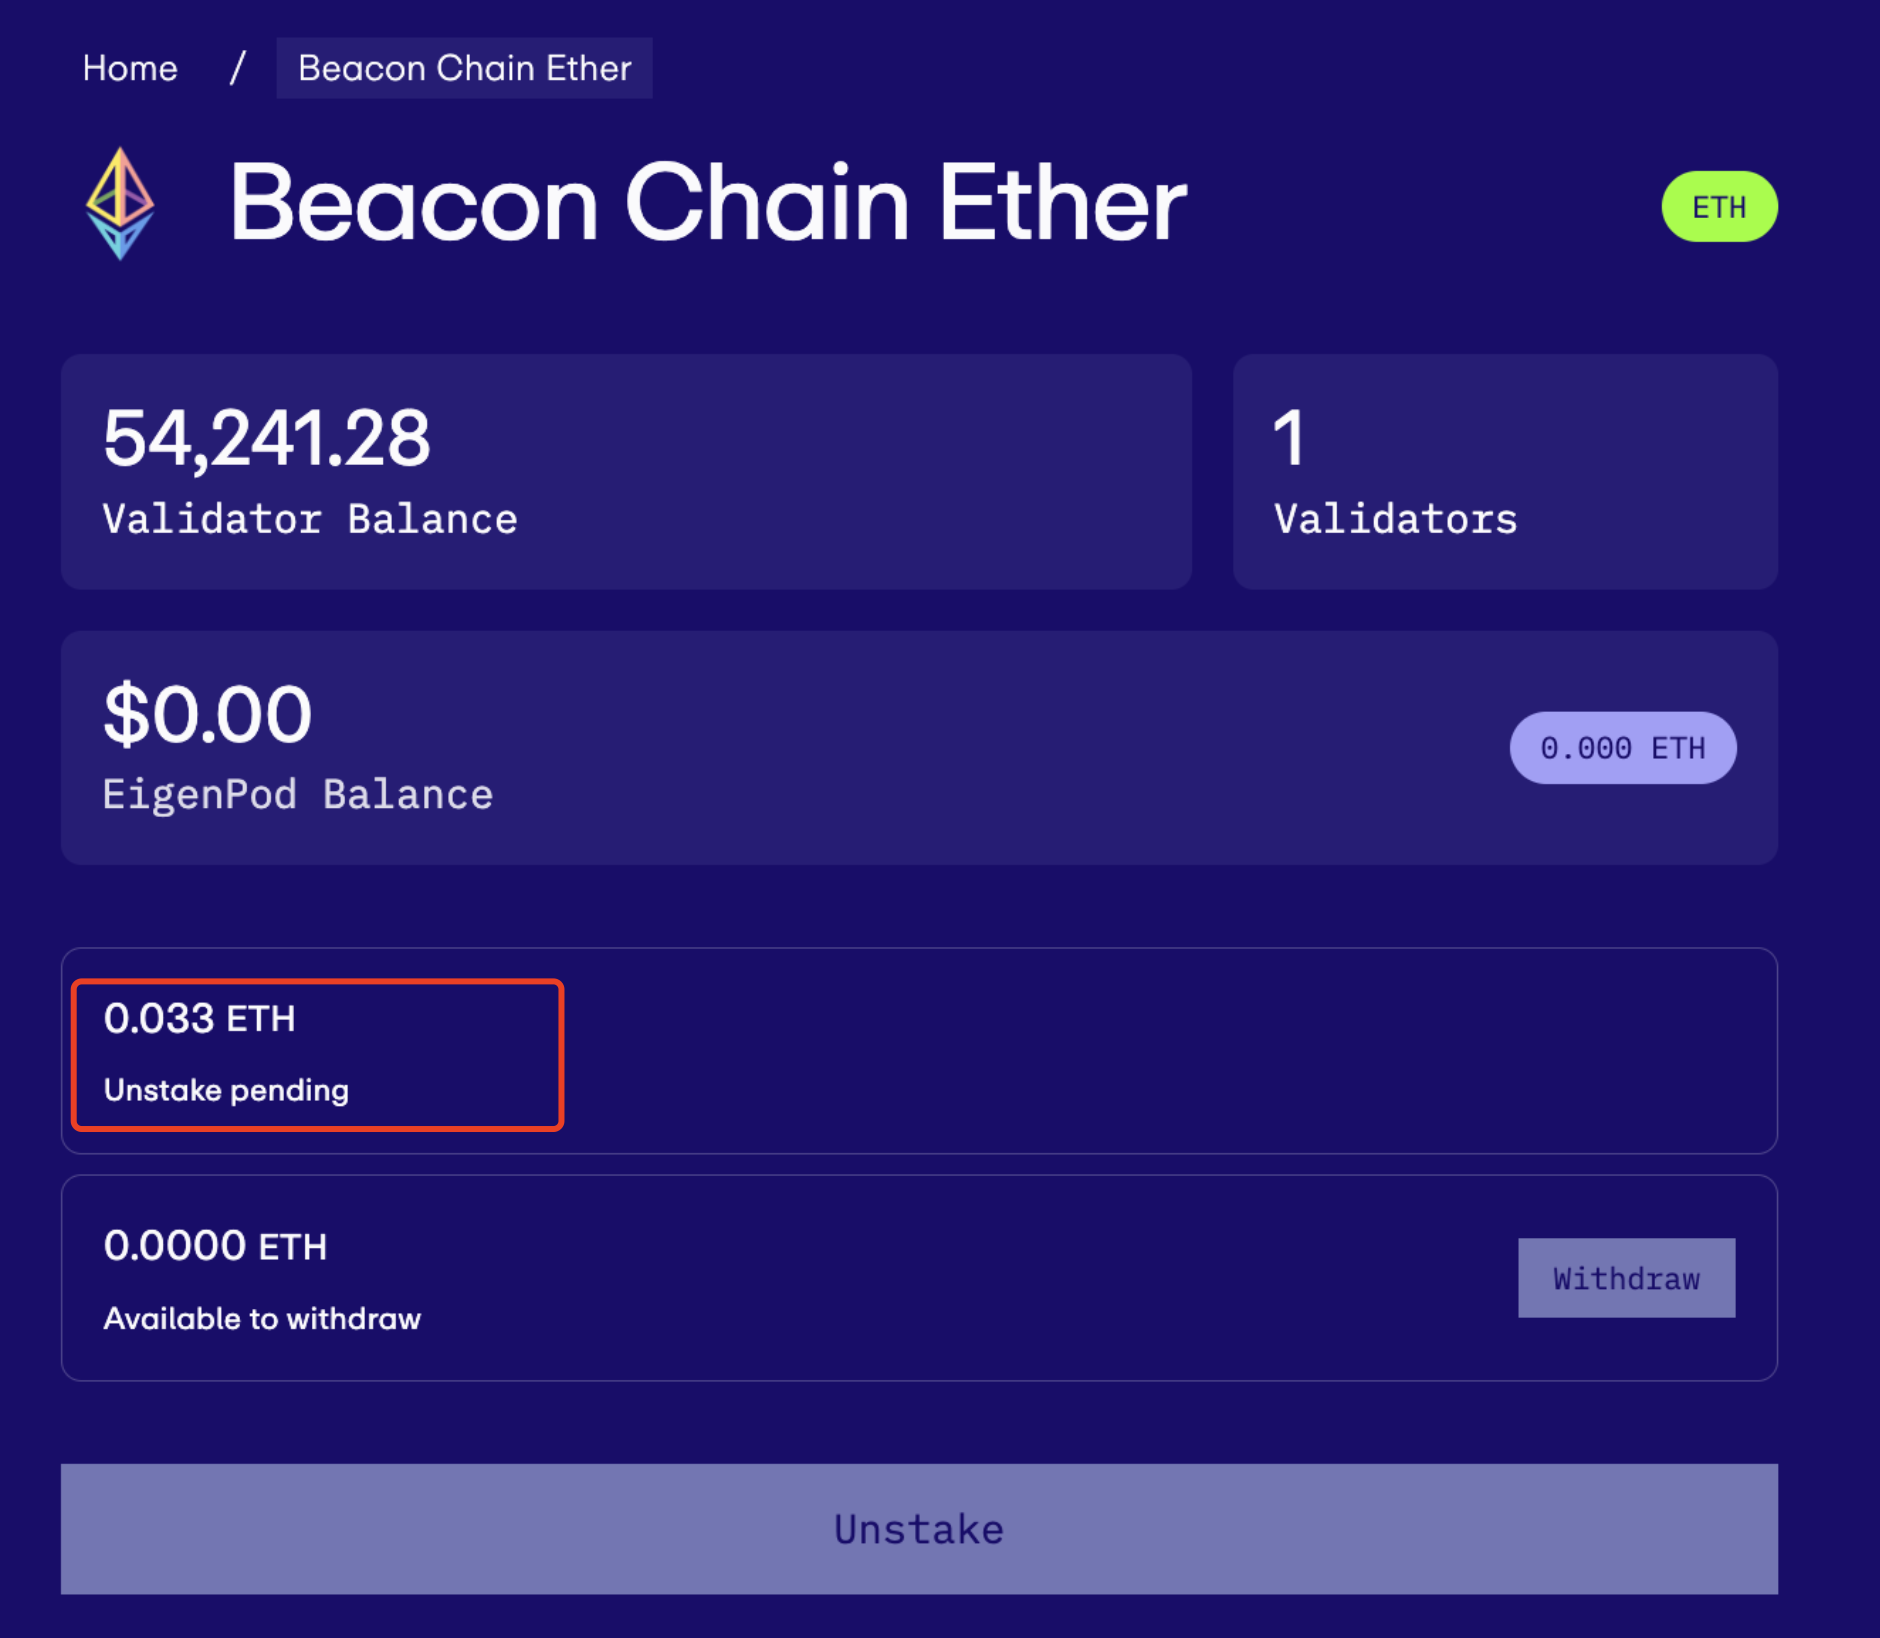
Within the EigenLayer platform, should you have any unclaimed rewards, they will be visible in your EigenPod Balance. To begin the claim process, click “Unstake” to trigger the 7-day escrow period.

Step 2: Wait in the Unstake Pending Queue
After the verification of the transaction, your EigenPod balance will shift to an “Unstake pending” status. It is crucial to understand that Ethereum's withdrawal framework allows for only one partial withdrawal per validator sweep cycle, generally occurring over a period of 4-5 days.
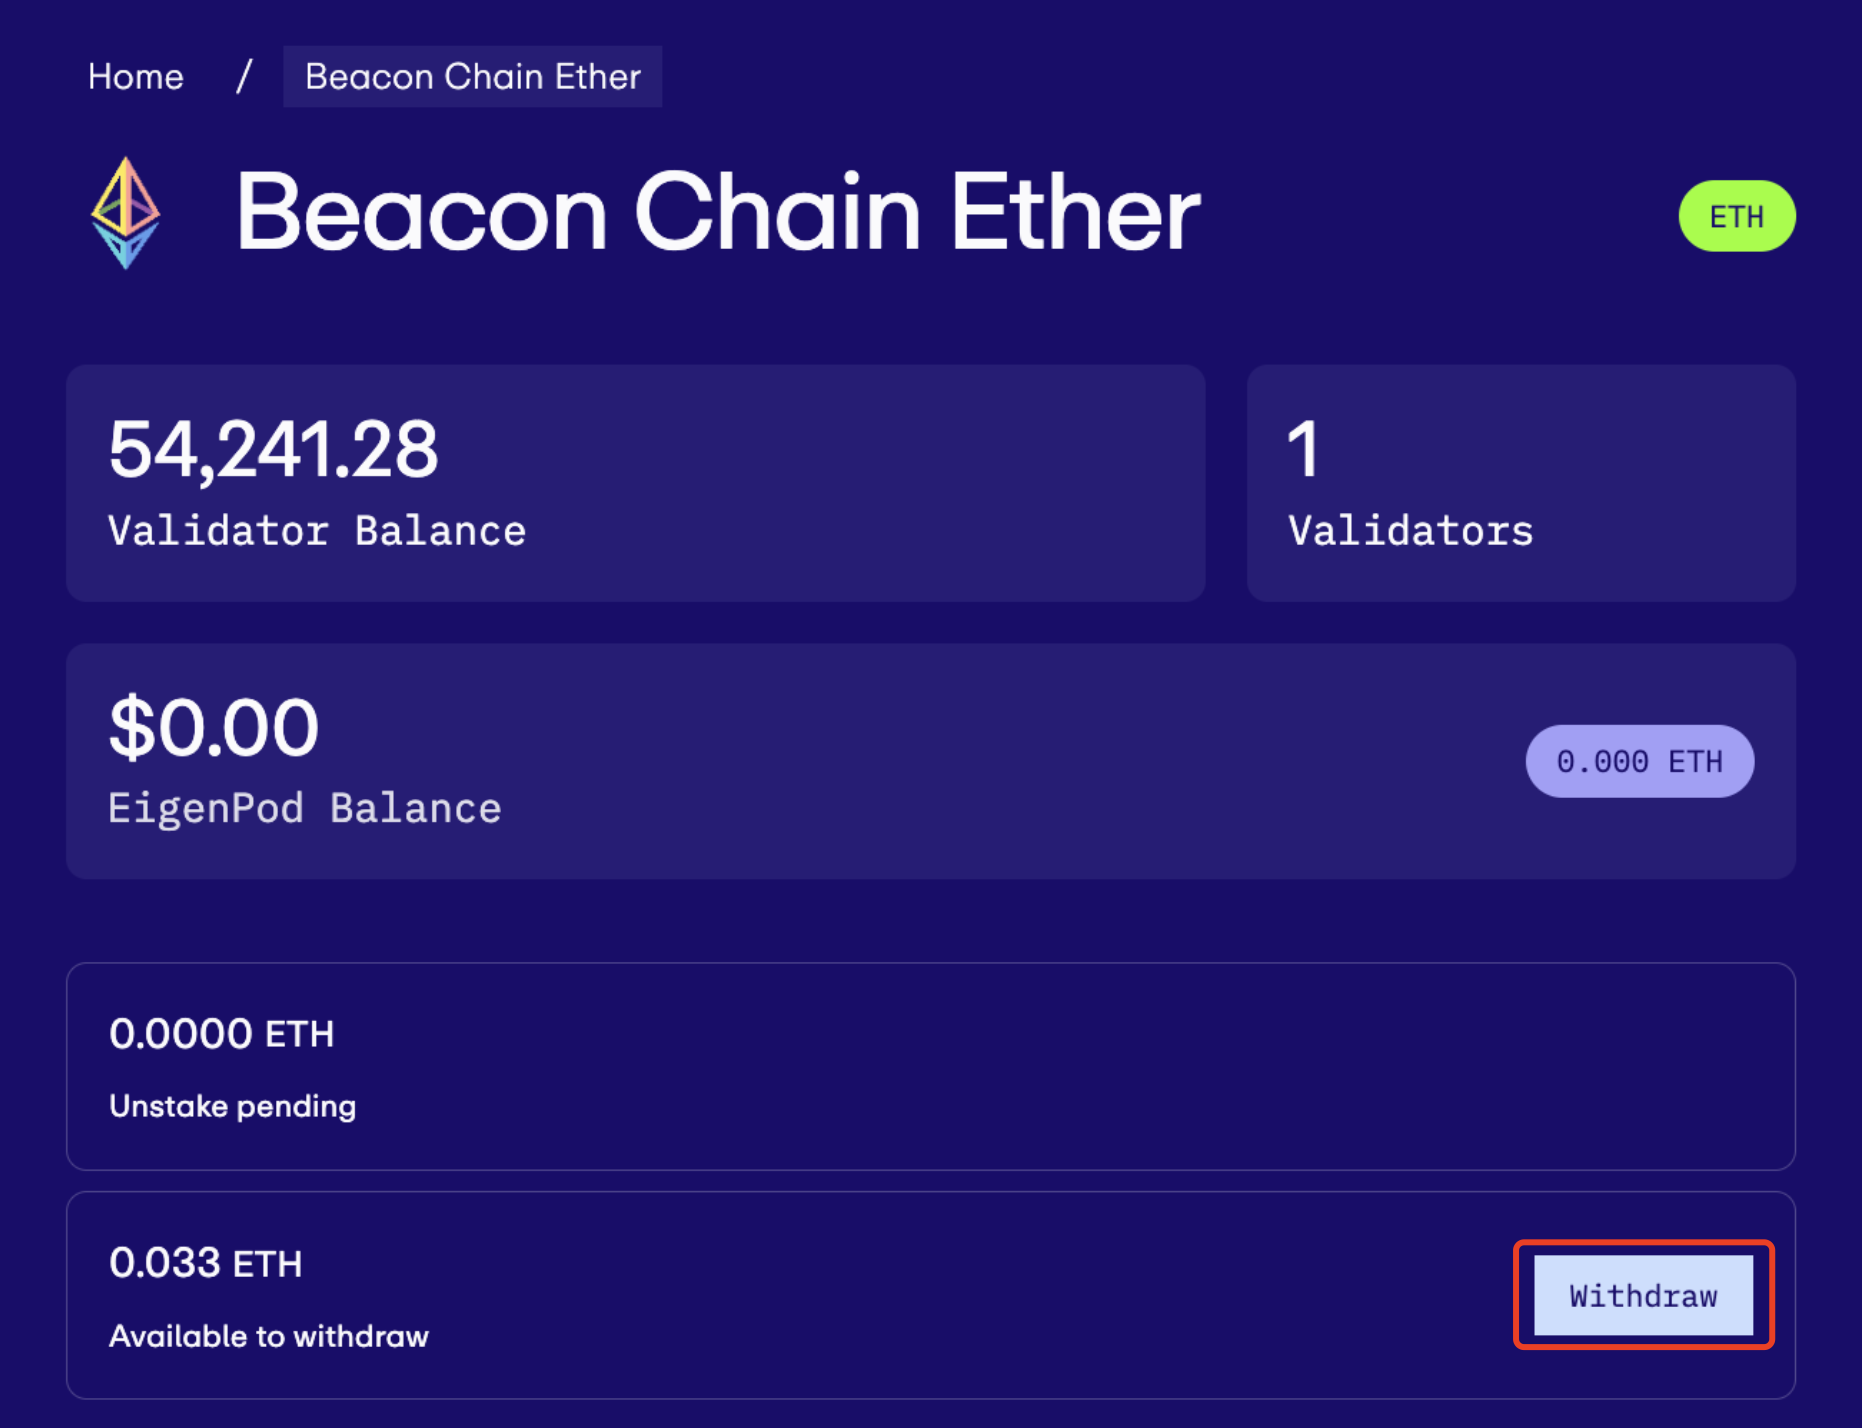
Step 3: Withdraw After 7-Day’s Waiting
Upon completion of the escrow period, you'll have the option to click “Withdraw” and move the funds to your wallet. Note that any funds unstaked from EigenLayer undergo a mandatory 7-day escrow period, introducing a waiting time before your assets become accessible.
Monitor Points on EigenLayer
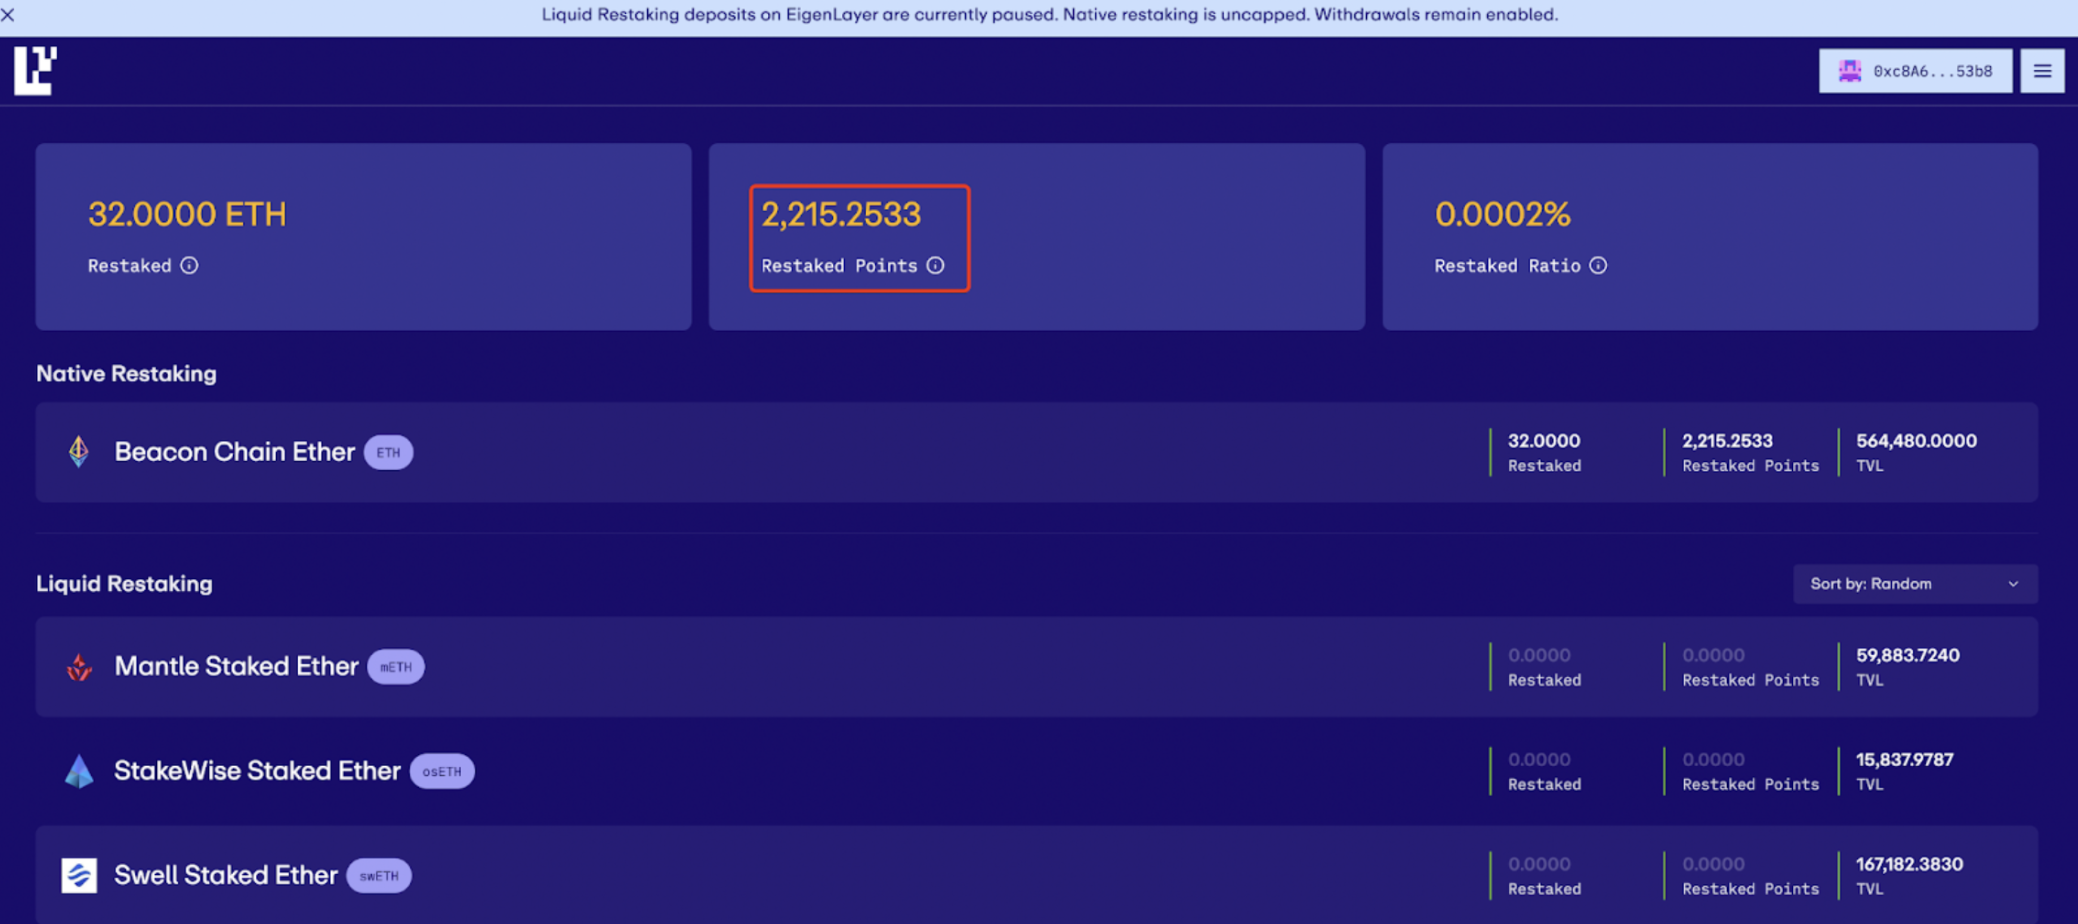
Step 1: Check EigenLayer Restaked Points
Given that restaked points are pivotal for potential EigenLayer airdrop opportunities, they form an essential aspect of your restaking strategy. You can monitor your Restaked Points at any moment by accessing your EigenPod dashboard within the EigenLayer app.
How to Unstake ETH
For an in-depth walkthrough on how to unstake your ETH, feel free to explore our previously published blog.
Unstake from InfStones
Step 1: Select Validators You Need to Unstake on InfStones
Initiating a withdrawal from InfStones to your EigenPod contract is straightforward on the InfStones platform. Start by heading to the Safe Stake section to enter your Dashboard. Confirm the wallet address from which you intend to unstake, then click on the three dots on the right to reveal the dropdown menu. From there, choose “Unstake” to start the withdrawal of your staked assets.

Once your wallet is connected, the following page will showcase all the validators associated with your address. To proceed with unstaking, just check the small boxes next to the validators you wish to unstake from, and then click “Select”.
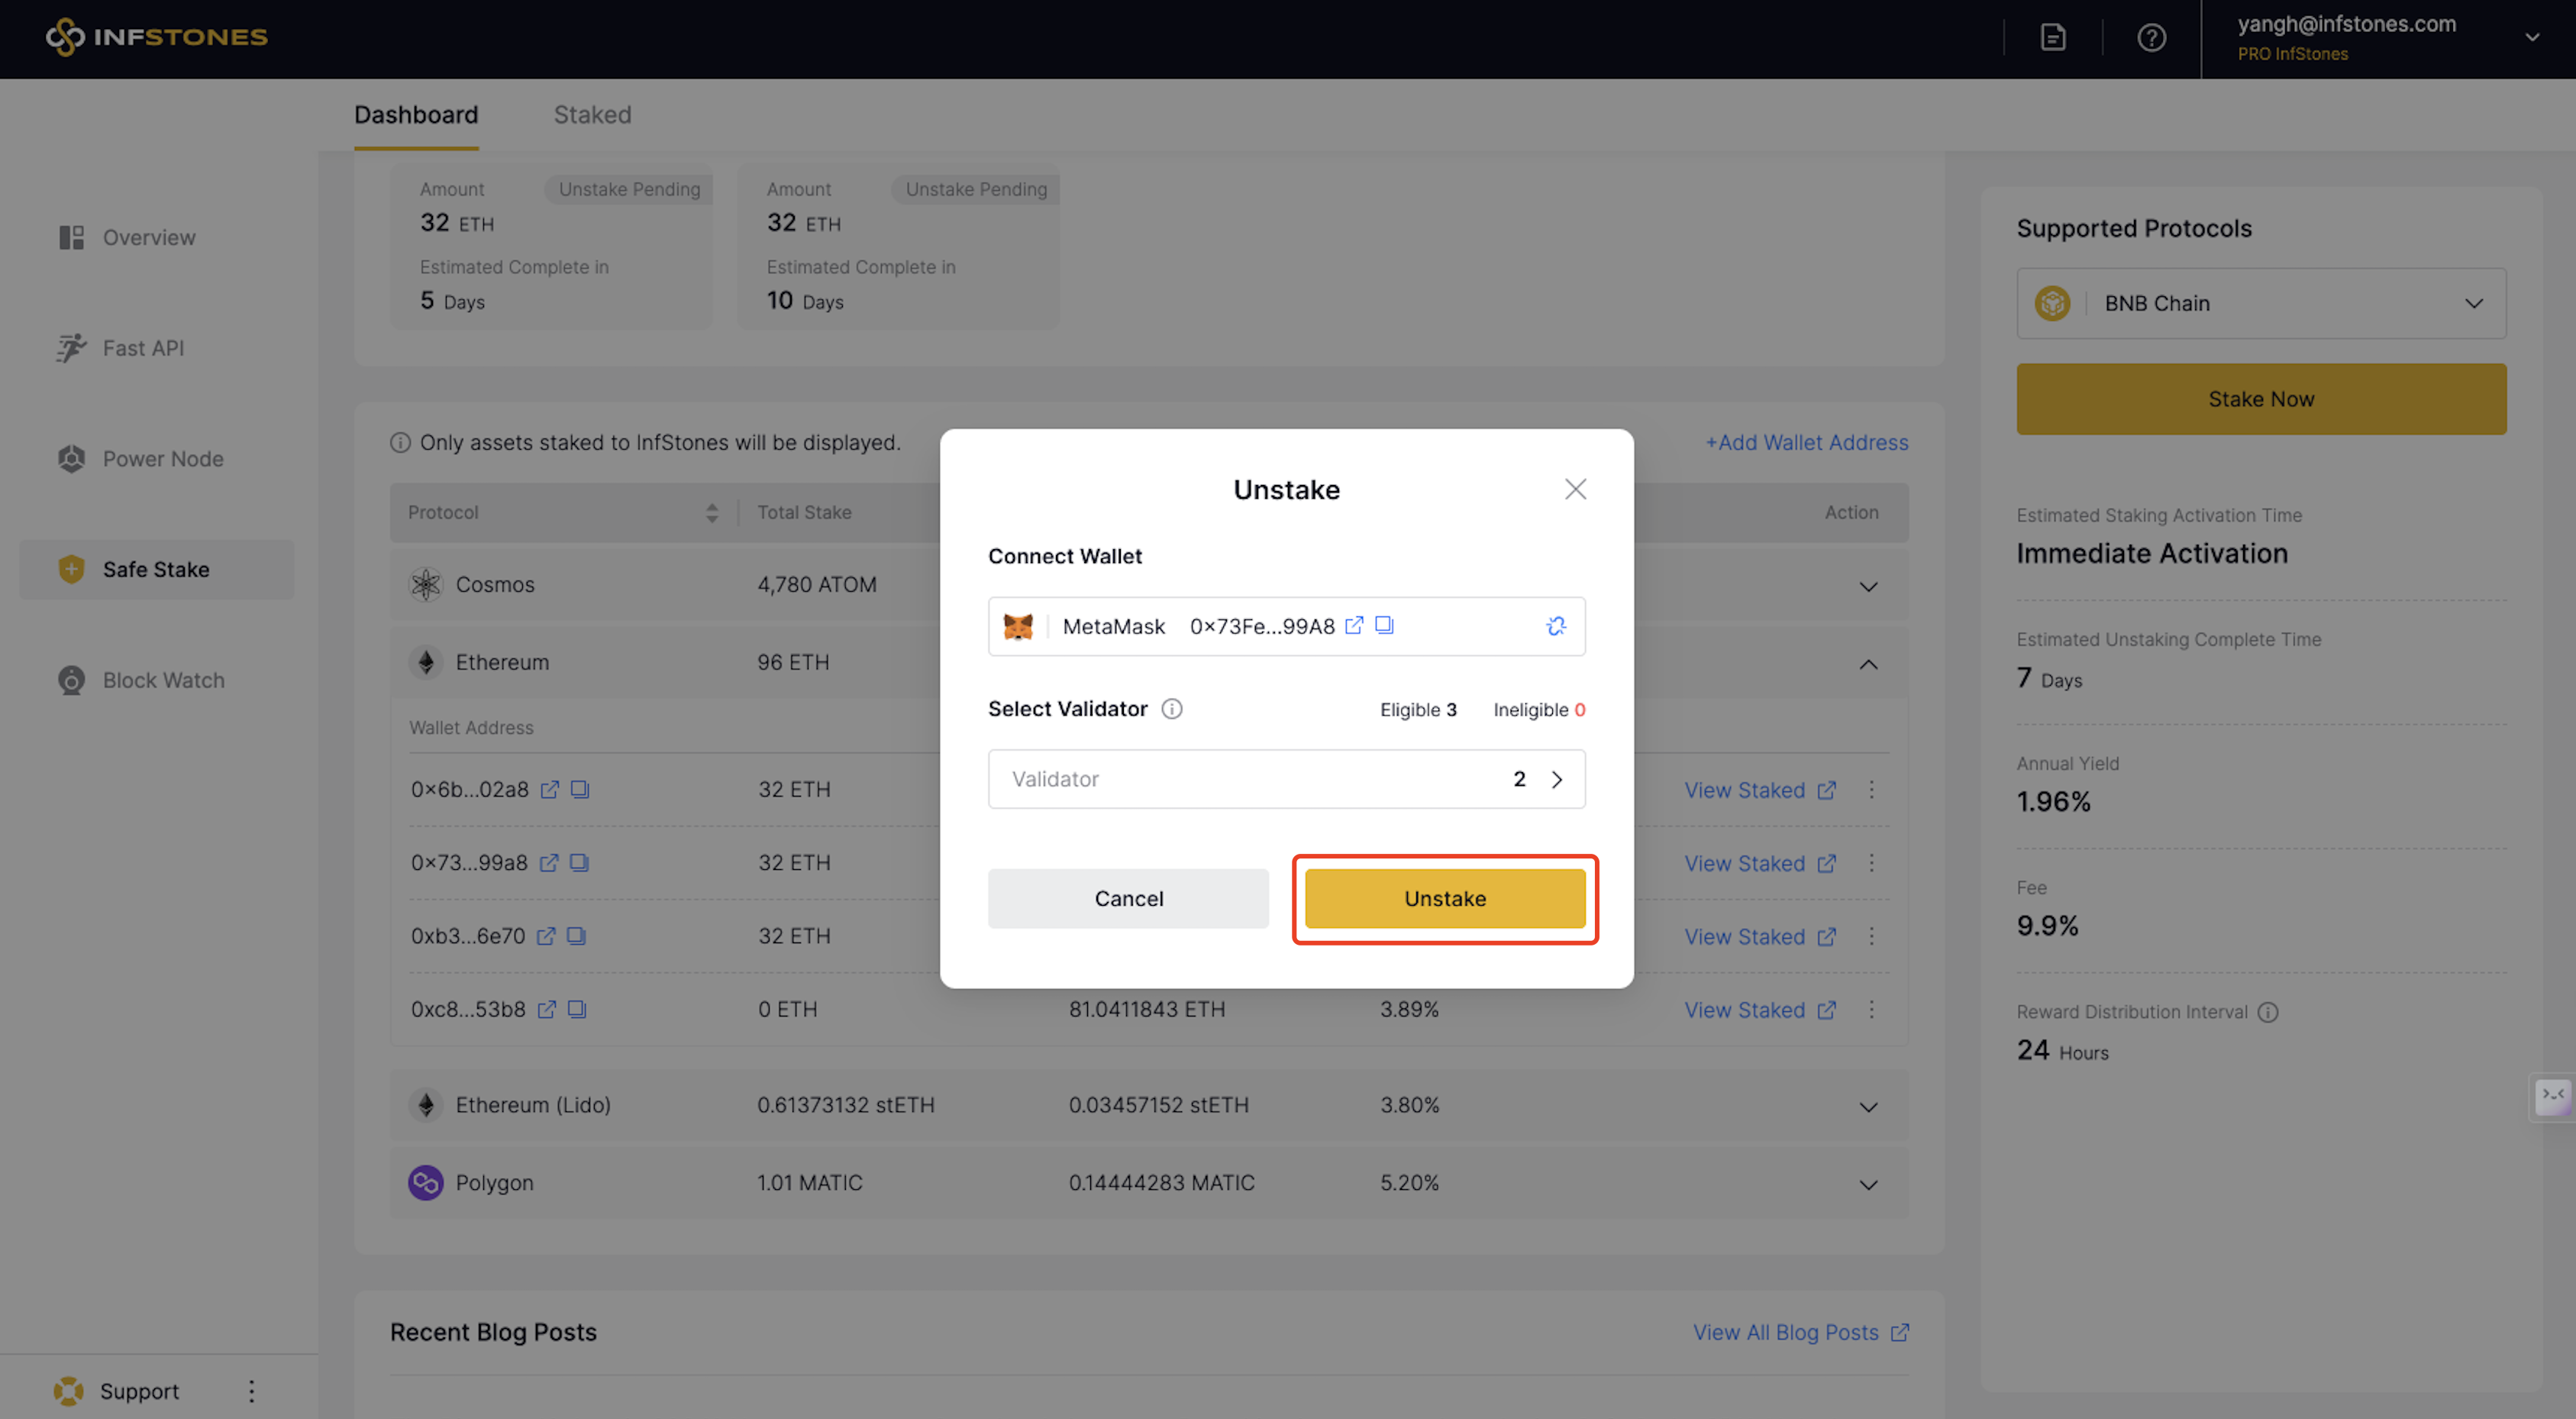
Step 2: Unstake on InfStones
Upon selecting the validator you aim to unstake from, you'll encounter the “Unstake” option. Please be aware that when you withdraw from the Ethereum network with InfStones, your staked ETH balance will be credited to your EigenPod address, which you can view in the EigenLayer app. This process may span several days due to the necessity of a complete exit from the validator queue.
Withdraw from EigenLayer
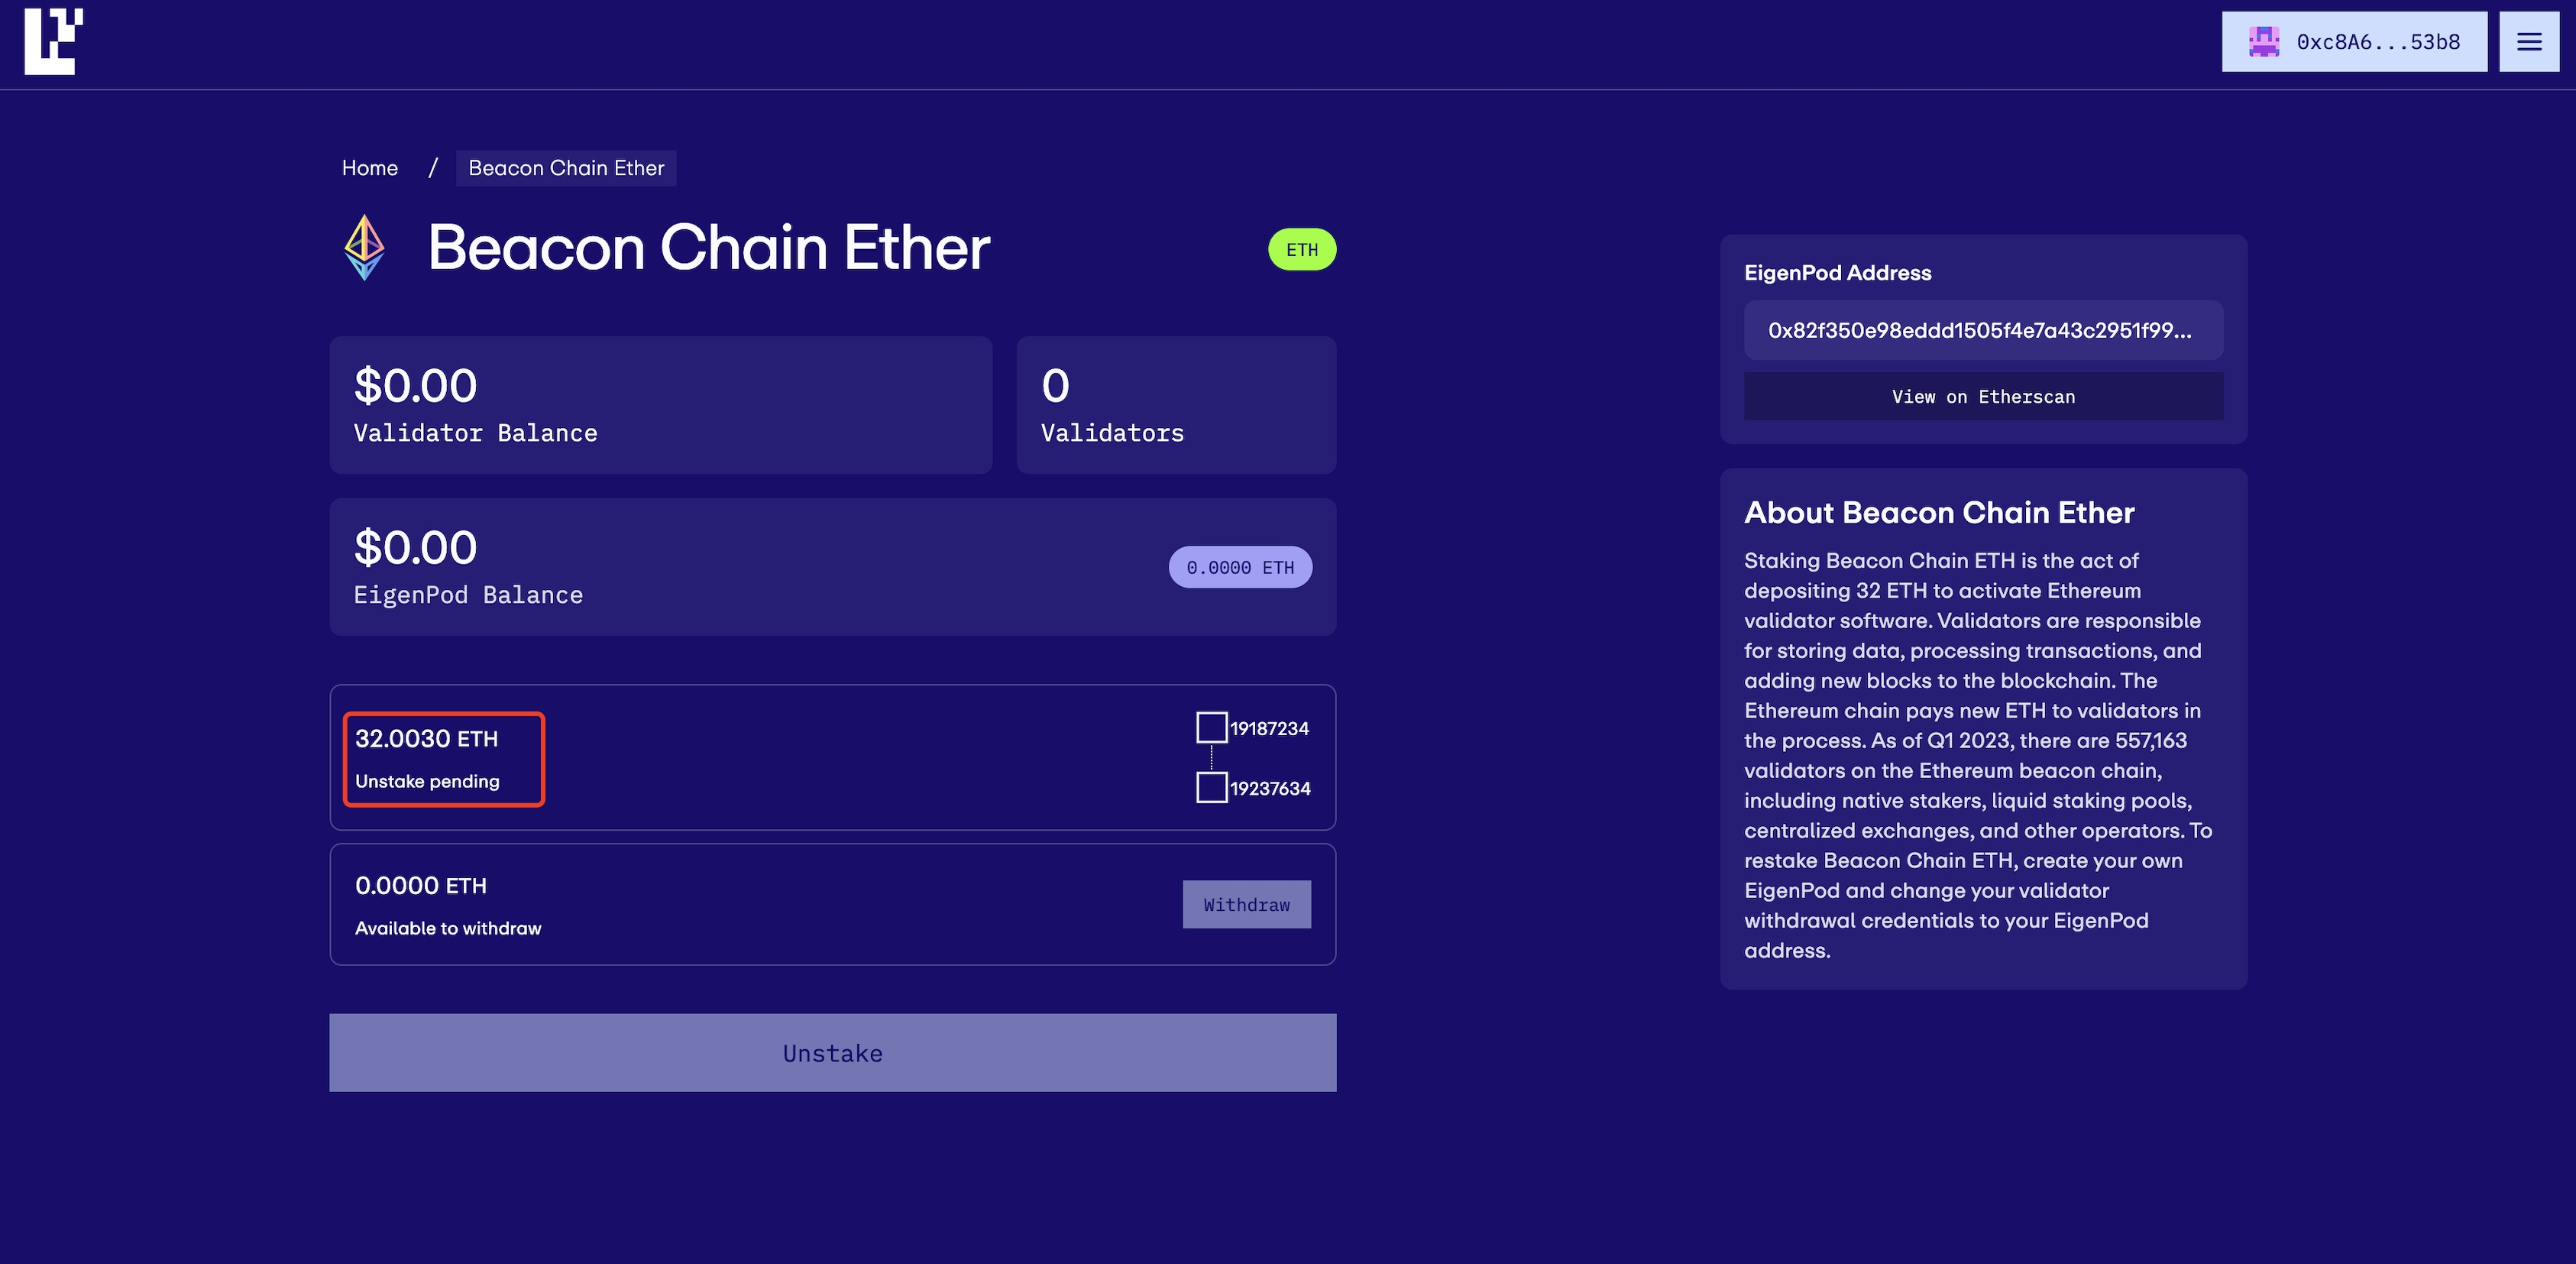
Step 1: Check EigenPod Balance and Unstake
Access your EigenLayer Dashboard here. Following the successful withdrawal of the validator from Ethereum via InfStones, your staked ETH will be displayed as EigenPod Balance within the EigenLayer platform. Now you can click “Unstake” to start the 7-day escrow period.

Once the transaction is confirmed, your EigenPod balance will update to reflect a status of “Unstake pending”. Please remember that any funds unstaked from EigenLayer are locked in a 7-day escrow period, during which you cannot access your assets.
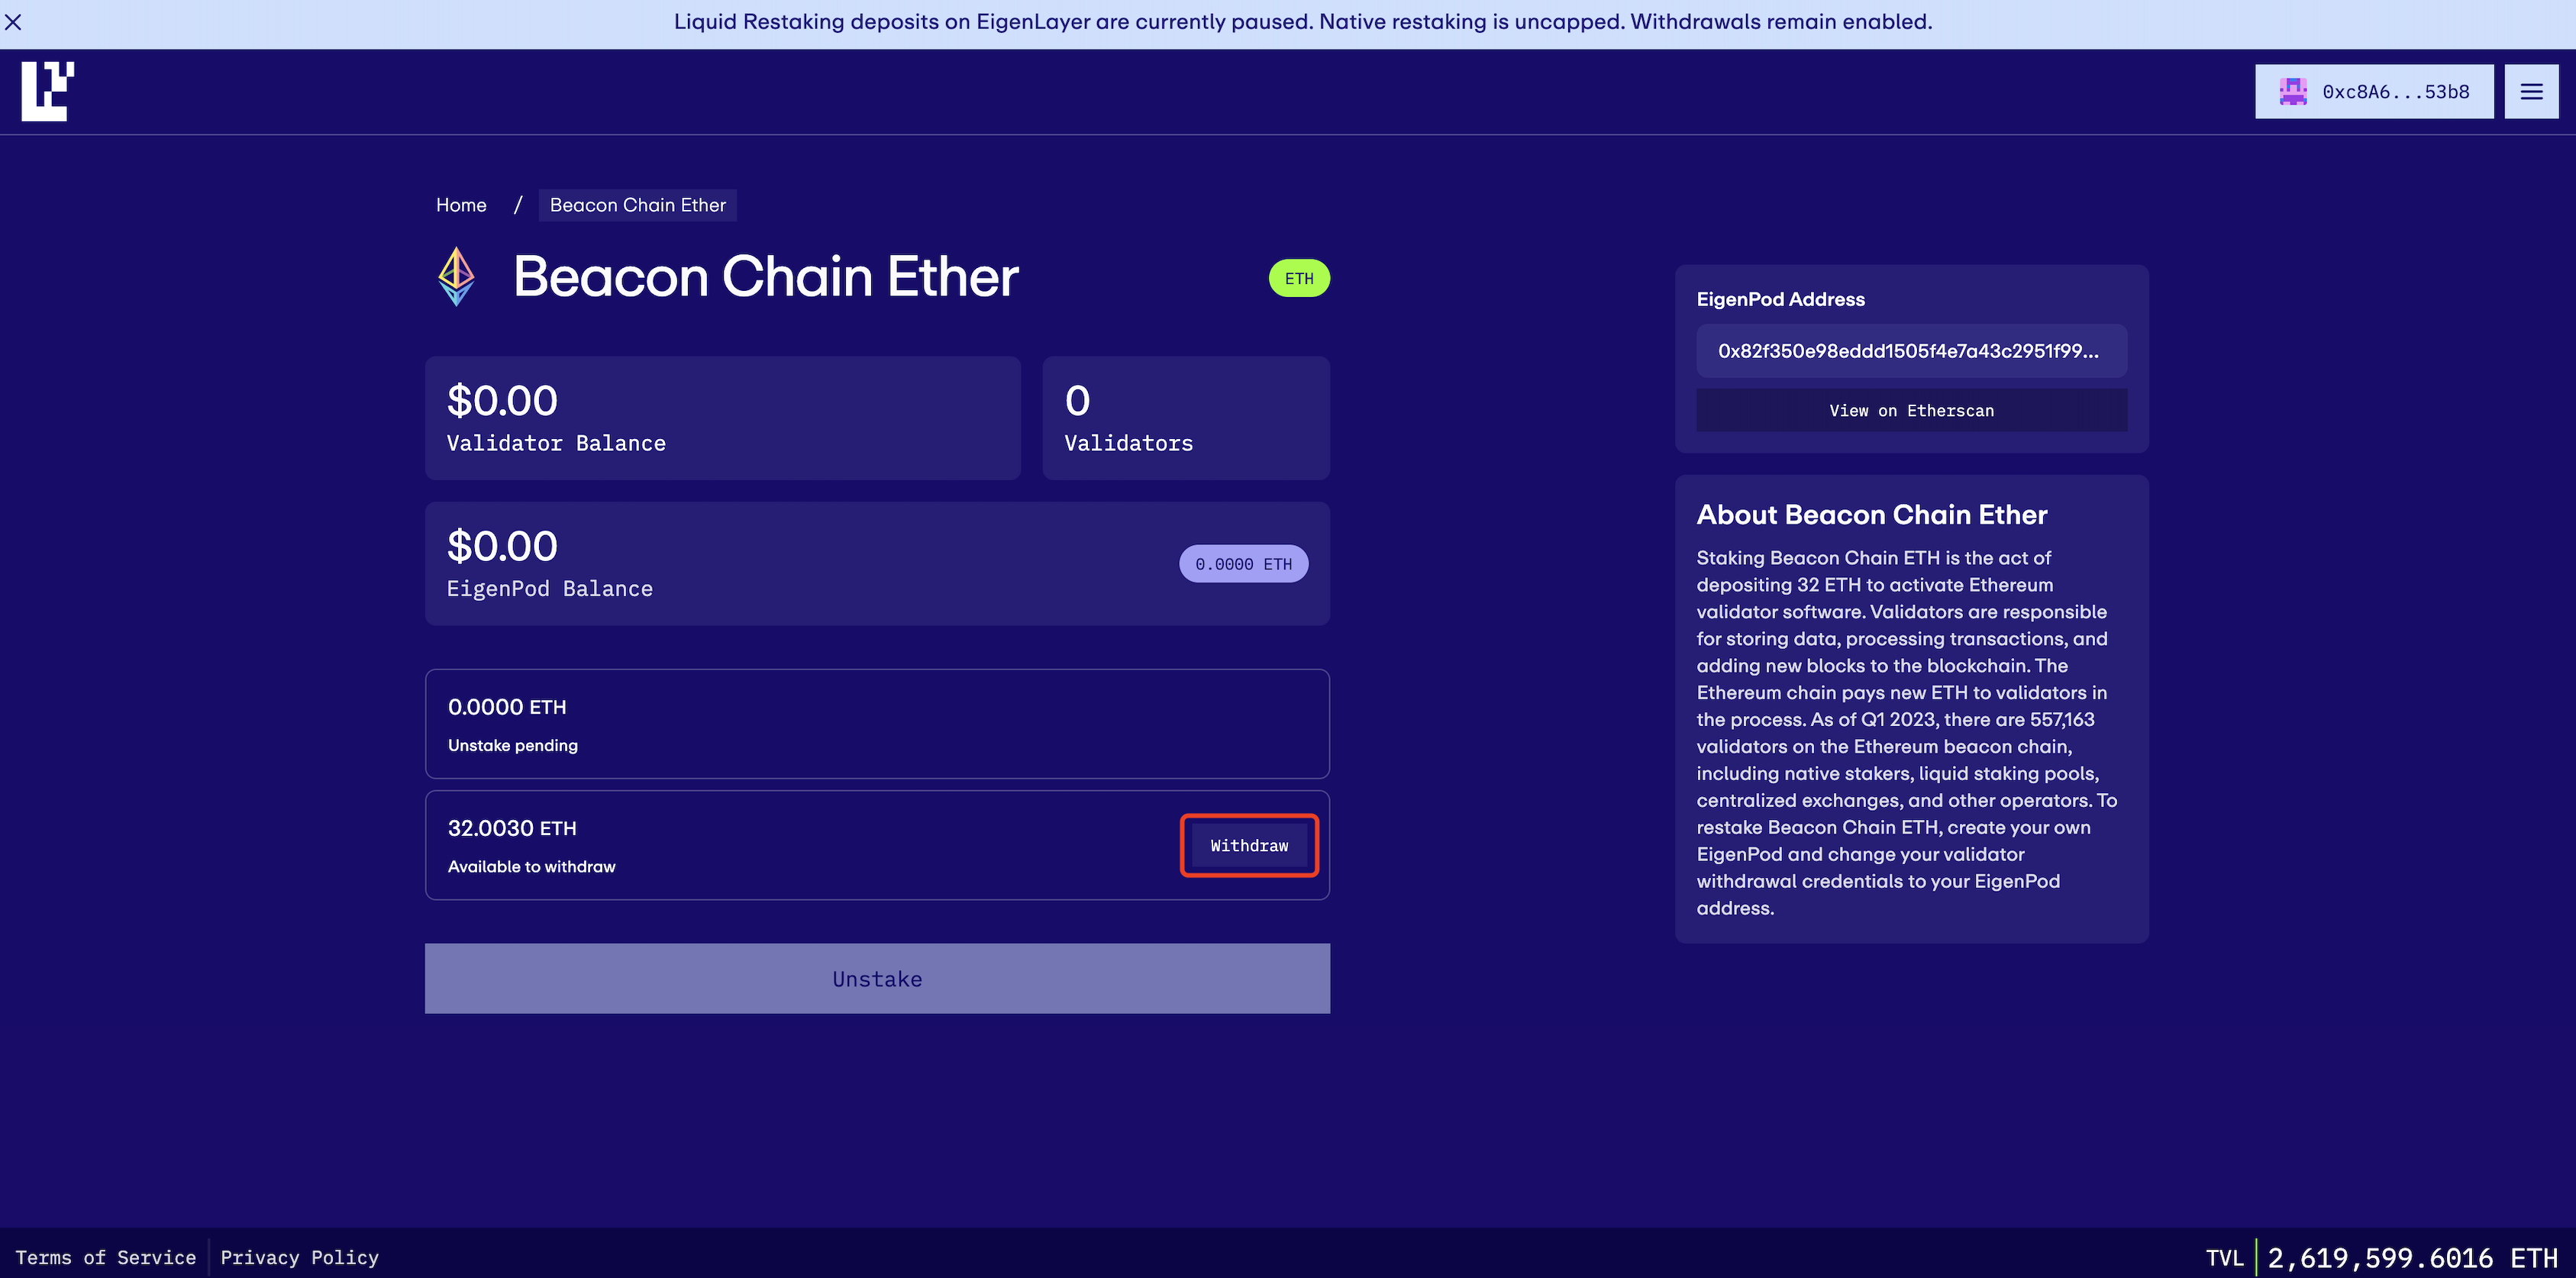
Step 2: Withdraw from EigenLayer
After enduring the escrow period, the time to retrieve your ETH is at hand. Simply click “Withdraw” to move the ETH into your wallet.
InfStones is an advanced, enterprise-grade Platform as a Service (PaaS) blockchain infrastructure provider trusted by the top blockchain companies in the world. InfStones’ AI-based infrastructure provides developers worldwide with a rugged, powerful node management platform alongside an easy-to-use API. With over 20,000 nodes supported on over 80 blockchains, InfStones gives developers all the control they need - reliability, speed, efficiency, security, and scalability - for cross-chain DeFi, NFT, GameFi, and decentralized application development.
InfStones is trusted by the biggest blockchain companies in the world including Binance, CoinList, BitGo, OKX, Chainlink, Polygon, Harmony, and KuCoin, among a hundred other customers. InfStones is dedicated to developing the next evolution of a better world through limitless Web3 innovation.
DIN is Joining InfStones Node Launchpool – Earn Extra Rewards on Your License Delegation!
InfStones Loyalty Points - EigenLayer Season 1 Conclusion & What's Next
Introduce InfStones CARV Perk: Unlock Extra Airdrop and Exclusive Benefit